 50.002 CS
50.002 Computation Structures
Information Systems Technology and Design
Singapore University of Technology and Design
Chua Wei Yang (Spring 2025)
Testbench
This document is written to guide you with debugging the FPGA using Alchitry Labs V2 Test Bench. Using test bench is way faster than building and flashing into the FPGA, and is able to display more information than the simulation HUD.
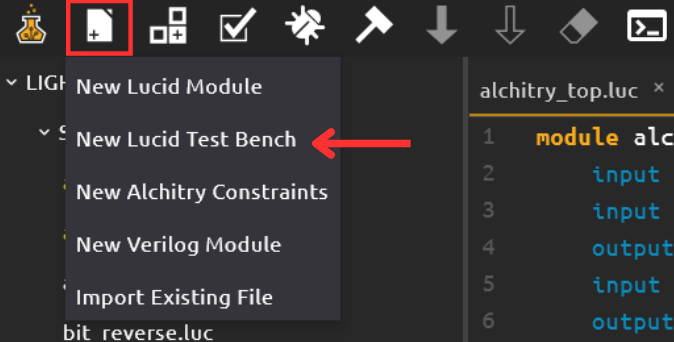
Creating a test bench
To start create a test bench modules under the create file tab:
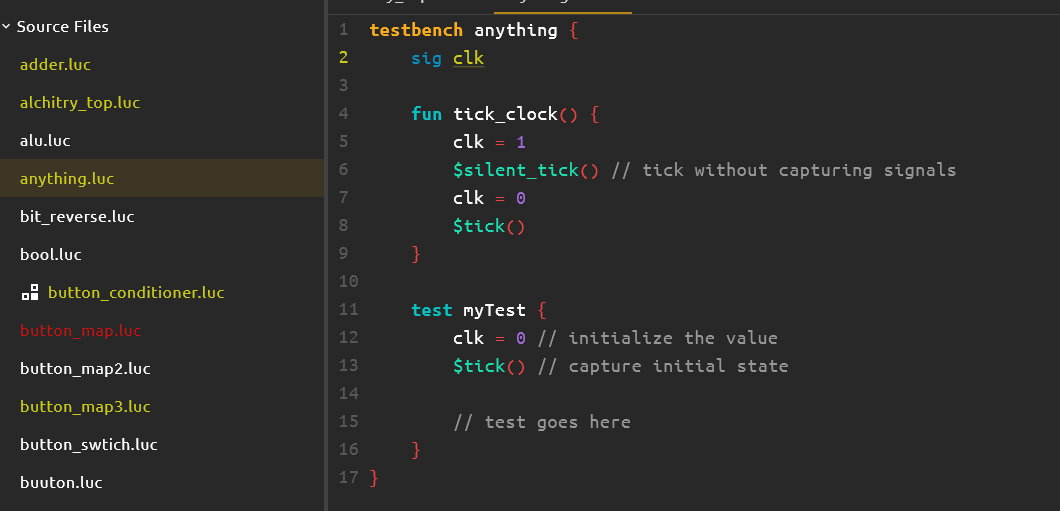
It should create a new file under your source files. And when opened it looks something like this:
In Alchitry Lab v2 there are functions that can only be used in test bench modules. These are very useful for debugging. The source document can be found here.
| Function | Argument Type | Purpose |
|---|---|---|
$tick() |
None | Propagates all signal changes and captures the state. |
$silent_tick() |
None | Propagates all signal changes. |
$assert(expr) |
Any expression, typically a comparison. | Checks that expr is non-zero (true). If it is zero the simulation is halted and an error is printed indicating the failed assert. |
$print(expr) |
Any expression | Prints the value of expr. If expr is a string literal, it prints the string. Otherwise, it prints expr = value where expr is the text and value is the actual value. |
$print(format, exprs...) |
format is a string literal and exprs is a variable number of expressions depending on the format |
Prints the string format with the values of the provided exprs replaced where applicable. Valid format flags are %d for decimal, %h for hex, %b for binary, %nf for fractional where n is the number of fractional bits. |
How to use
Basic Usage
The best way to use test bench is to use it on each individual modules you create be it the adder, multiplier or any custom modules you plan to use. The purpose of test bench is to make sure your modules work as expected before integrating into your data path.
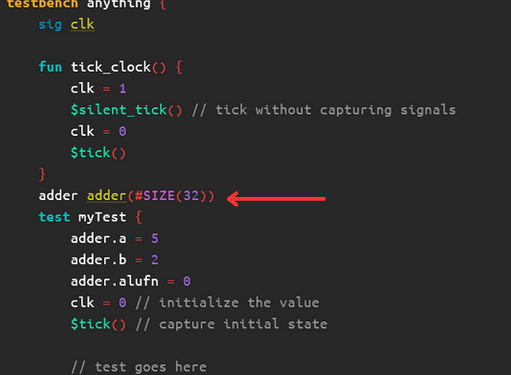
To test, implements your module like how you would in a normal lucid file with the required PARAMETER and assign their INPUT and OUTPUT:
- Instatiate your module as shown below
- Create a test file
- Set the inputs to your module
- Then call the
$tick()function to propagate signal changes, this is like waiting long enough to capture the output of your module
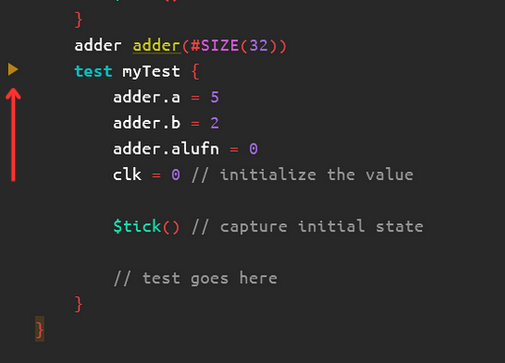
Once you fully implement your test modules (no error detected), a play button should appear at the top of the test block. Which means that your test bench is ready to run.
Once Alchitry Lab has finished loading your test case, it will open a new tab with the expected output.
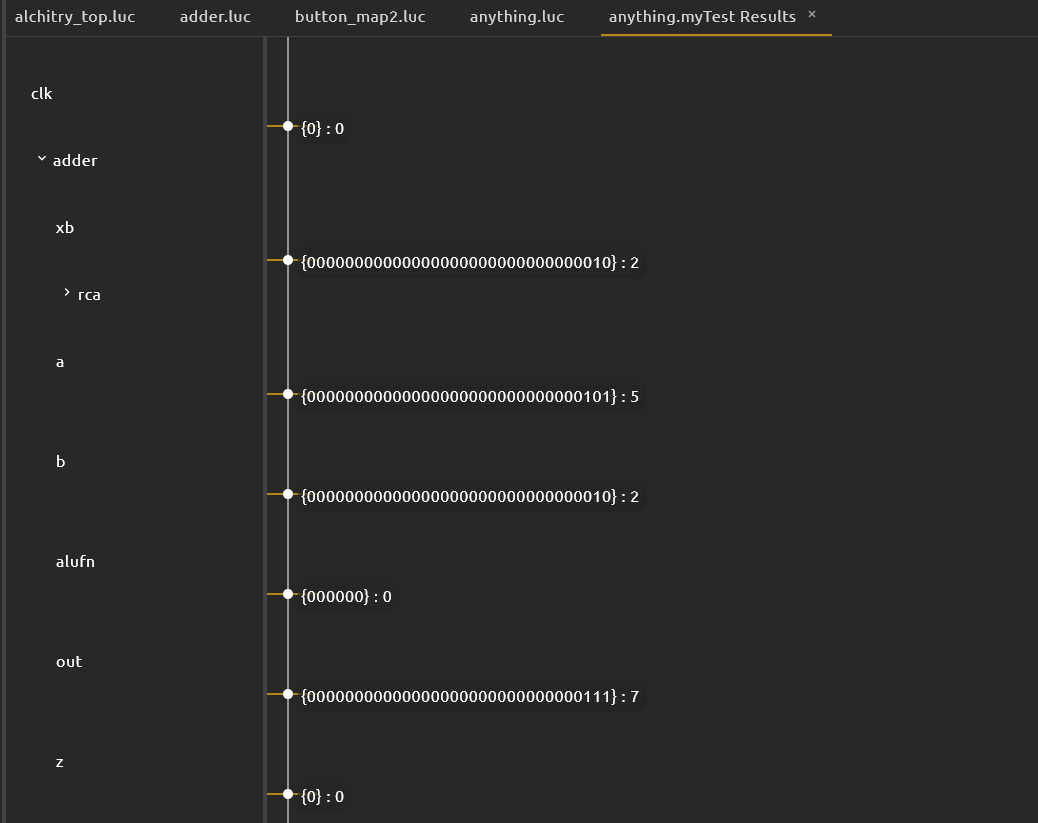
On the graph, if you hover your mouse, you can see your values of the INPUT and OUTPUT ports as well as the values in a SIGNAL and DFF at the first clock cycle.
With this method using $tick, you can propagate signals to your modules to check if the given input values are returning the correct expect outputs. The downside is: you need to manually check the output and potentially see if there is any error when with the logic.
Advancing clock cycle
If you want to test sequential logic device, you need to advance to the next several clock cycles to check if your DFF is storing/outputting the correct values in the modules.
The best way to do so is to use the tick_clock function provided by the template. We can call this function several times to mimmick multiple clock cycle advancement. For example, suppose we want to advance the system by 2 clock cycles, hence we can write $tick_clock() twice under the test block.
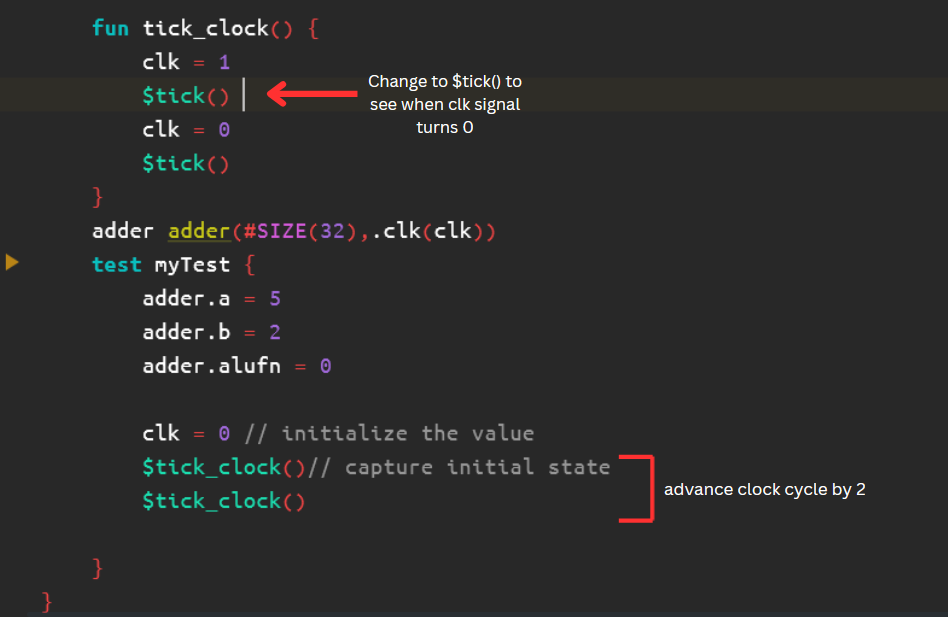
We can change silent_tick to tick if we want to see the output graph too at CLK = 0.
If we run the test block, we can now see 2 clock cycle outputs. As you can see on the first cycle the dff store takes in input 7 while the output remains at 0. Only on the second cycle , dff store is outputting the stored value 7.
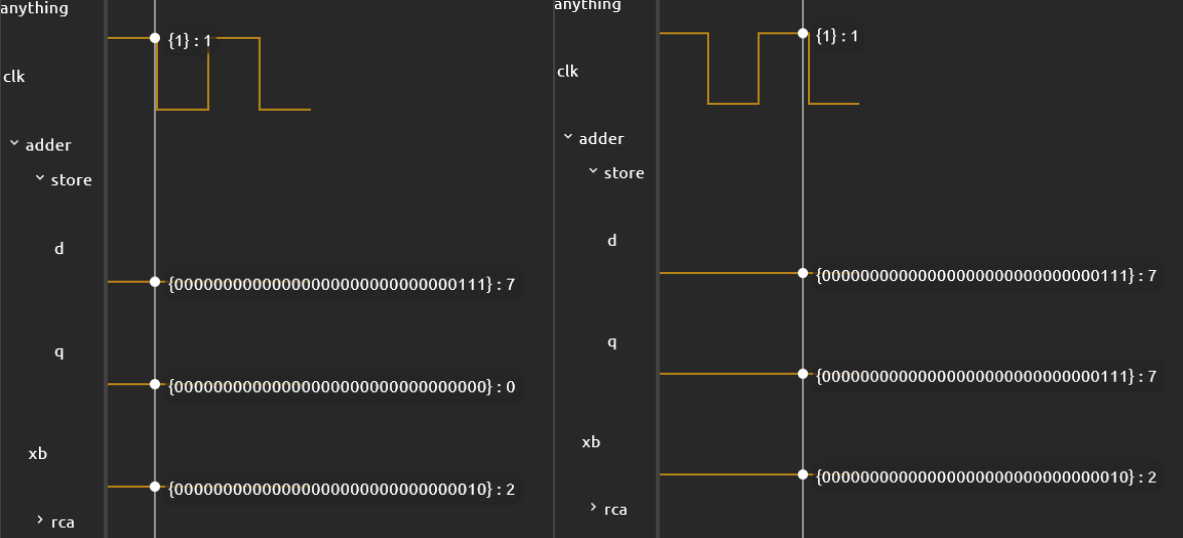
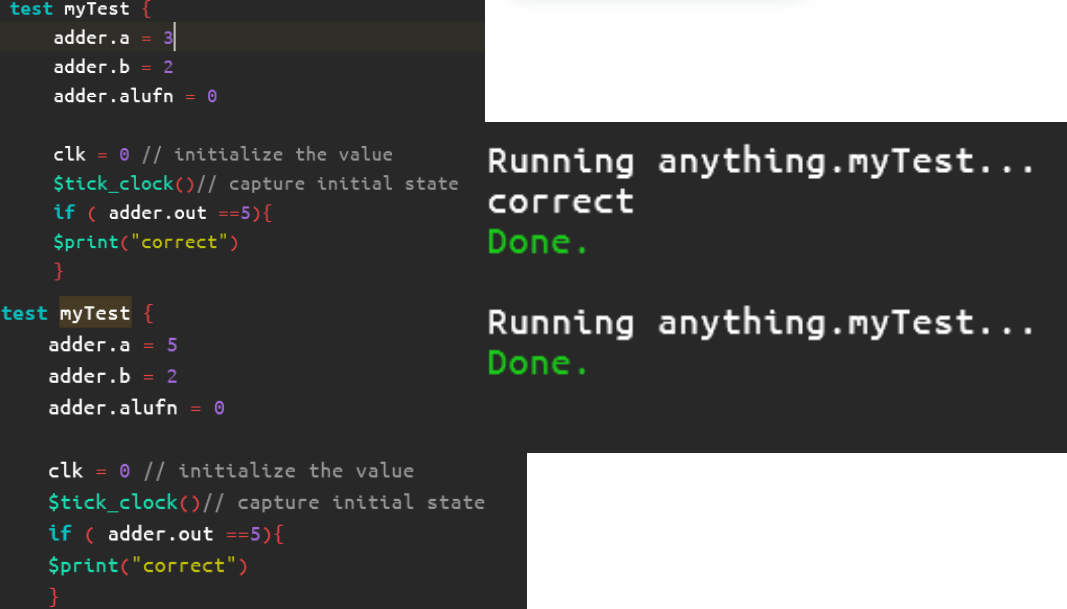
We can actually run multiple test cases in one go too by separating each test case with the tick_clock function.

With this you should be able to use test bench for testing any modules. Each time, you need to manually confirm with the graph that your module outputs the correct expected value.
Advance Usage
In test bench modules, there are 3 more (advanced) built-in functions that can be used to automatically check the output of your module.
| Function | Argument Type | Purpose |
|---|---|---|
$assert(expr) |
Any expression, typically a comparison. | Checks that expr is non-zero (true). If it is zero the simulation is halted and an error is printed indicating the failed assert. |
$print(expr) |
Any expression | Prints the value of expr. If expr is a string literal, it prints the string. Otherwise, it prints expr = value where expr is the text and value is the actual value. |
$print(format, exprs...) |
format is a string literal and exprs is a variable number of expressions depending on the format |
Prints the string format with the values of the provided exprs replaced where applicable. Valid format flags are %d for decimal, %h for hex, %b for binary, %nf for fractional where n is the number of fractional bits. |
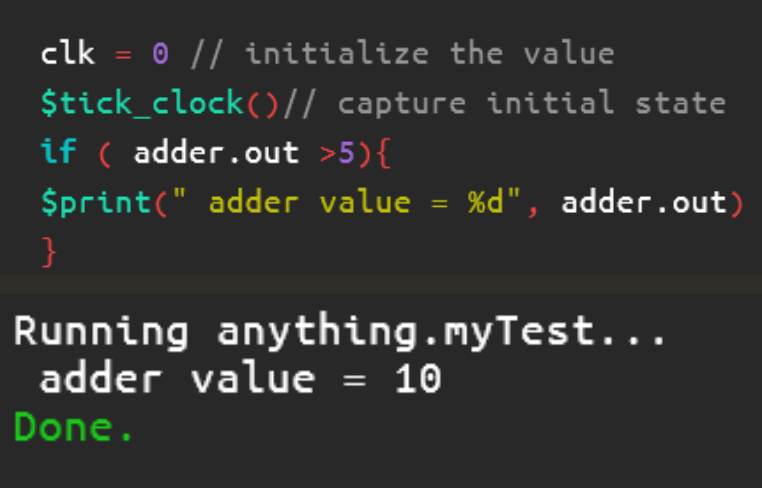
$assert(expr)
This function will halt execution if the output is not as expected.

The clock cycle only advances only once even though the tick_clock function was called 3 times because the $assert function after the first cycle halt the clock fails to pass the check.
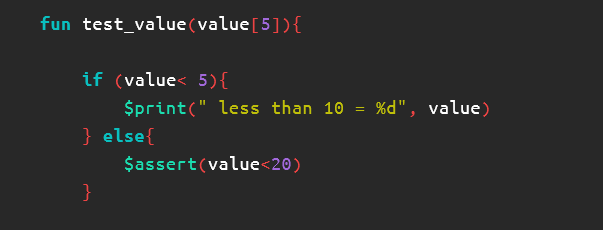
$print(expr)
For $print, you can use them like how you would use them in python or java, where you can print a string or any output value. The printed statement would appear in the terminal below.
$print(format, exprs...)
For $print with format, it allows you to format and variable into a print statement just like in any programming language.
Creating custom functions
To create custom test function we use the fun syntax like the provided fun tick_clock() .
We can create a simple function like this just to test your module’s outputs:
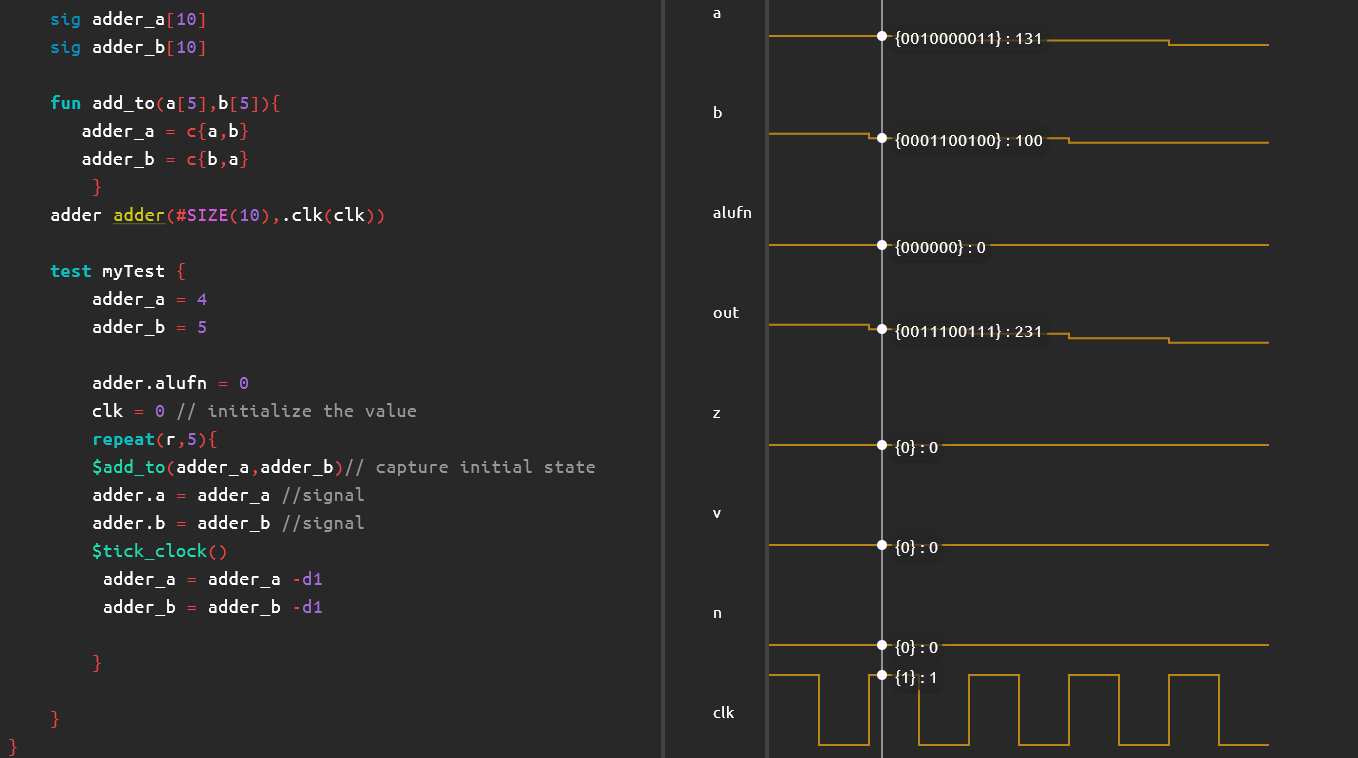
We can also create a useful helper functions that can be used for multiple modules. For instance, a function that concatenates two 5-bit values then assign to signal a and b of the adder module. You can use the repeat function like a for loop in test bench IF you include a clock advancement in the repeat function:
Another useful but simple function you can use is one that will advance the clock cycle by a specified amout:
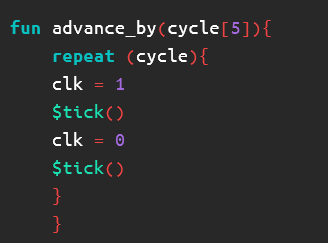
You can just utilise this function instead of writing a bunch of $tick_clock every time.
Debugging & Tips for Test Bench
This section is written to tackle any bugs you might have met while writing test files:
-
Make sure all other lucid modules do not have error (highlighted red), else the run button will not show up
-
If you want to use the output value of a module make sure to capture it AFTER clock advancement, NOT before; else your output value would be 1 cycle behind

-
If the terminal is stuck at running test bench, just close and reopen Alchitry Lab, it should not take more than a few seconds to run. Unless you advance the clock more than 20 times, then it will start to slow down.
-
You can simulate button presses by assigning its input to
1in the current cycle and0the next cycle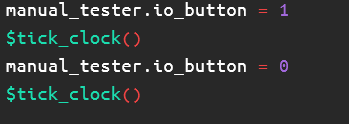
-
When creating a function, remember to add the bit size for your arguments.
Summary
This guide explains how to use test bench modules in Alchitry Lab v2 to efficiently debug Lucid designs without needing to flash the FPGA. Test benches allow you to simulate modules individually, inspect signal values across clock cycles, and use powerful built-in functions like $tick(), $assert(), and $print() for debugging and validation. You can run multiple test cases, create custom functions for repeated checks, and visualize behavior using waveform outputs. This method greatly speeds up development by enabling quick iteration and detailed introspection of logic, making it ideal for verifying modules before integration into a full datapath.