 50.005 CSE
- Programming Assignment 2
- System Requirements
- Starter Code
- Test the Starter Code
- Build
- Using the same machine
- Using different machines
- Example: Direct LAN / Local AP setup
- Example 1: Linux <–> Linux over RJ45 (nmcli)
- Example 2: Linux <–> Linux over RJ45 (no nmcli)
- Example 3: Linux host <–> Windows client over RJ45 (nmcli)
- Restore networking configuration
- Example 4: Linux Host (AP with nmcli)
- Example 5: Linux Client (connect with nmcli)
- Example 6: Linux Client (connect with wpa_supplicant)
- Restore Normal Connection
- Important Requirements
50.005 Computer System Engineering
Information Systems Technology and Design
Singapore University of Technology and Design
Natalie Agus (Summer 2026)
Programming Assignment 2
Main Task
In this assignment, you will implement a secure file upload application from a client to a secure file server. You will design and code the secure File Transfer Protocol (FTP) into the application.
Secure means that it fulfiles these three requirements simultaneously:
- First, before you do your upload as the client, you should authenticate the identity of the file server so you won’t leak your data to random entities including criminals.
- Secondly, you want to ensure that you’re talking to a live server.
- Thirdly, while carrying out the upload you should be able to protect the confidentiality of the data against eavesdropping by any curious adversaries.
You may complete this assignment in groups of 2-3 pax. Indicate your partner’s name in the google sheet link that can be found on eDimension.
There are three parts of this assignment:
- Authentication Protocol (AP)
- Confidentiality Protocol 1 (CP1)
- Confidentiality Protocol 2 (CP2)
These three parts form a strict Secure File Transfer protocol. You will be using socket programming (from the first half of the term) and cryptography knowledge (from the second half of the term) to complete this assignment.
Secure FTP != HTTPS
Note that you will be implementing Secure FTP as your own whole new application layer protocol. In NO WAY we are relying on HTTP/s.
There seem to be some ridiculous misunderstanding from your seniors in the past years that this assignment requires knowledge on HTTP/s and/or DNS. It’s totally two different protocol even though they are both application layer protocol. HTTPS is not equal to our SFTP, they are unrelated, as unrelated as 🍊 fruit is to 🌹 flower.
System Requirements
The starter code provided to you is written in C and uses the OpenSSL library (libssl, libcrypto) for all cryptographic operations. You need:
- A C compiler (
gccorclang) - OpenSSL development headers
- A POSIX-compliant OS (Linux or macOS)
Install the dependencies:
# Ubuntu / Debian
sudo apt-get install build-essential libssl-dev

# macOS (Homebrew): the Makefile auto-detects the path
brew install openssl

# Fedora / RHEL
sudo dnf install gcc openssl-devel
Starter Code
You should have joined the GitHub Classroom and obtained the starter code for this assignment there. The link can be found on eDimension.
PA2 Files
Anything under source/ is where you will work for this assignment. All files in the same level as source/ are for admin purposes. Do not modify these.
.[PROJECT_DIR]
├── AGENTS.md
├── auth
│   ├── cacsertificate.crt
│   └── generate_keys.sh
├── files
│   ├── cbc.bmp
│   ├── file.txt
│   ├── image.ppm
│   ├── jsim.jar
│   ├── player.psd
│   ├── squeak.wav
│   ├── vscodejsim.mp4
│   └── week9.html
├── includes
│   └── libs
│       └── common.h
├── Makefile
├── prompts
│   └── generate-unit-tests.md
├── README.md
├── recv_files
├── recv_files_enc
├── scripts
│   └── gen_unit_tests.sh
├── send_files_enc
├── setup.sh
├── source
│   ├── ClientWithoutSecurity.c
│   ├── libs
│   │   └── common.c
│   └── ServerWithoutSecurity.c
└── tests
    ├── integration
    │   ├── _lib.sh
    │   ├── test_exit.sh
    │   ├── test_multi_transfer.sh
    │   ├── test_transfer_binary.sh
    │   └── test_transfer.sh
    ├── unit
    │   ├── test_int_bytes.c
    │   └── test_socket.c
    └── unity
        ├── unity_internals.h
        ├── unity.c
        └── unity.h
This structure is self-explanatory, and similar to PA1 and any other C projects. Refer to appendix for details if you’re interested.
We also assume that you’re familiar with Makefile by now. If not, read this section.
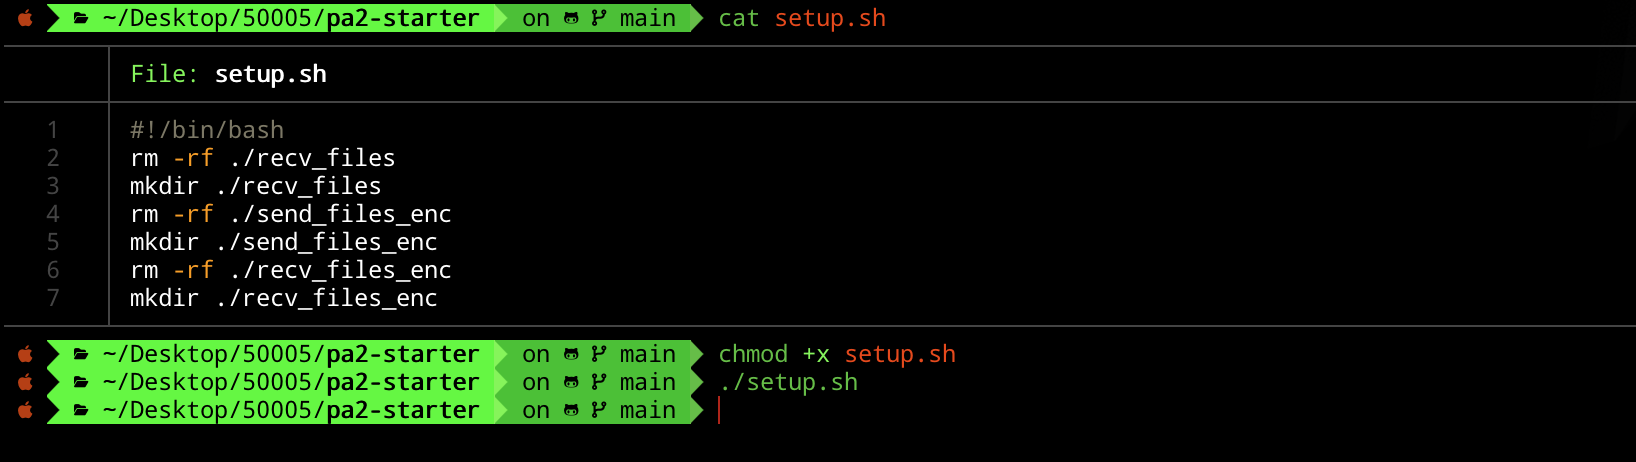
Run ./setup.sh
[PROJ_ROOT_DIR]/recv_files, [PROJ_ROOT_DIR]/recv_files_enc, and [PROJ_ROOT_DIR]/send_files_enc are all empty directories that are not added in .git. To create them, simply run ./setup.sh in the project root.
You should see exactly the above file structure afterwards. ./setup.sh is a bash script, in order to execute it you must chmod it to be executable first.
Custom Crypto Library common.c
All complex OpenSSL calls are wrapped for you in common.h / common.c. You call these wrapper functions and you do NOT need to write raw OpenSSL EVP_* code yourself.
Here’s a summary of what common.c contains:
| Functionality | C function (in common.h) |
|---|---|
| Generate random bytes | RAND_bytes(buf, len) |
| Send 8-byte int | send_int(sockfd, val) |
| Send raw bytes | send_all(sockfd, buf, len) |
| Read exact bytes | read_bytes(sockfd, len), must free() |
| Convert 8B buf to int | bytes_to_int(buf) |
| Parse cert from bytes | load_cert_bytes(data, len), must X509_free() |
| Verify cert vs CA | verify_server_cert(cert, ca_path), returns 1 or 0 |
| Verify RSA-PSS signature | verify_message_pss(cert, sig, sig_len, msg, msg_len), 1/0 |
| Sign with RSA-PSS | sign_message_pss(key, msg, len, &sig_len), must free() |
| Load private key | load_private_key(path), must EVP_PKEY_free() |
| Extract pub key from cert | X509_get_pubkey(cert), must EVP_PKEY_free() |
| RSA encrypt one block | rsa_encrypt_block(key, pt, pt_len, &ct_len, use_oaep), must free() |
| RSA decrypt one block | rsa_decrypt_block(key, ct, ct_len, &pt_len, use_oaep), must free() |
| Generate session key | generate_session_key(key_buf) |
| Symmetric encrypt | session_encrypt(key, pt, pt_len, &ct_len), must free() |
| Symmetric decrypt | session_decrypt(key, ct, ct_len, &pt_len), must free() |
Memory management in C
Unlike Python, C does not have garbage collection. Every function that returns a
malloc()‘d buffer (marked “mustfree()” above) requires you to callfree()on the returned pointer when you are done with it. Similarly,X509*objects must be freed withX509_free()andEVP_PKEY*withEVP_PKEY_free(). Failure to do so causes memory leaks. Readcommon.hcarefully — each function’s documentation specifies who must free what.
The documentation for common.c library can be found here. Refer to it when completing this assignment.
Test the Starter Code
Build
Run the following command in the project root to compile:
make
The Makefile automatically detects macOS vs Linux and locates OpenSSL headers. If the build fails, ensure libssl-dev (Linux) or brew install openssl (macOS) is installed.
Using the same machine
The starter code provided to you implements a simple, non-secure file transfer protocol. We will explain in detail what the protocol is. For now, let’s just ensure that everything runs normally.
Run each of these commands in two separate shell sessions:
./ServerWithoutSecurity
./ClientWithoutSecurity
You can type in the filename you want to send, e.g files/image.ppm from the Client’s window, and the server will receive it and store it under [PROJECT_DIR]/recv_files directory.
You can repeat the above steps multiple times for each file you want to send to the server. If the client would like to close connection to the server, key in -1.

Using different machines
You can also host the Server file in another computer:
./ServerWithoutSecurity [PORT] 0.0.0.0
You can use any high port you want, e.g: 12345.
The client computer can connect to it using the command:
./ClientWithoutSecurity [PORT] [SERVER-IP-ADDRESS]
Ensure you use the same port. The server’s IP address (private) should be discoverable using the following if you use WiFi (en0), or en1 if you use ethernet:
# Linux
ip addr

# macOS
ipconfig getifaddr en0
To get this to work, you most probably need to be on the same subnet. Just ensure that both machines are connected to the same WiFi and subnet. If you use SUTD WiFi, there’s a chance that you are not in the same subnet. In that case, simply use your phone hotspot and both machines shall connect to it.
Example: Direct LAN / Local AP setup
You may try to create a local network using one Linux machine acting as a temporary Wi-Fi AP, or by directly connecting machines over Ethernet. This example assumes the Linux host uses NetworkManager via nmcli. If you use another network manager or a different OS, adapt the commands accordingly.
Different examples below intentionally use different private subnets to reduce accidental address conflicts if you directly reuse the commands for multiple setups. In each individual example, all participating machines must still be placed on the same subnet.
Example 1: Linux <–> Linux over RJ45 (nmcli)
Find your interface:
nmcli device status
Look for a device name like eth0, enp3s0 etc.
Assign static IPs on the same private subnet.
Host:
nmcli connection modify [connection name] \
ipv4.method manual \
ipv4.addresses 192.168.10.1/24
nmcli connection up [connection name]
Client:
nmcli connection modify [connection name] \
ipv4.method manual \
ipv4.addresses 192.168.10.2/24
nmcli connection up [connection name]
Example 2: Linux <–> Linux over RJ45 (no nmcli)
Find your interface:
ip link
ip addr
Look for a device name like eth0, enp3s0 etc.
Assign static IPs in the same private subnet.
Host:
ip addr add 192.168.20.1/24 dev eth0
ip link set eth0 up
Client:
ip addr add 192.168.20.2/24 dev eth0
ip link set eth0 up
Example 3: Linux host <–> Windows client over RJ45 (nmcli)
Find your interface:
nmcli device status
Look for a device name like eth0, enp3s0 etc.
Assign static IPs in the same private subnet.
Linux Host:
nmcli connection modify [connection name] \
ipv4.method manual \
ipv4.addresses 192.168.30.1/24
nmcli connection up [connection name]
Windows Client (Ethernet adapter -> IPv4):
- IP: 192.168.30.2/24
- Subnet: 255.255.255.0
- Gateway: [leave empty]
Restore networking configuration
Linux (NetworkManager):
nmcli connection modify [connection name] ipv4.method auto ipv4.addresses ""
nmcli connection up [connection name]
Linux (manual):
ip addr flush dev eth0
Windows:
- Set IPv4 back to “Obtain IP automatically”
Example 4: Linux Host (AP with nmcli)
Find your interface:
nmcli device status
Start AP:
nmcli device wifi hotspot \
ifname [change this to the device name e.g. wlan0 / wlp2s1] \
ssid [change this to network name e.g. pa2-lan] \
password [change this e.g. 12345678]
Modify the IP:
nmcli connection modify Hotspot ipv4.method manual ipv4.addresses 192.168.40.1/24
nmcli connection up Hotspot
Example 5: Linux Client (connect with nmcli)
Find your interface:
nmcli device status
Find/Verify the AP exists:
nmcli dev wifi
Connect to the AP:
nmcli device wifi connect [network name, e.g. pa2-lan] password [password, e.g. 12345678]
Connect with a static IP:
nmcli connection modify [connection name, usually the SSID] \
ipv4.method manual \
ipv4.addresses 192.168.40.2/24 \
ipv4.gateway 192.168.40.1
nmcli connection up [connection name, usually the SSID]
Example 6: Linux Client (connect with wpa_supplicant)
Create a minimal wpa_supplicant config file e.g. wpapa2.conf:
network={
    ssid="pa2-lan"
    psk="12345678"
}
Connect to the network defined in the config:
wpa_supplicant -i [wireless interface, e.g. wlan0] -c wpapa2.conf -B
Assign an IP on the same subnet as host:
ip addr add 192.168.40.3/24 dev [wireless interface, e.g. wlan0]
ip link set [wireless interface, e.g. wlan0] up
Restore Normal Connection
Host:
nmcli connection down Hotspot
Connect to usual Wi-Fi:
nmcli device wifi connect [some SSID] password [your password]
Remove the temporary hotspot profile if needed:
nmcli connection delete Hotspot
Restore DHCP if configured to static IP:
nmcli connection modify [connection name] ipv4.method auto ipv4.addresses "" ipv4.gateway ""
nmcli connection up [connection name]
Important Requirements
Do NOT Modify
common.h/common.cYou are NOT allowed to modify
common.horcommon.c. These files contain all the cryptographic wrappers and socket helpers you need. You should only#include "common.h"in your new source files and call the functions declared there.
No other cryptographic libraries allowed
You are also not allowed to use any cryptographic library other than OpenSSL (which is what
common.calready uses). You may use any standard C library headers (stdio.h,stdlib.h,string.h, etc.) as they are already included viacommon.h.Appendix
This project is organised into separate folders for source code, header files, test files, scripts, authentication material, and sample files used for transfer testing.
Root Directory
.
├── AGENTS.md
├── Makefile
├── README.md
├── setup.sh
AGENTS.md
Contains instructions or notes for AI coding assistants. This is usually used to describe project conventions, expected behaviour, or development rules.
Makefile
Builds the project. It compiles the main C programs, links the required source files, and produces executable binaries.
The Makefile should know where to find:
source/
includes/
source/libs/
includes/libs/
README.md
Main project documentation. This should explain what the project does, how to build it, how to run the client/server, and how to run tests.
setup.sh
Setup script for preparing the environment. This can be used to create required folders, generate keys, install dependencies, or initialise the project.
Authentication Folder
auth
├── cacsertificate.crt
└── generate_keys.sh
auth/
Contains files related to authentication and security.
cacsertificate.crt
A certificate file used for secure communication or certificate validation.
generate_keys.sh
Script used to generate cryptographic keys and certificates.
Input / Sample Files
files
├── cbc.bmp
├── file.txt
├── image.ppm
├── jsim.jar
├── player.psd
├── squeak.wav
├── vscodejsim.mp4
└── week9.html
files/
Contains sample files used for testing file transfer.
These files are intentionally of different types:
.txt   text file
.bmp   bitmap image
.ppm   image file
.jar   binary Java archive
.psd   Photoshop file
.wav   audio file
.mp4   video file
.html  webpage file
This is useful because a file transfer program should work for both text files and binary files.
Header Files
includes
└── libs
    └── common.h
includes/
Contains header files.
includes/libs/common.h
Header file for shared helper functions used by multiple source files.
Since the file is inside includes/libs/, source files should include it like this:
#include "libs/common.h"
This keeps the include path clean and avoids needing relative includes like:
#include "../libs/common.h"
Source Code
source
├── ClientWithoutSecurity.c
├── ServerWithoutSecurity.c
└── libs
    └── common.c
source/
Contains the main C source files.
ClientWithoutSecurity.c
Client program without security features. This connects to the server and sends or receives files using plain socket communication.
ServerWithoutSecurity.c
Server program without security features. This listens for client connections and receives or sends files.
source/libs/common.c
Implementation file for shared helper functions declared in:
includes/libs/common.h
This file should be compiled together with any program that uses common.h.
For example:
gcc ... source/ClientWithoutSecurity.c source/libs/common.c ...
The Makefile already handles this.
Transfer Output Folders
recv_files
recv_files_enc
send_files_enc
recv_files/
Stores files received by the non-secure server or client.
recv_files_enc/
Stores received files after encrypted transfer.
send_files_enc/
Stores files prepared for encrypted sending.
These folders help keep original test files separate from received or encrypted files.
Scripts
scripts
└── gen_unit_tests.sh
scripts/
Contains helper scripts for development and testing.
gen_unit_tests.sh
Script for generating unit tests, probably using the prompt file in:
prompts/generate-unit-tests.md
Prompts
prompts
└── generate-unit-tests.md
prompts/
Contains AI prompt templates or written instructions used during development.
generate-unit-tests.md
Prompt file for generating unit tests. This keeps test-generation instructions separate from the source code.
Tests
tests
├── integration
│   ├── _lib.sh
│   ├── test_exit.sh
│   ├── test_multi_transfer.sh
│   ├── test_transfer_binary.sh
│   └── test_transfer.sh
├── unit
│   ├── test_int_bytes.c
│   └── test_socket.c
└── unity
    ├── unity_internals.h
    ├── unity.c
    └── unity.h
tests/
Contains all test-related files.
Integration Tests
tests/integration
├── _lib.sh
├── test_exit.sh
├── test_multi_transfer.sh
├── test_transfer_binary.sh
└── test_transfer.sh
tests/integration/
Contains shell-script tests that test the full client-server behaviour. These tests usually run the actual server and client programs together.
_lib.sh
Shared shell functions used by the integration tests. This avoids repeating setup, cleanup, process management, and assertion logic in every test script.
test_exit.sh
Tests whether the program exits correctly.
test_transfer.sh
Tests basic file transfer.
test_transfer_binary.sh
Tests binary file transfer. This is important because binary files must not be treated as strings.
test_multi_transfer.sh
Tests multiple file transfers, possibly to check repeated transfers or concurrent behaviour.
Unit Tests
tests/unit
├── test_int_bytes.c
└── test_socket.c
tests/unit/
Contains C unit tests for individual helper functions.
test_int_bytes.c
Tests integer-to-byte or byte-to-integer conversion functions.
This is useful when sending fixed-size integer values over a socket.
test_socket.c
Tests socket-related helper functions.
Unity Test Framework
tests/unity
├── unity_internals.h
├── unity.c
└── unity.h
tests/unity/
Contains the Unity C testing framework, which is the lightweight testing framework for C you used in PA1 as well.
Overall Structure
The structure separates the project into clear responsibilities:
source/          main C programs
source/libs/     shared C implementations
includes/libs/   shared header files
files/           sample input files
recv_files/      received output files
auth/            certificates and key generation
tests/unit/      C unit tests
tests/integration/ full client-server tests
tests/unity/     Unity test framework
scripts/         helper scripts
prompts/         AI prompt templates
The main idea is:
Headers go in includes/
Implementations go in source/
Shared library code goes under libs/
Tests go in tests/
Test input files go in files/
Generated or received files go in recv_files/ or *_enc/
This makes the project easier to build, test, and extend.
Makefile Details
This Makefile builds the Secure FTP project and provides commands for compiling programs, running tests, generating unit tests, and cleaning the workspace. It assumes the project uses source/ for main C files, source/libs/ for shared C implementations, includes/ for headers, tests/unit/ for C unit tests, tests/integration/ for Bash integration tests, and tests/unity/ for the Unity test framework. :contentReference[oaicite:0]{index=0}
The compiler is set using CC = gcc. The main path variables are SRC_ROOT = ./source, LIB_DIR = ./source/libs, and INC_DIR = ./includes. These variables avoid repeating long folder paths throughout the Makefile.
LIB_SOURCES = $(wildcard $(LIB_DIR)/*.c) automatically collects every .c file inside source/libs/. This means shared helper code such as source/libs/common.c is compiled together with each main program. Its matching header is expected to be in includes/libs/common.h, so source files should include it using #include "libs/common.h".
The ALL variable lists all client and server executables, such as ClientWithoutSecurity, ServerWithoutSecurity, ClientWithSecurityAP, ServerWithSecurityAP, and the CP1/CP2 versions. Running make builds everything in this list. The shortcut targets make NoSec, make AP, make CP1, and make CP2 build only the selected client/server pair.
The Makefile detects whether it is running on macOS or Linux. On macOS, it uses Homebrew to find OpenSSL and adds the correct OpenSSL include and library paths. On Linux, it assumes OpenSSL is available through the system paths. The project is linked with -lssl -lcrypto.
The generic build rule:
%: $(SRC_ROOT)/%.c $(LIB_SOURCES)
	$(CC) $(CFLAGS) -o $@ $(sort $^) $(LDFLAGS)
This means that an executable is built from a .c file with the same name in source/. For example, ClientWithoutSecurity is built from source/ClientWithoutSecurity.c, together with all files in source/libs/.
Unit tests are automatically discovered from files matching tests/unit/test_*.c. Their compiled binaries are placed in tests/unit/bin/. The Makefile also includes the Unity framework from tests/unity/, so each unit test can use #include "unity.h".
The unit test rules try to match each test file with a corresponding implementation file. For example, tests/unit/test_common.c may be compiled with either source/common.c or source/libs/common.c. If no exact matching source file exists, the fallback rule still compiles the test with all shared library files from source/libs/.
Running make unit builds and runs all unit tests, then prints how many passed and failed. Running make integration first builds the non-secure client/server pair, then runs every Bash test script in tests/integration/. Running make test runs both unit and integration tests.
The ai-unit-tests target generates unit tests using the helper script in scripts/gen_unit_tests.sh. It requires a module name, for example:
make ai-unit-tests MODULE=common
This looks for files such as includes/libs/common.h and source/libs/common.c, then generates a matching test file such as tests/unit/test_common.c.
The clean target removes compiled programs and unit test binaries, then runs setup.sh to reset the workspace. This is useful when the project needs to be rebuilt from a clean state.
Common commands:
make                 # build all programs
make NoSec           # build non-secure client and server
make AP              # build AP client and server
make CP1             # build CP1 client and server
make CP2             # build CP2 client and server
make unit            # run unit tests
make integration     # run integration tests
make test            # run all tests
make clean           # clean and reset project