Programming Assignment 2
In this assignment, you will implement a secure file upload application from a client to a secure file server. By secure, we mean three fulfilled requirements:
- First, before you do your upload as the client, you should authenticate the identity of the file server so you won’t leak your data to random entities including criminals.
- Secondly, you want to ensure that you’re talking to a live server too.
- Thirdly, while carrying out the upload you should be able to protect the confidentiality of the data against eavesdropping by any curious adversaries.
You may complete this assignment in groups of 2-3 pax. Indicate your partner’s name in the google sheet provided in our course handout.
There are three parts of this assignment:
- Authentication Protocol (AP)
- Confidentiality Protocol 1 (CP1)
- Confidentiality Protocol 2 (CP2)
These three parts form a strict Secure File Transfer protocol. You will be using socket programming (from the first half of the term) and cryptography knowledge (from the second half of the term) to complete this assignment.
Secure FTP != HTTPs
Note that you will be implementing Secure FTP as your own whole new application layer protocol. In NO WAY we are relying on HTTP/s.
There seem to be some ridiculous misunderstanding from your seniors in the past years that this assignment requires knowledge on HTTP/s and/or DNS. It’s totally two different protocol even though they are both applicaiton layer protocol. HTTPs is not equal to our SFTP, they are unrelated, as unrelated as 🍊 fruit is to 🌹 flower.
System Requirements
The starter code provided to you is written in Python. You need at least Python 3.10 to complete this assignment and the cryptography module.
While you can develop in Python using any OS, you still need to ensure that your assignment runs on a POSIX-compliant OS (path, etc is resolved).
Starter Code
You should have joined the GitHub Classroom and obtain the starter code for this assignment there. The link can be found in the Course Calendar portion of your Course Handout.
PA2 Files
Anything under source/ is where you will work for this assignment. All files in the same level as source/ are for admin purposes. Do not modify these.
.
├── README.md
├── setup.sh
├── .gitignore
├── files
│   ├── cbc.bmp
│   ├── file.txt
│   ├── image.ppm
│   ├── jsim.jar
│   ├── player.psd
│   ├── squeak.wav
│   ├── vscodejsim.mp4
│   └── week9.html
├── requirements.txt
└── source
    ├── ClientWithoutSecurity.py
    ├── ServerWithoutSecurity.py
    └── auth
        ├── cacsertificate.crt
        └── generate_keys.py
Run ./setup.sh
[PROJ_ROOT_DIR]/recv_files, [PROJ_ROOT_DIR]/recv_files_enc, and [PROJ_ROOT_DIR]/send_files_enc are all empty directories that are not added in .git. To create them, simply run ./setup.sh in the project root.
You should see exactly the above file structure afterwards. ./setup.sh is a bash script, in order to execute it you must chmod it to be executable first.
Test the Starter Code
Install required modules
Run the following command to ensure you install the required modules for this assignment:
python3 -m pip install -r requirements.txt
You can use pipenv if you don’t want to clutter your machine. Refer to the repository readme for details.
Using the same machine
The starter code provided to you implements a simple, non-secure file transfer protocol. We will explain in detail what the protocol is. For now, let’s just ensure that everything runs normally.
Run each of these commands in two separate shell sessions:
python3 source/ServerWithoutSecurity.py
python3 source/ClientWithoutSecurity.py
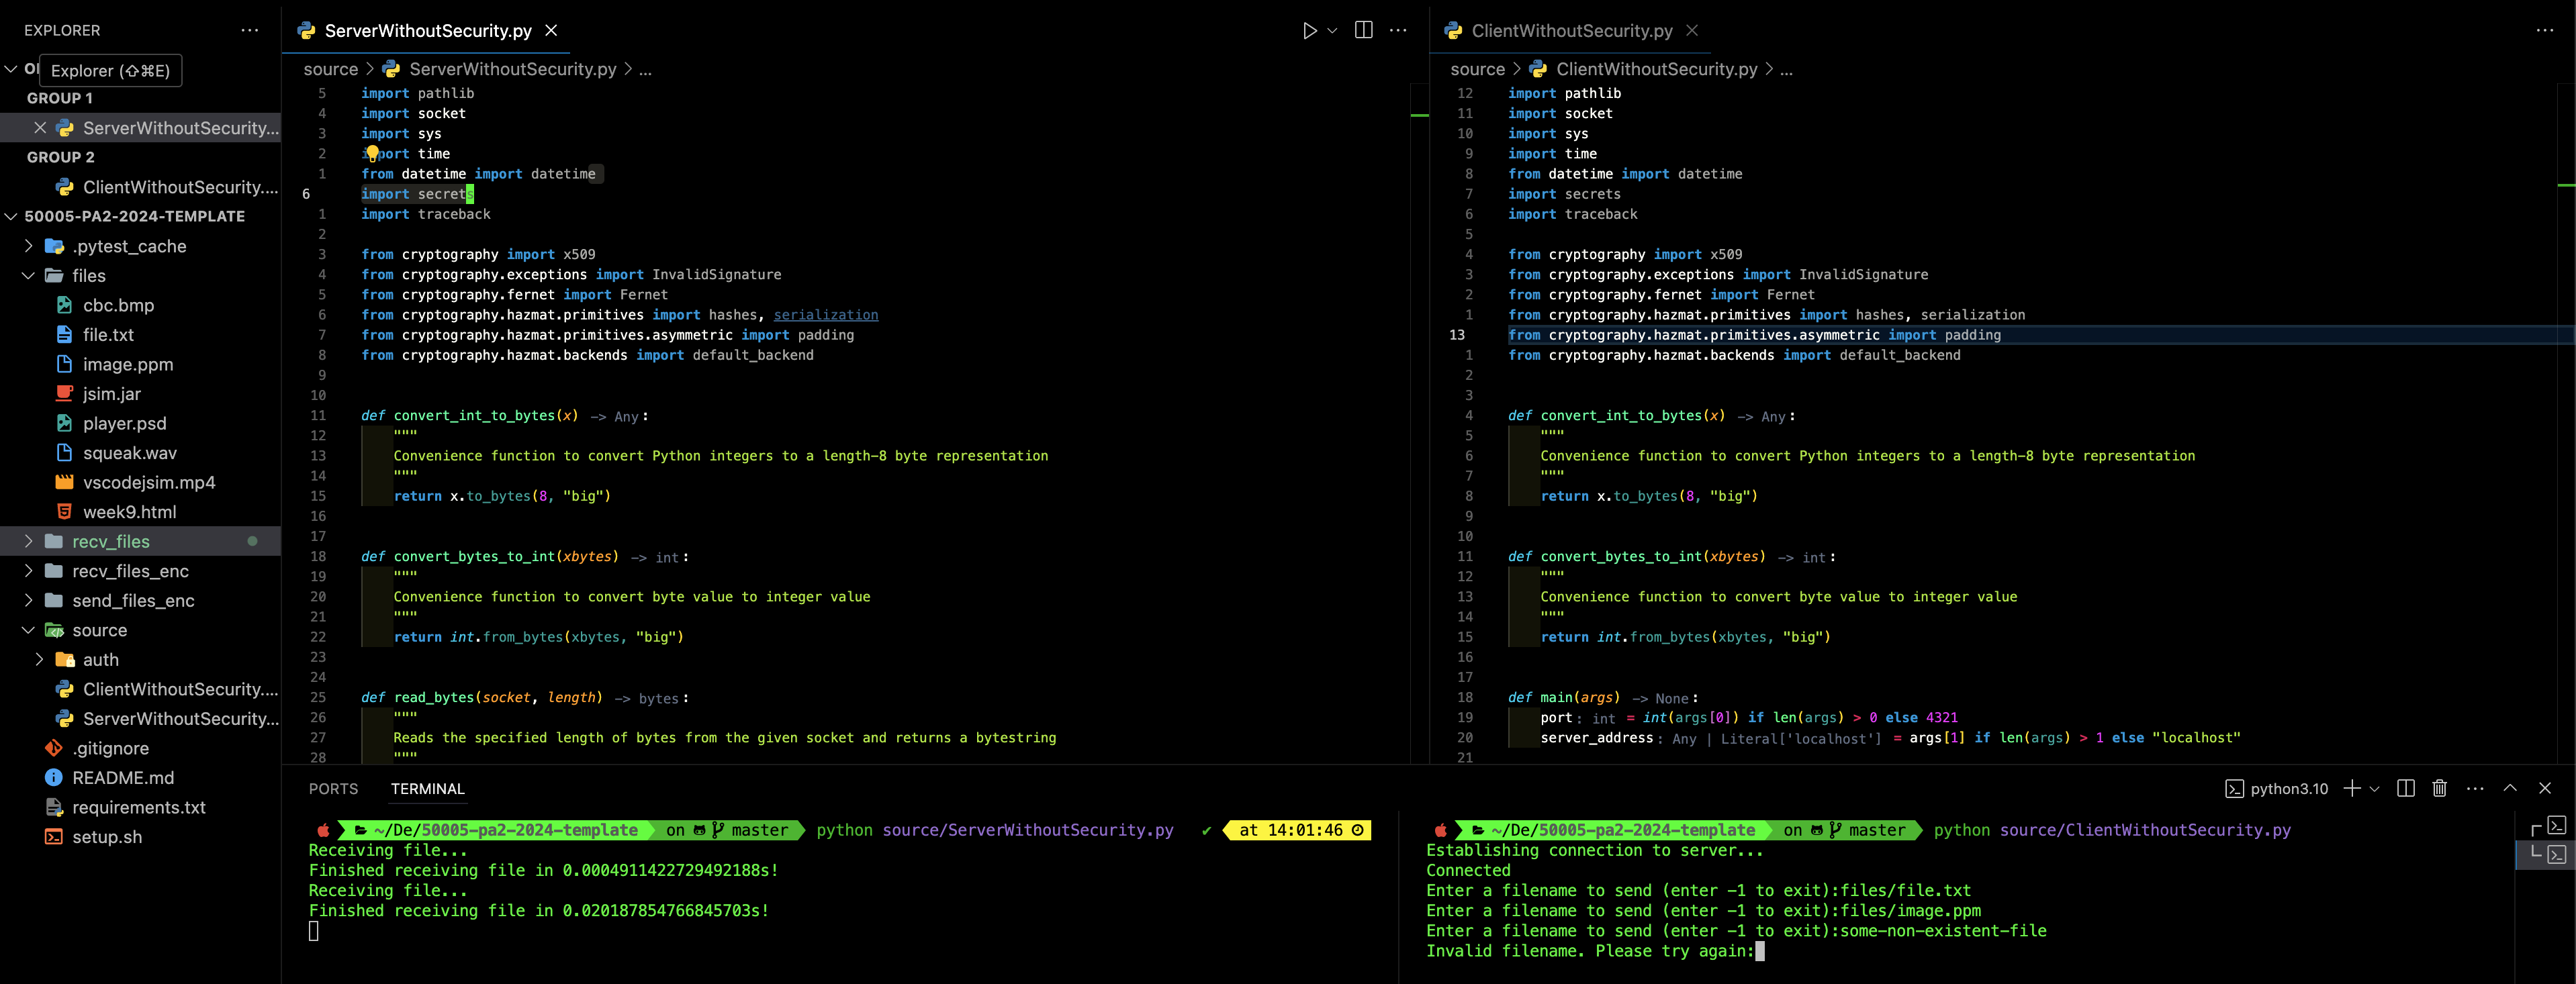
You can type in the filename you want to send, e.g files/image.ppm from the Client’s window, and the server will receive it and store it under [PROJECT_DIR]/recv_files directory.
You can repeat the above steps multiple times for each file you want to send to the server. If the client would like to close connection to the server, key in -1.
The screenshot below shows how client process can send files to the server process, when both are hosted in the same computer:

Using different machines
You can also host the Server file in another computer:
python3 source/ServerWithoutSecurity.py [port] 0.0.0.0
You can use any high port you want, e.g: 12345.
The client computer can connect to it using the command:
python3 source/ClientWithoutSecurity.py [port] [server-ip-address]
Ensure you use the same port. The server’s IP address (private) should be discoverable using this command:
hostname -I | awk '{print $1}'
You can also run this one-liner Python script instead:
python3 -c "import socket; print(socket.gethostbyname(socket.gethostname()))"
To get this to work, you most probably need to be on the same subnet. Just ensure that both machines are connected to the same WiFi and subnet. If you use SUTD WiFi, there’s a chance that you are not in the same subnet. In that case, simply use your phone hotspot and both machines shall connect to it.
In the client machine, run this Python script to quickly check if you’re on the same subnet:
import ipaddress

ip1 = input("Enter your IP: ").strip()
ip2 = input("Enter server IP: ").strip()
mask = input("Enter subnet mask (e.g., 255.255.255.0): ").strip() # discoverable via ifconfig (macOS) or ipconfig (Win) or ip addr (Linux) command

net = ipaddress.IPv4Network(f"{ip1}/{mask}", strict=False)

if ipaddress.IPv4Address(ip2) in net:
    print("Same subnet")
else:
    print("Different subnet")
Consult the Debug Notes page should you find any difficulties running the starter code.
Do NOT Import Other Python Modules for the Main Tasks
You are NOT allowed to import any other python modules other than what’s given to implement the main tasks:
import pathlib
import socket
import sys
import time
from datetime import datetime
import secrets
import traceback
from signal import signal, SIGINT
from cryptography import x509
from cryptography.exceptions import InvalidSignature
from cryptography.fernet import Fernet
from cryptography.hazmat.primitives import hashes, serialization
from cryptography.hazmat.primitives.asymmetric import padding
from cryptography.hazmat.backends import default_backend
You can however utilise other libraries to implement the Sustainability and Inclusivity part for demo purposes only, without disturbing the main FTP protocol.
 50.005 CSE