Installation and Setup
We are using the following versions of Unity editor, dotnet, and VSCode extensions:
- Unity Hub 3.14.0
- Unity 6000.0.56f1 LTS
- Released on August 2025
- Installed via Unity Hub
- Sign in to Unity Hub first and manage your personal license
- .NET 9.0 Framework
- Or if you prefer to used managed .NET version: .NET Install Tool
- VSCode C# Dev Kit v1.50.33
- VSCode Unity v1.1.3 Extension
Please install all of the above tools before proceeding.
Recommendation
macOS users are recommended to use Visual Studio Code with the Unity + C# Dev kit extension.
Windows users are recommended to use Visual Studio instead of VSC. It will be the default recommended version when you install Unity from Unity Hub.
Basic Setup
Download the starter asset from your course handout, under "Class Calendar" heading, Week 1 Lab Session row. We do not own any of the assets distributed in this lab, they can all be freely obtained from the Internet, credits are all indicated in the individual sheet/resources.
This is a starter asset for this week that you can import to your project and complete the lab. It contains all required images, sound files, etc so we can save time without having to search for all these assets.
Create New Project
Using UnityHub, create a new 2D project:
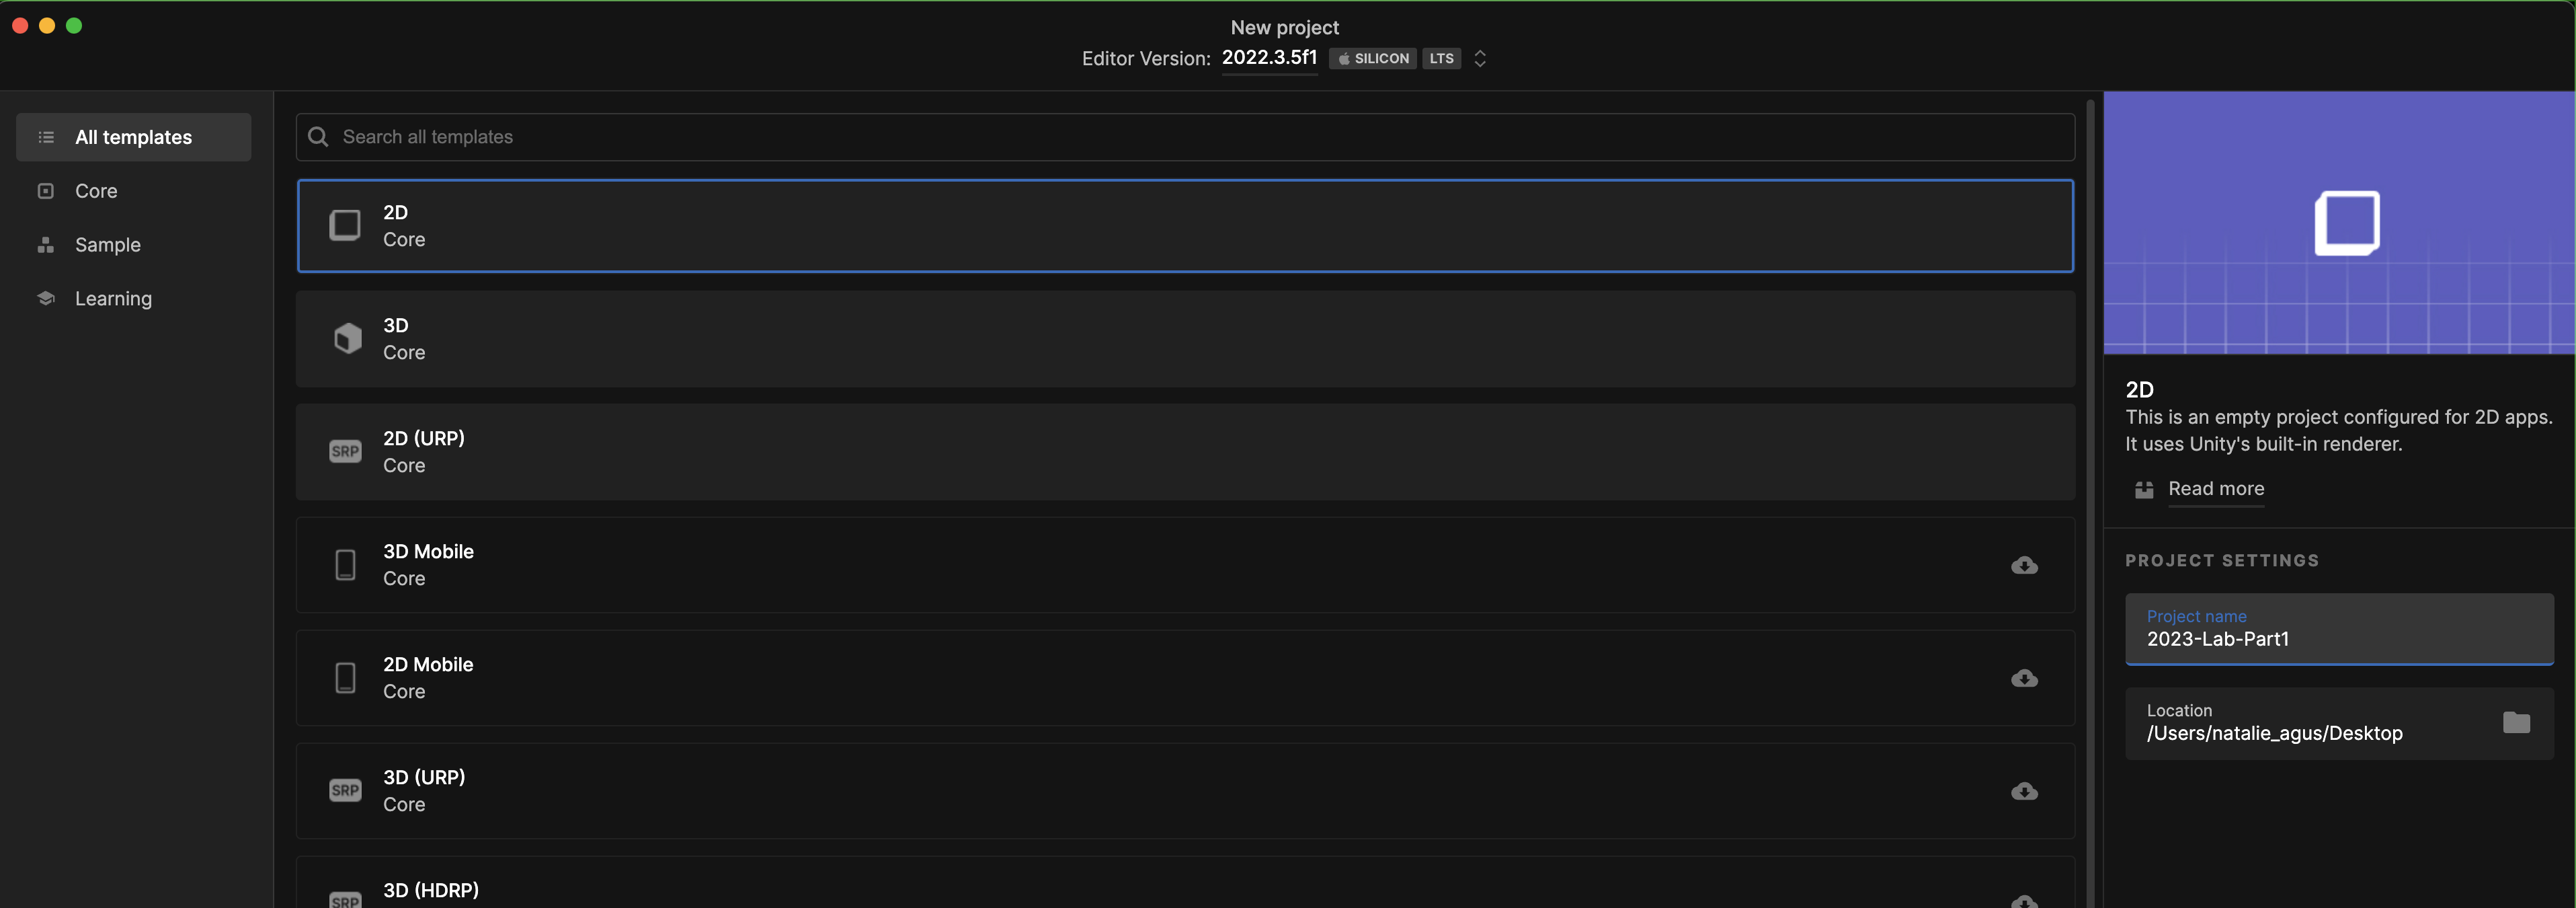
Then, import the asset mario-lab.unitypackage you downloaded from the Course Handout :
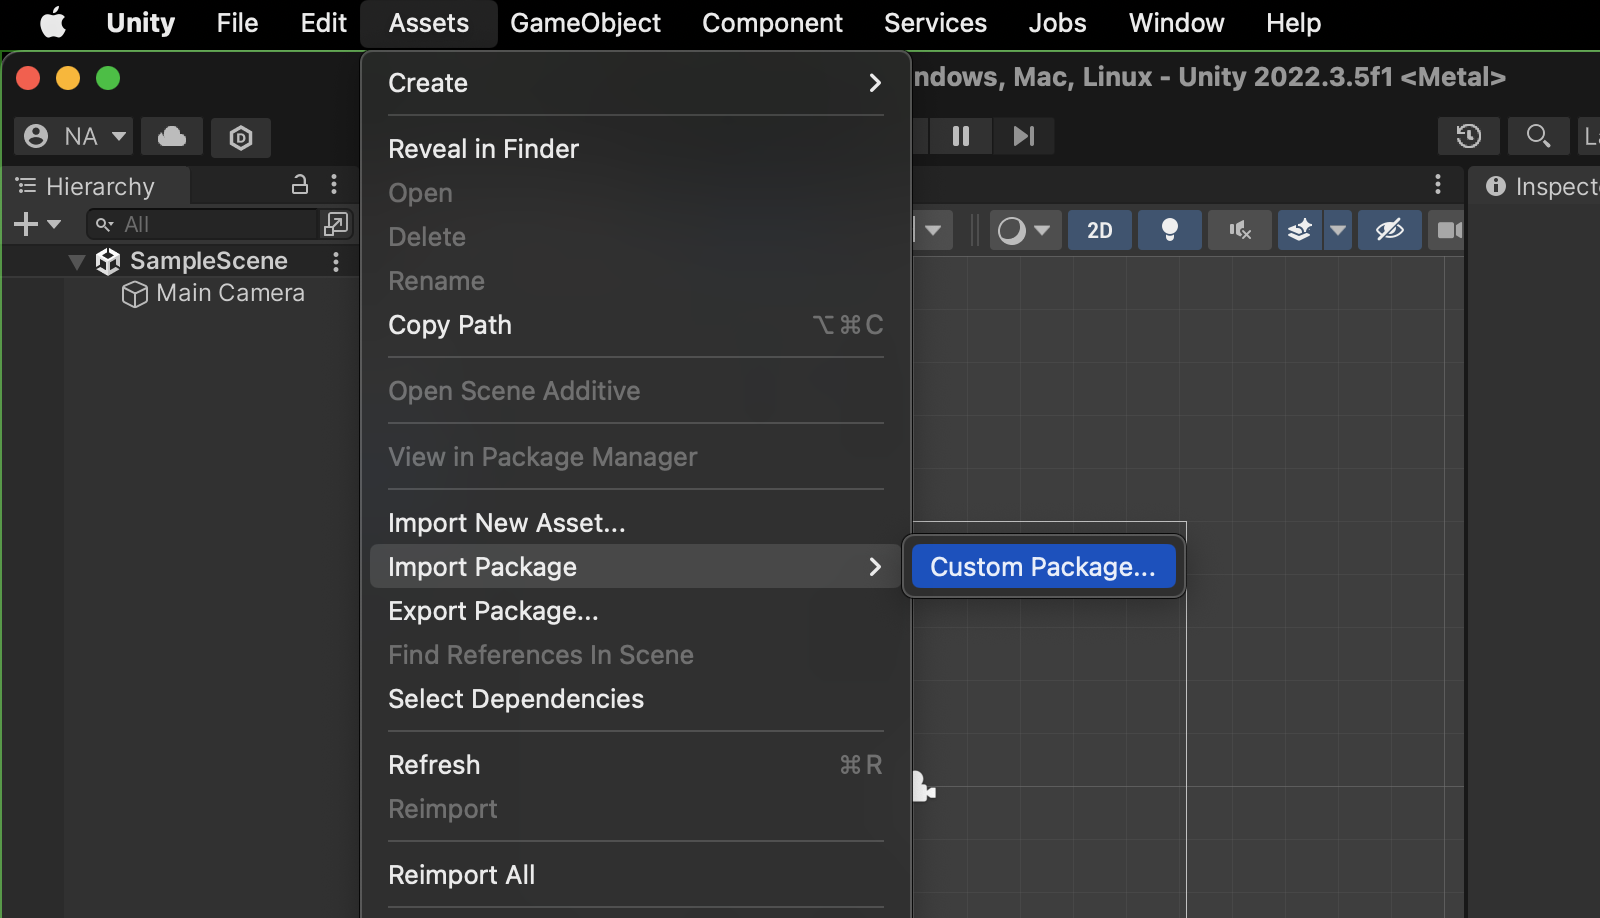
You should see a list of assets on the Project tab in the Unity editor.
You can create new project using the all new Unity 6.2 in the fall of 2025, but note the changes here. Some code might not be able to be copy-pasted as-is, but it is not difficult to figure out the new API. Don't worry.
Setting up VSCode
Ensure that all extensions for VSCode above are installed properly. If you use .NET Install Tool, you wont need to manage dotnet manually. This is the recommended way. Otherwise, check that dotnet is installed properly:

Then add the following to your VSCode settings.json:
{
  // for format on save (automatically)
  "editor.formatOnSave": true,
  "[csharp]": {
    "editor.defaultFormatter": "ms-dotnettools.csharp"
  }
}
You might want to ignore irrelevant files while opening your project with VSCode. Add the following setting in your project workspace:
    // Configure glob patterns for excluding files and folders.
    "files.exclude": {
        "**/.git": true,
        "**/.DS_Store": true,
        "**/*.meta": true,
        "**/*.*.meta": true,
        "**/*.unity": true,
        "**/*.unityproj": true,
        "**/*.mat": true,
        "**/*.fbx": true,
        "**/*.FBX": true,
        "**/*.tga": true,
        "**/*.cubemap": true,
        "**/*.prefab": true,
        "**/Library": true,
        "**/ProjectSettings": true,
        "**/Temp": true
    }
Unity: Install Visual Studio Editor Package
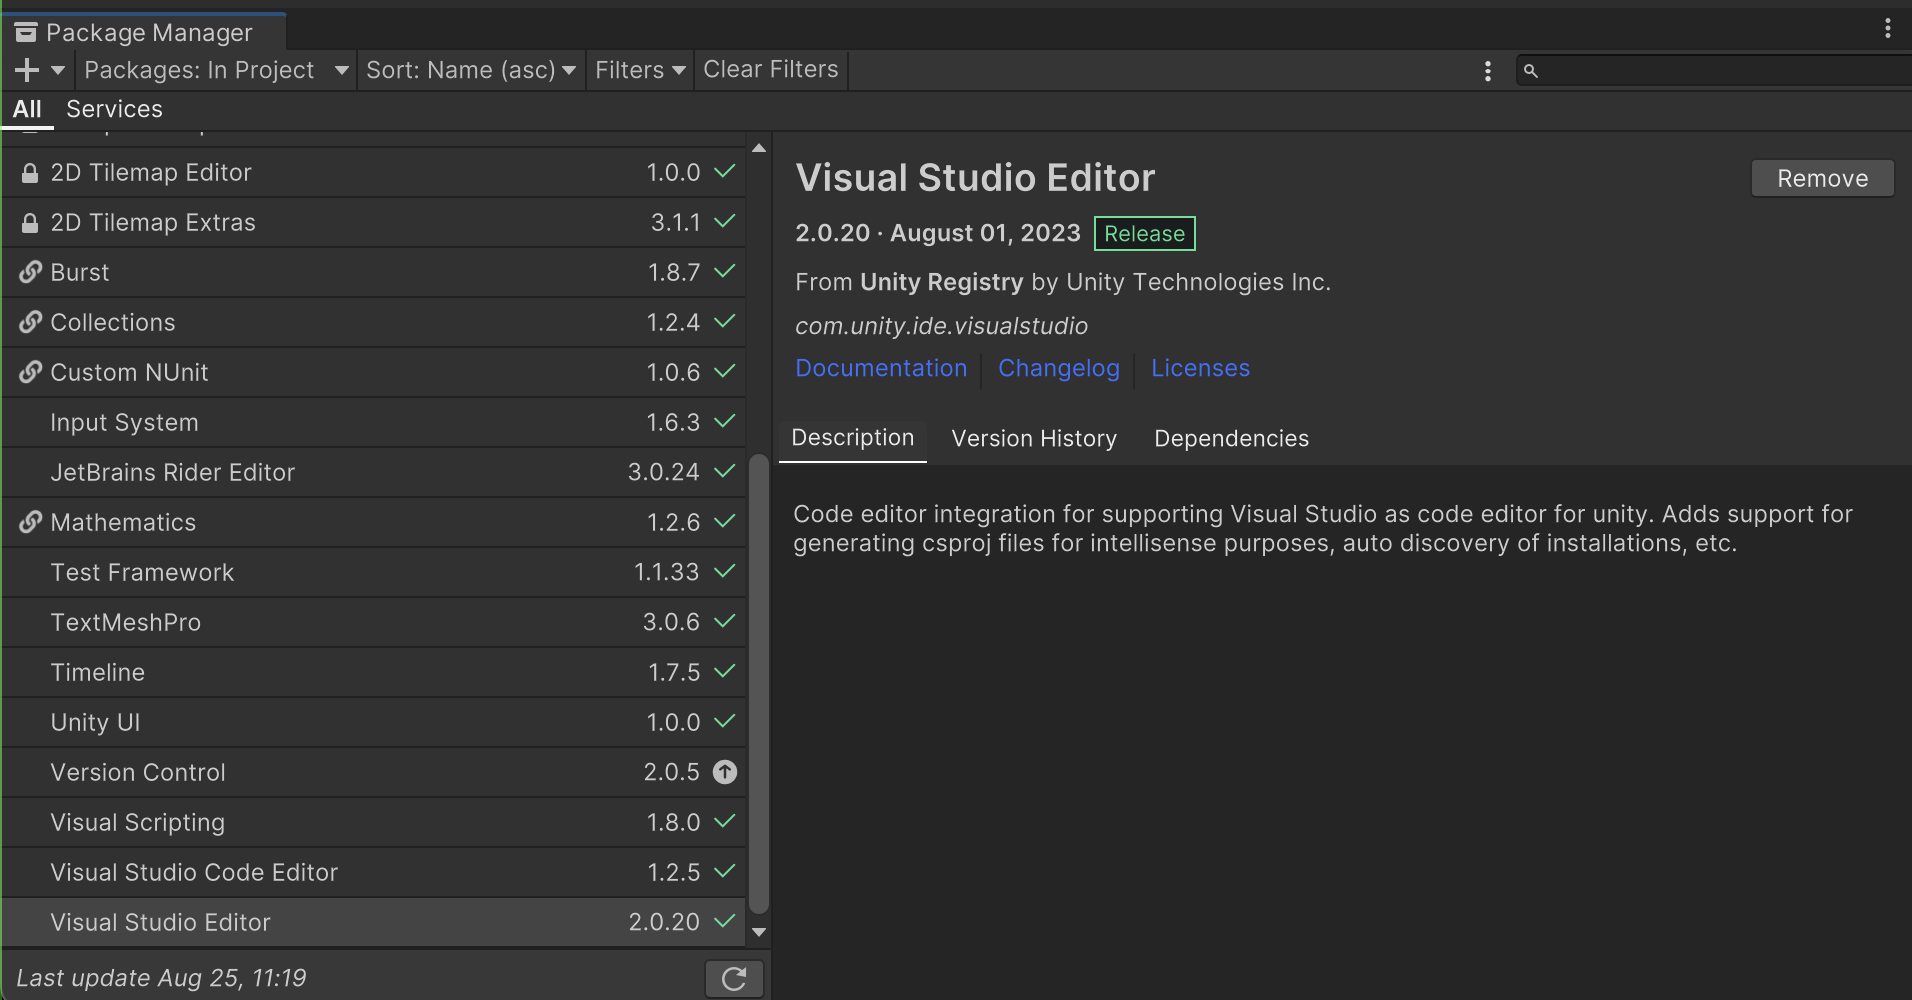
Manually update the Visual Studio Editor package in all the Unity projects so that VSCode works with the Unity extension.
Go to Window >> Package Manager and install Visual Studio Editor:
Go to Unity >> Settings (Windows: Edit >> Prefernces) and set Visual Studio Code as your external tools:
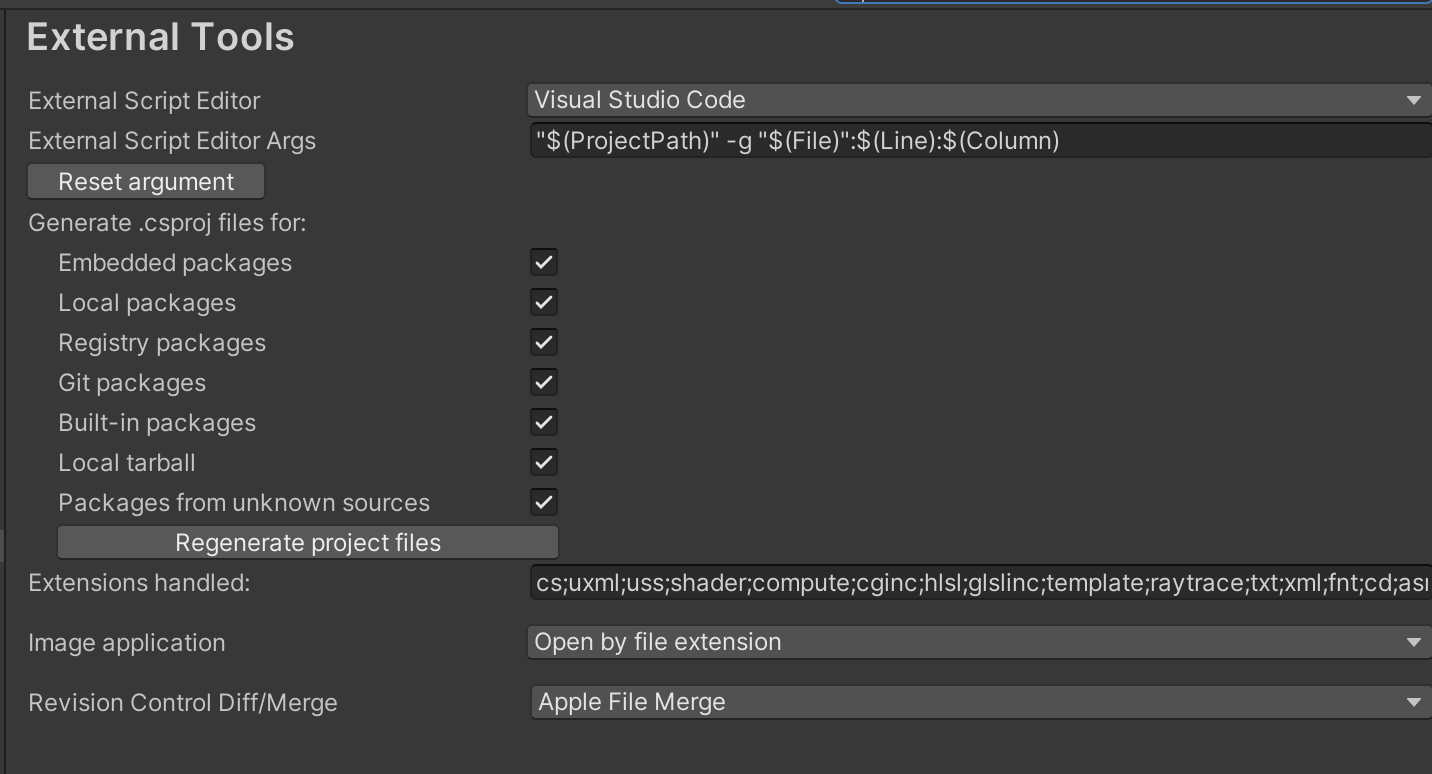
Generate all .csproj files as shown and click Regenerate Project Files.
Finally, Completely quit and restart VSCode and reopen your scripts via Unity. Your intellisense should be good to go:
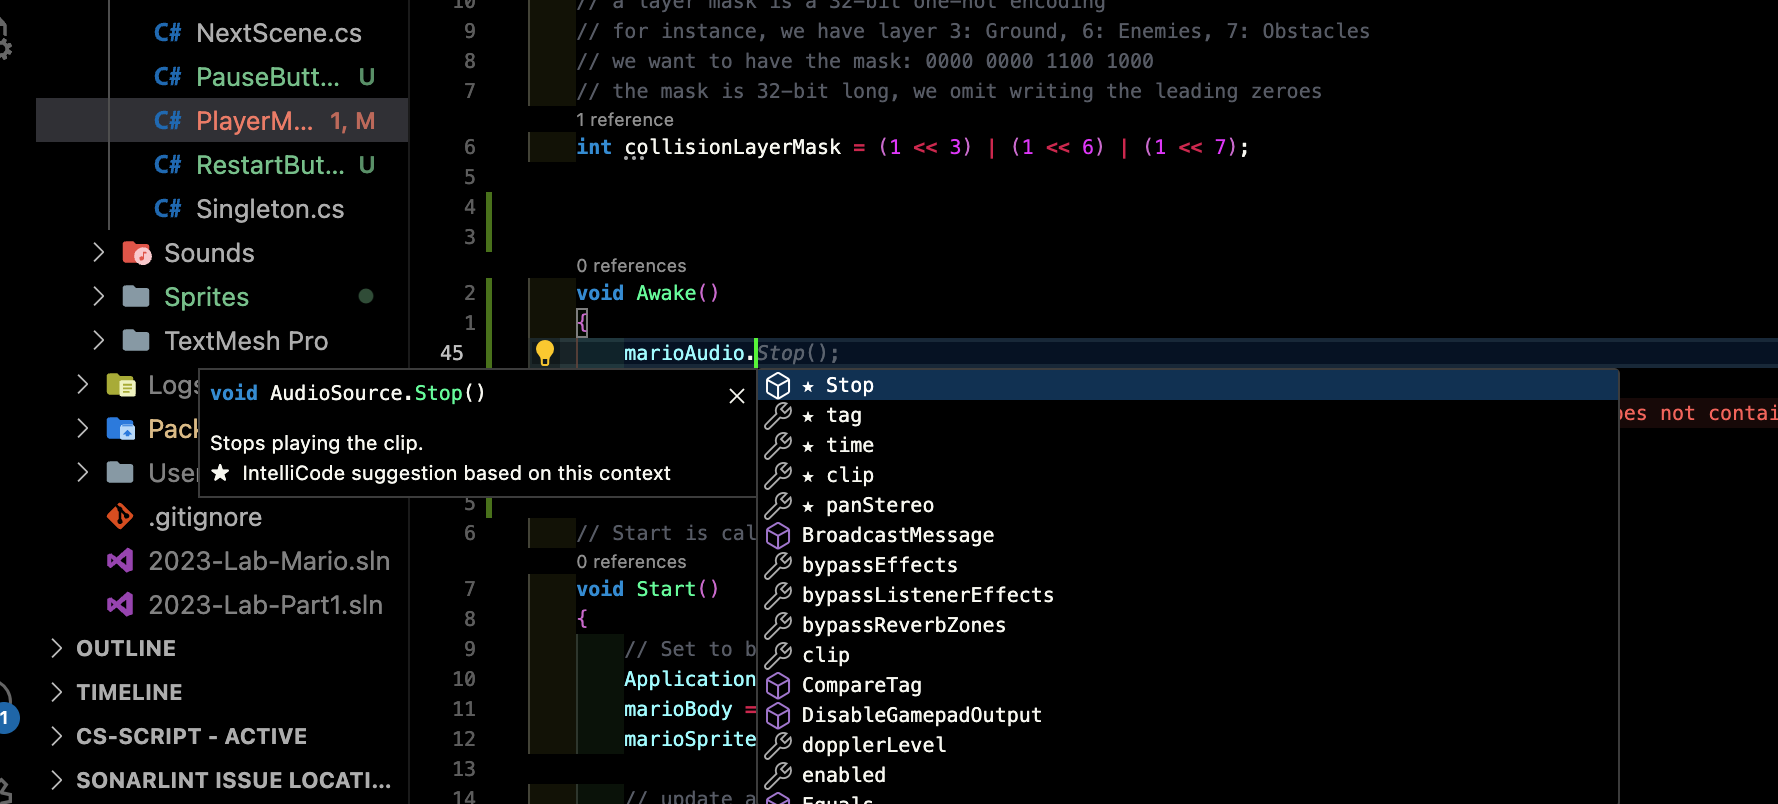
Please contact your TA or instructor if you still can't get your intellisense working, or use another IDE/editor like Visual Studio. Do not program blind for the rest of the semester.
Completely Quit and Restart VSCode
If you find the following error:
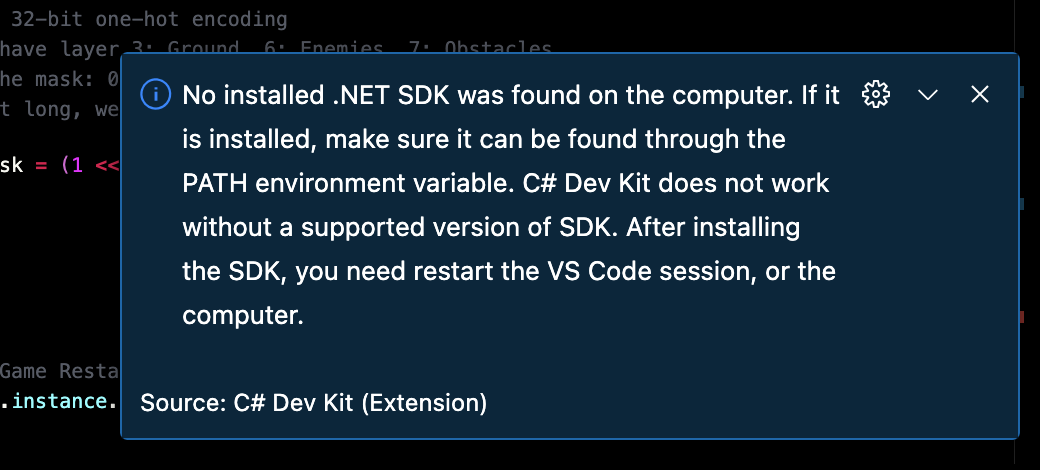
Please restart VSCode completely and reopen the script. This is due to the fact that you close VSCode window and it's still running (in the background), and yet you reopen the scripts from Unity. There will be a conflict in the language server.
You should reopen your VSCode window from VSCode itself:

Housekeeping
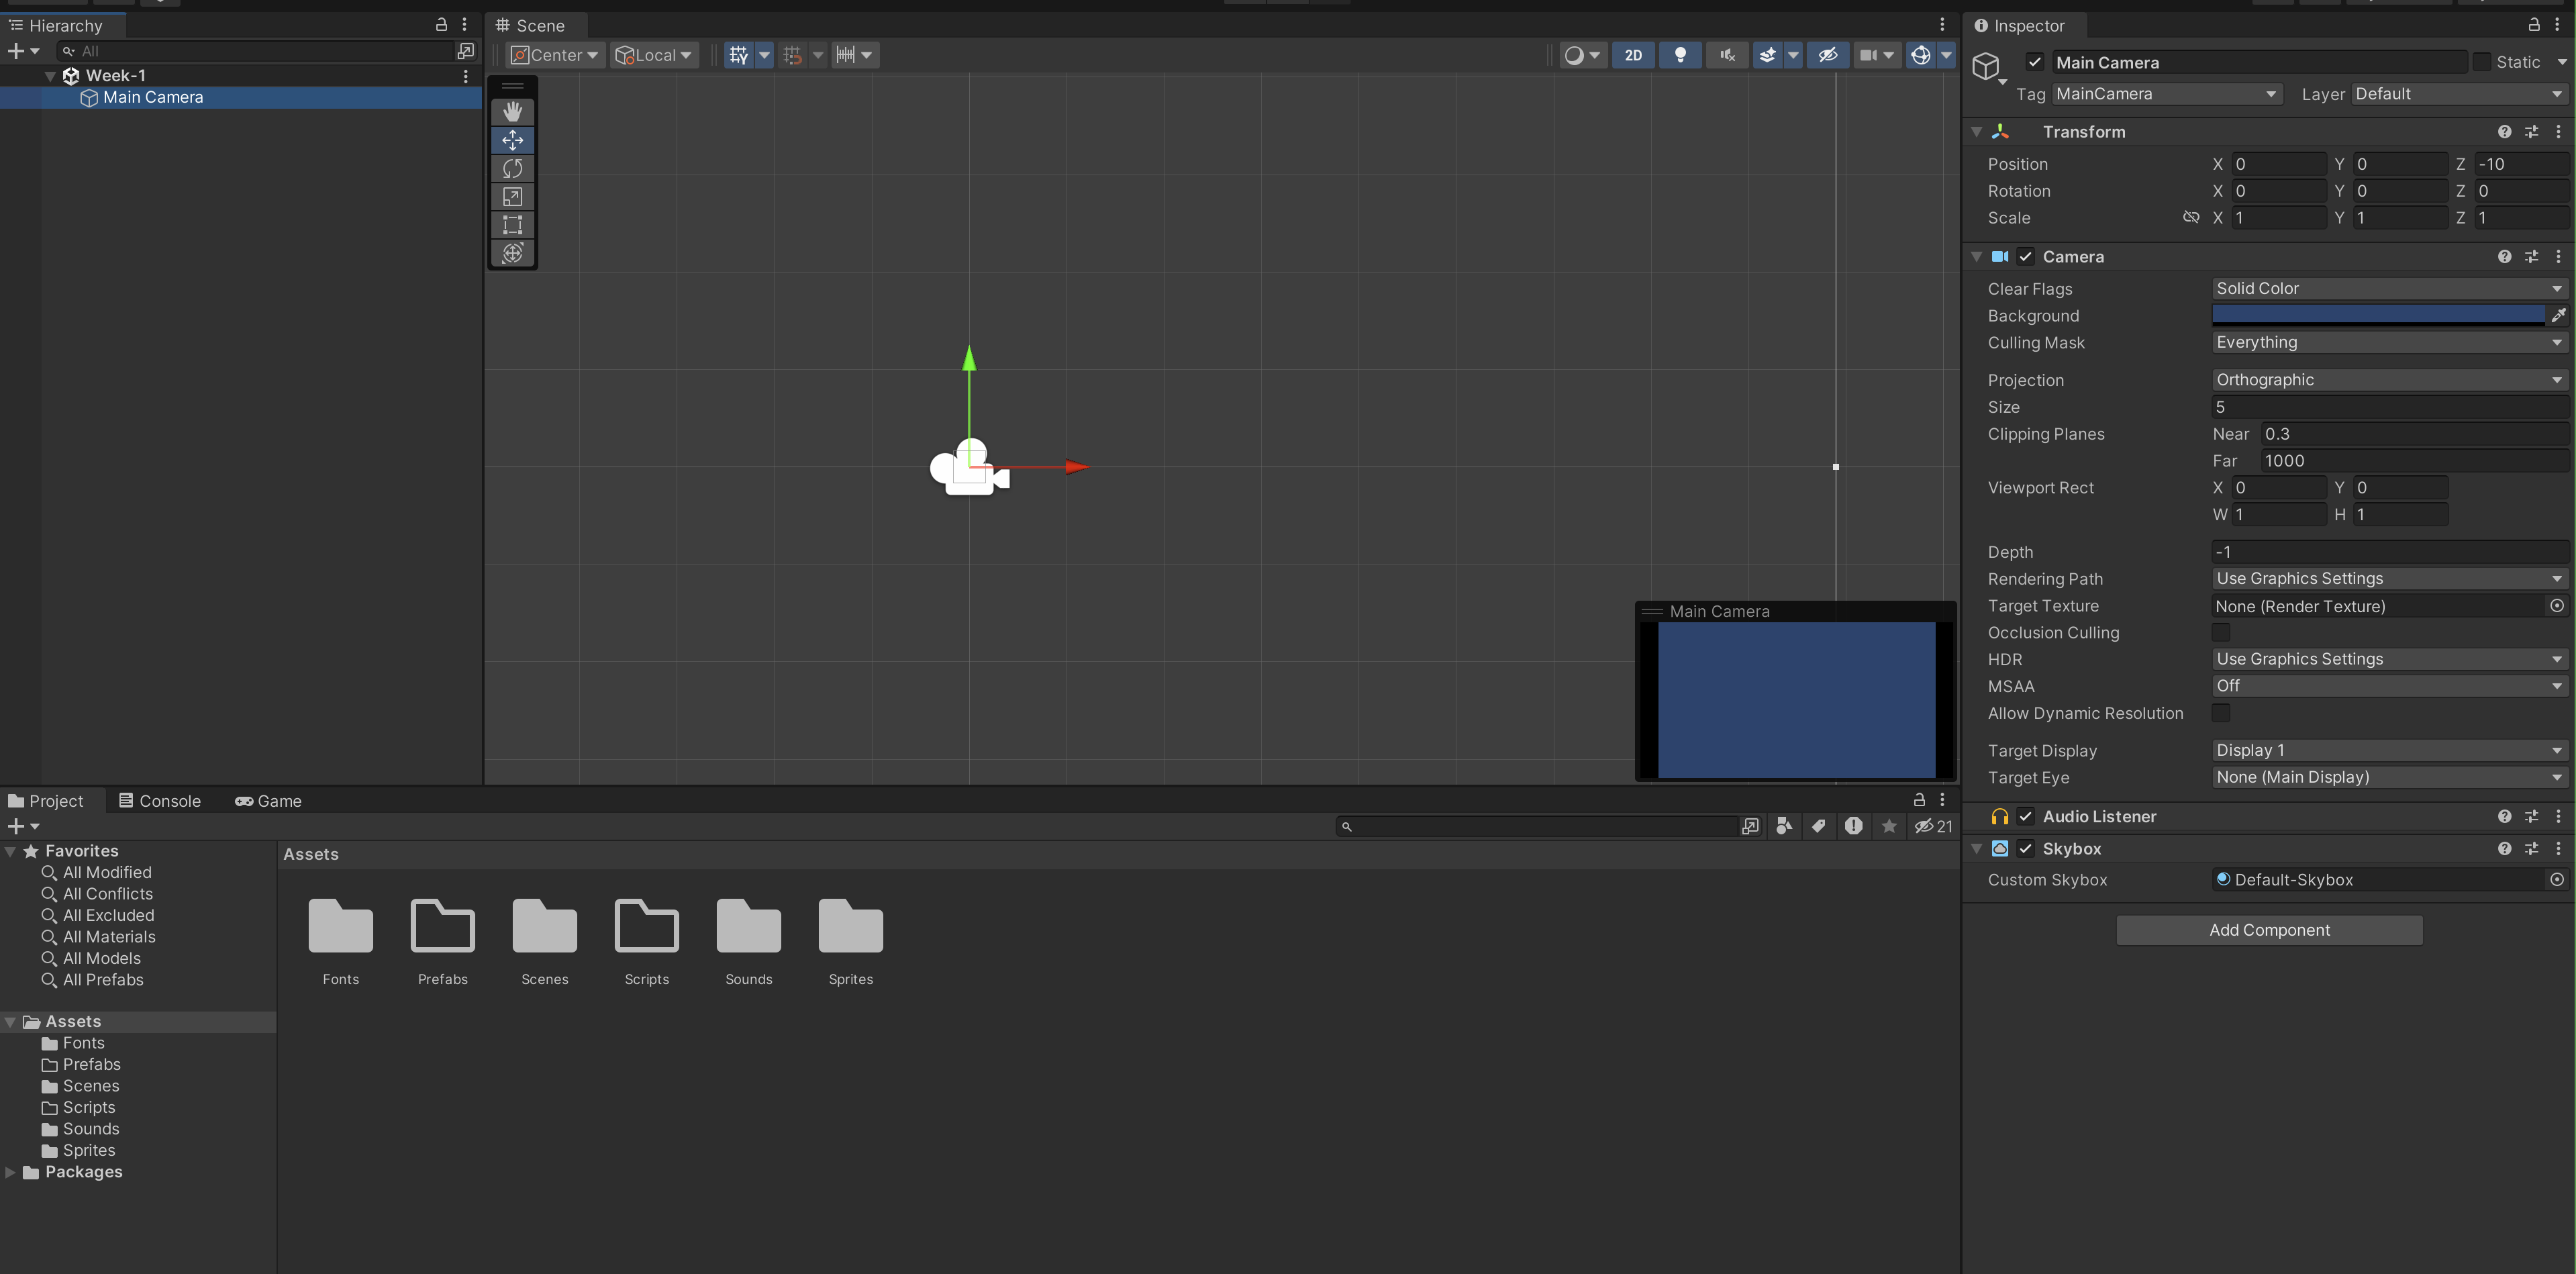
To work better, we need to set up the UI in a more comfortable way. We need at least the following windows:
- Inspector (to have an overview of all elements in a GameObject), set on the right hand side,
- Game Hierarchy (to have an overview of all GameObjects in the scene), set on the left hand side
- Scene Editor (to add GameObjects and place them), set on the middle of the screen
- Then usually we also have the following windows (kept as tabs):
- Project (to show all the files),
- Console (to see printed output)
- Game Screen (to test your game)
Then, go to Scenes folder and rename your scene in a way that it makes more sense than “SampleScene”. Create two more folders called “Scripts”, and “Prefabs” under "Assets". We will learn about them soon.
Here's a suggested layout:
Using git
You can use git as per normal and should not need to touch Git LFS for making this short, 15-minute game. Don't forget to add unity-specific .gitignore file.
Here's one suggestion, taken from this source:
# This .gitignore file should be placed at the root of your Unity project directory
#
# Get latest from https://github.com/github/gitignore/blob/main/Unity.gitignore
#

# for vscode
.vscode/*
!.vscode/settings.json
!.vscode/tasks.json
!.vscode/launch.json
!.vscode/extensions.json
!.vscode/*.code-snippets

# Local History for Visual Studio Code
.history/

# Built Visual Studio Code Extensions
*.vsix

/[Ll]ibrary/
/[Tt]emp/
/[Oo]bj/
/[Bb]uild/
/[Bb]uilds/
/[Ll]ogs/
/[Uu]ser[Ss]ettings/

# MemoryCaptures can get excessive in size.
# They also could contain extremely sensitive data
/[Mm]emoryCaptures/

# Recordings can get excessive in size
/[Rr]ecordings/

# Uncomment this line if you wish to ignore the asset store tools plugin
# /[Aa]ssets/AssetStoreTools*

# Autogenerated Jetbrains Rider plugin
/[Aa]ssets/Plugins/Editor/JetBrains*

# Visual Studio cache directory
.vs/

# Gradle cache directory
.gradle/

# Autogenerated VS/MD/Consulo solution and project files
ExportedObj/
.consulo/
*.csproj
*.unityproj
*.sln
*.suo
*.tmp
*.user
*.userprefs
*.pidb
*.booproj
*.svd
*.pdb
*.mdb
*.opendb
*.VC.db

# Unity3D generated meta files
*.pidb.meta
*.pdb.meta
*.mdb.meta

# Unity3D generated file on crash reports
sysinfo.txt

# Builds
*.apk
*.aab
*.unitypackage
*.app

# Crashlytics generated file
crashlytics-build.properties

# Packed Addressables
/[Aa]ssets/[Aa]ddressable[Aa]ssets[Dd]ata/*/*.bin*

# Temporary auto-generated Android Assets
/[Aa]ssets/[Ss]treamingAssets/aa.meta
/[Aa]ssets/[Ss]treamingAssets/aa/*
You can read more about how to use Git from this wonderful article.
Force Text Asset Serialization
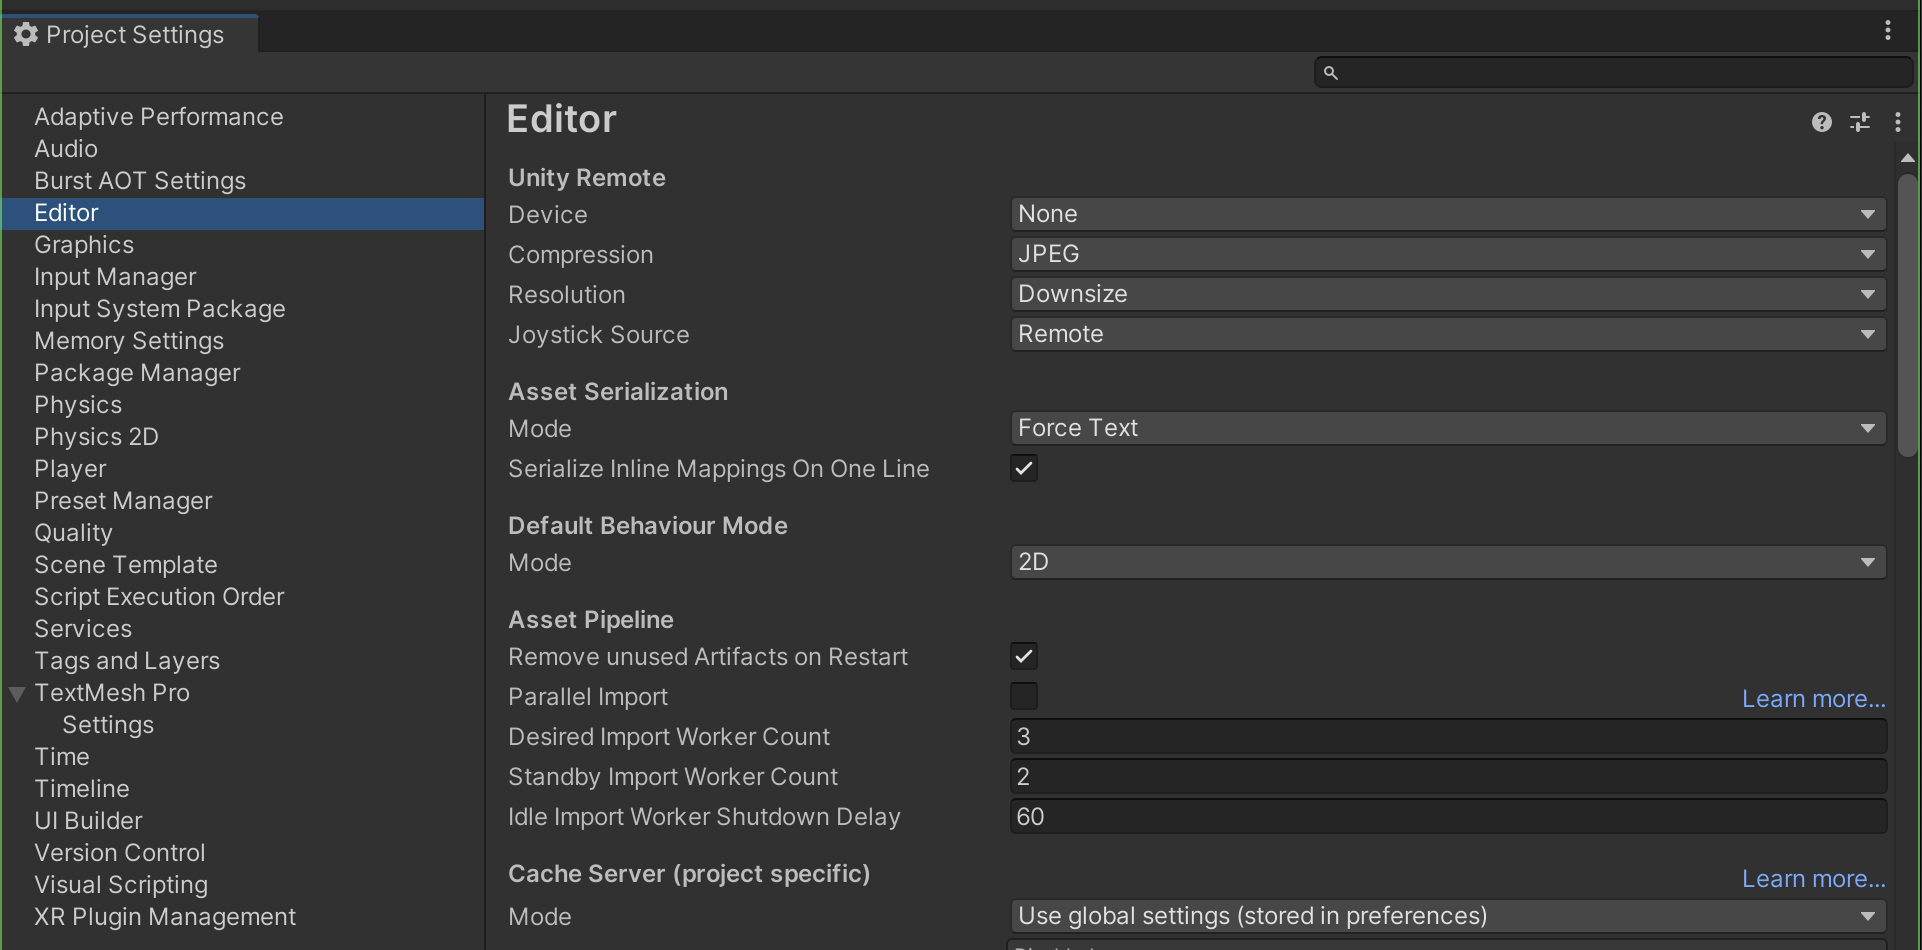
Go to Edit >> Project Settings in Unity, and set Asset Serialization Mode under Editor tab into Force Text:
Git LFS
Git LFS should be used only if you need to version large files. Normal free-tier GitHub repository can hold as much as 5GB, but 1GB is the recommended size. You can push objects not more than 100MB in size. A typical 50.033 project is far less than 1GB in total, given that you use proper .gitignore file.
If you still want to use Git LFS because you have complex VFX or SFX, then give this article a read. Do note the billing information about Git LFS (there's a limit on bandwidth, not just size).