C# Quick Tour
We shall refactor our existing game further so that it becomes more modular and maintainable, especially when we want to create multiple scenes (stages) in our game.
C# Static Variable
When a variable is declared as static, then a single copy of the variable is created and shared among all objects at the class level. Static variables are accessed with the name of the class, they do not require any instance for access. In the Singleton class, we define instance getter and setter:
    private static T _instance;
    public static T instance
    {
        get
        {
            return _instance;
        }
    }
Utilise static instance with Singleton
This allows any Singleton to be referenced directly by other scripts as such:
- PlayerMovement.cs
- EnemyManager.cs
- HUDManager.cs
    void Awake(){
        // other instructions
        // subscribe to Game Restart event
        GameManagerWeek4.instance.gameRestart.AddListener(GameRestart);
    }
    void Awake()
    {
        // other instructions
        GameManagerWeek4.instance.gameRestart.AddListener(GameRestart);
    }
    void Awake()
    {
        // other instructions
        // subscribe to events
        GameManagerWeek4.instance.gameStart.AddListener(GameStart);
        GameManagerWeek4.instance.gameOver.AddListener(GameOver);
        GameManagerWeek4.instance.gameRestart.AddListener(GameStart);
        GameManagerWeek4.instance.scoreChange.AddListener(SetScore);

    }
This way, we remove references to PlayerMovement and EnemyManager instance from GameManager Singleton, going from here:
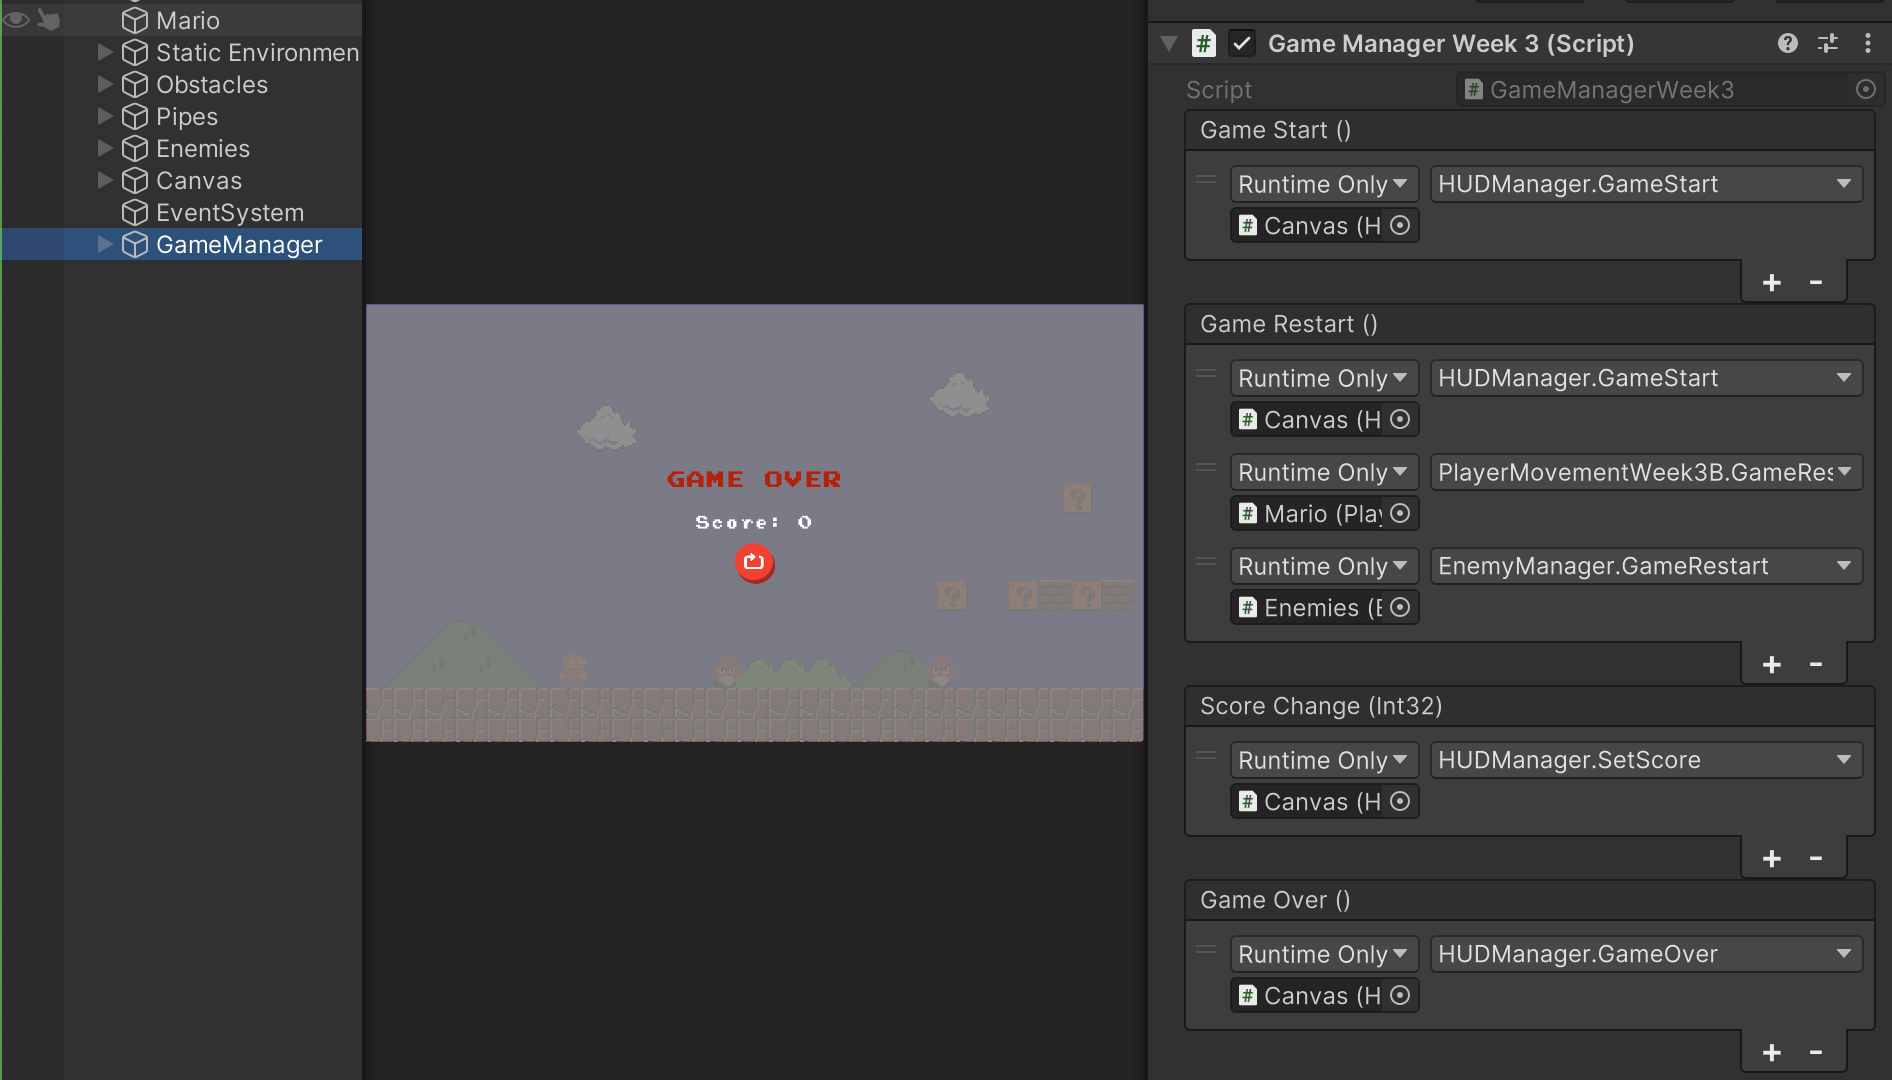
... to here:
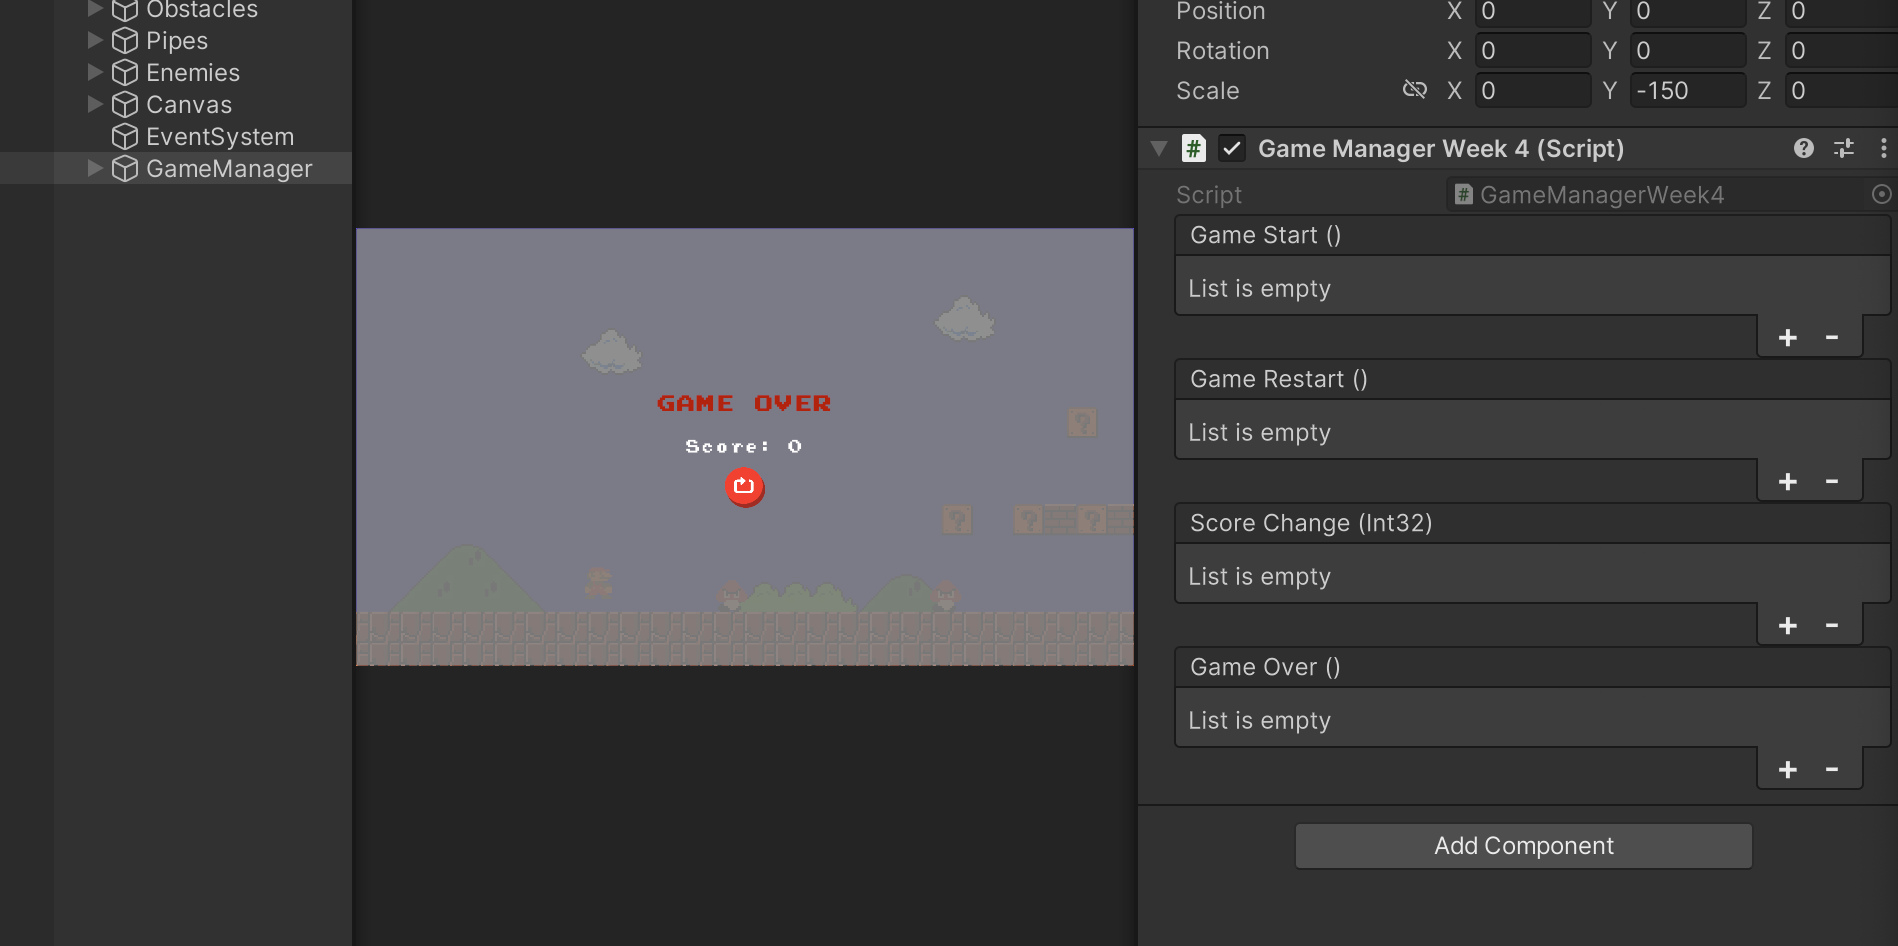
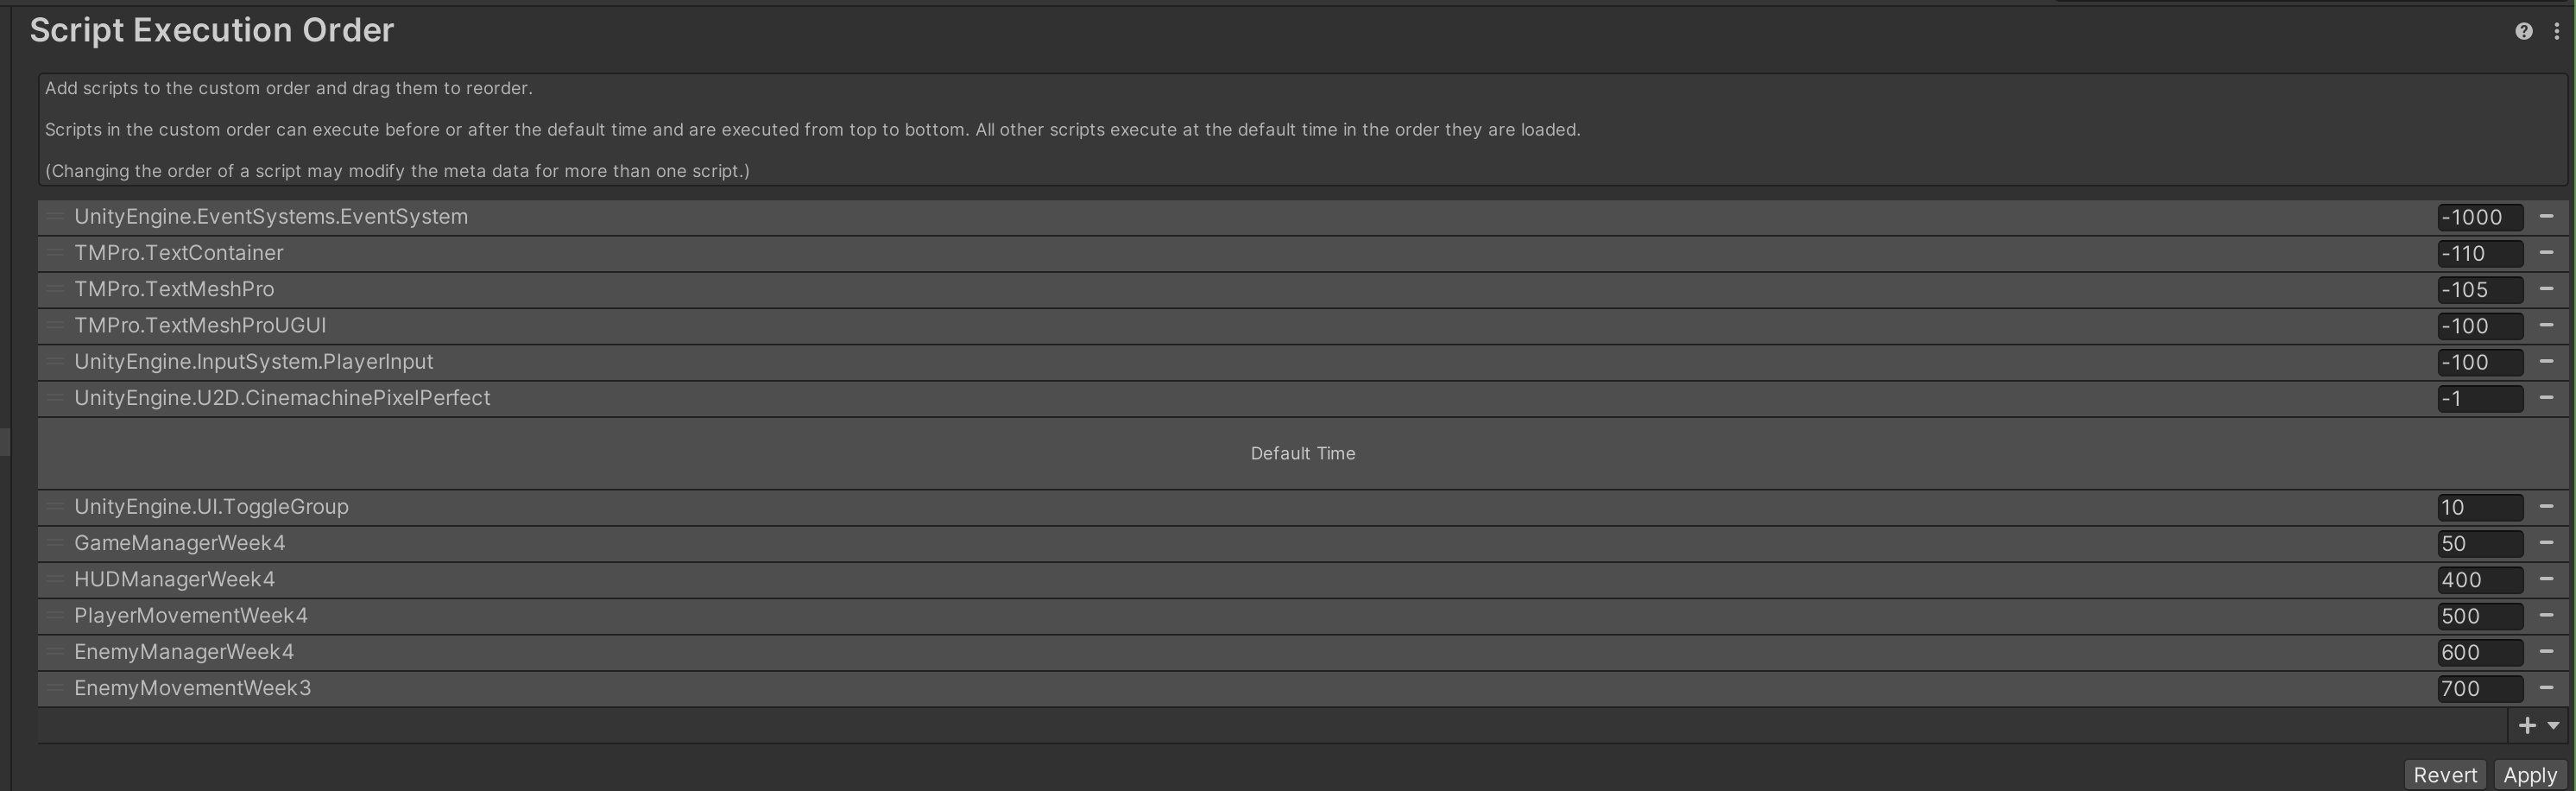
We need to ensure that GameManager Singleton is created before we try to reference instance in each Awake() function via other scripts above. Ensure your order of execution prioritizes GameManager first:
Remove Mario and HUDManager Singleton
We can then only put GameManager under DontDestroyOnLoad, while the rest of the objects (Mario, Canvas, Enemies, etc) can remain normal (new instance per scene). A few housekeeping:
- Ensure that Mario does not refer to GameManager instance on the scene, all references to
GameManagershould be obtained viastatic instanceproperty. - Ensure that
GameManageris a root GameObject, best if it does NOT have any children. You can easily make a mistake referring to GameManager's children who are not Singletons
Don't forget to remove subscription to activeSceneChanged in PlayerMovement.cs because your Mario will not need to "reset" its position anymore in the new scene.
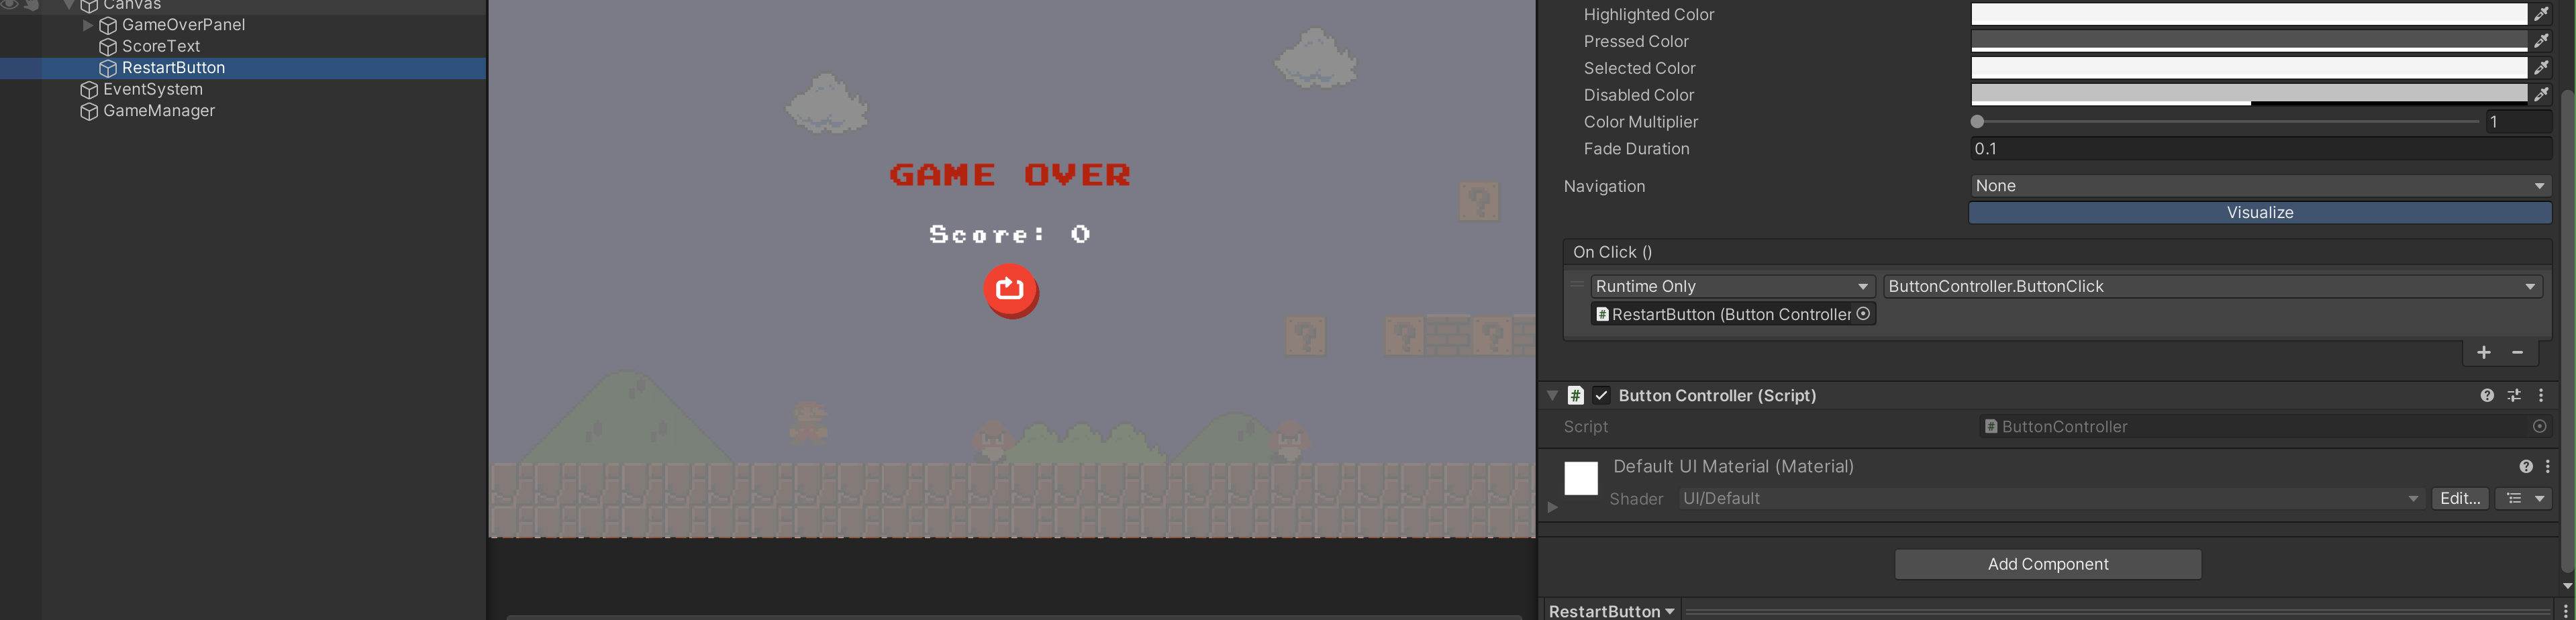
Restart Button
Initially, the restart button is made to call GameRestart function at that scene's GameManager instance.
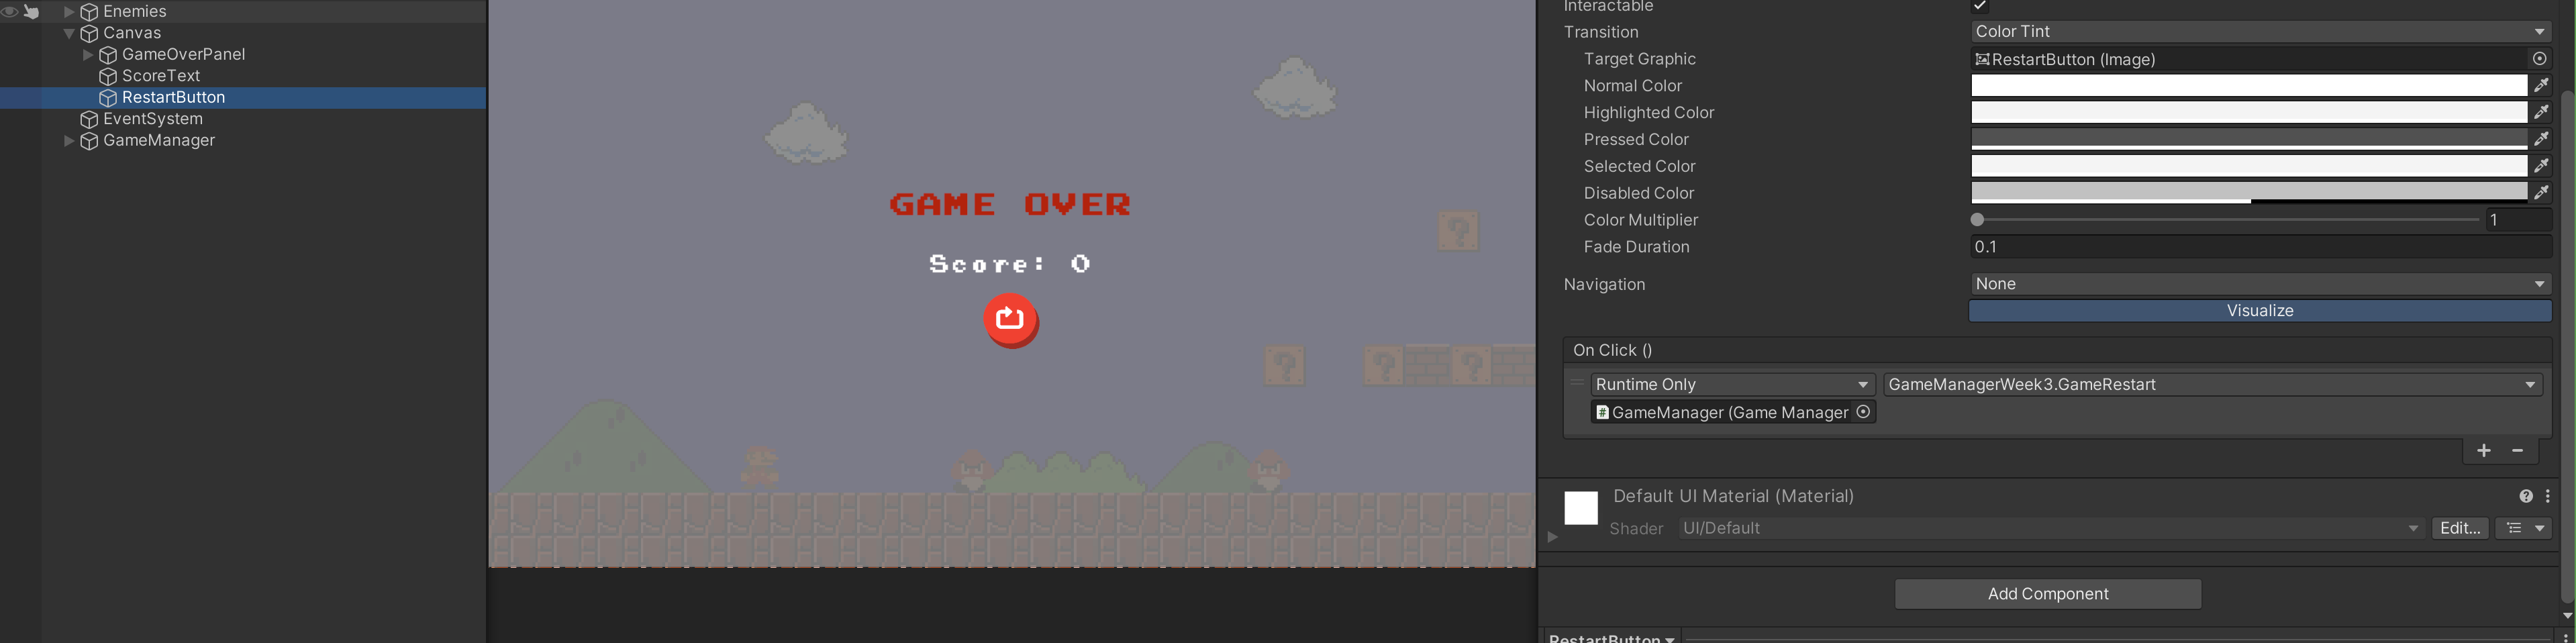
You need to call GameRestart via script instead. Create a new script called ButtonController.cs:
    public void ButtonClick()
    {
        GameManagerWeek4.instance.GameRestart();
    }
Then attach the script to the restart button, and select the ButtonClick() function as a callback.
If your button somehow is not Clickable in World-1-2, remember to check if you have the EventSystem enabled with the new InputSystem:
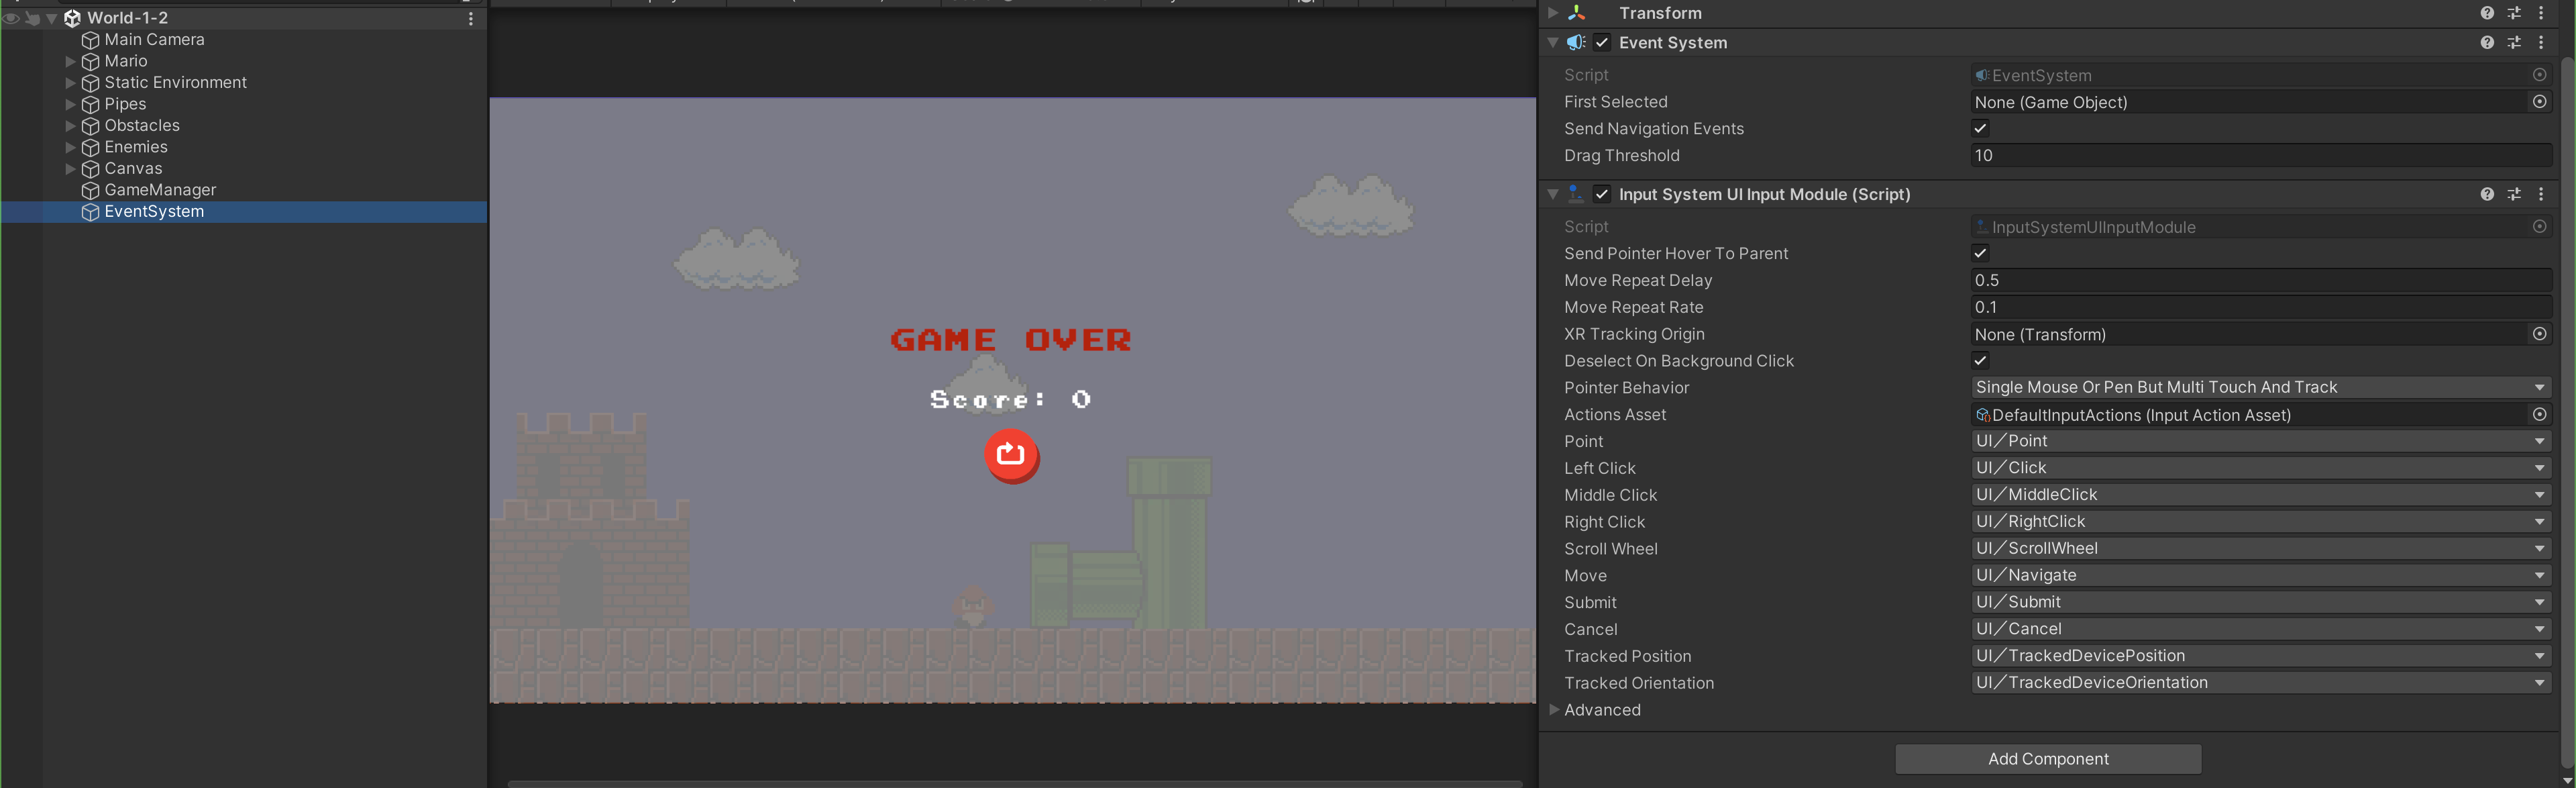
Typically this will be automatically created the moment you create any interactive UI GameObject.
Setting Score Upon Scene Change
You may not need to reset Mario's position anymore because you have a new Mario instance in World-1-2 that you have placed in the correct starting position. However, the GameManager must do some housekeeping:
- Remove the HUD when scene changes, this used to be done at
Start()in GameManager - Set the score to current score (from World-1-1)
The GameManager can now subscribe to activeSceneChanged:
using UnityEngine.SceneManagement;


    void Start()
    {

        gameStart.Invoke();
        Time.timeScale = 1.0f;
        // subscribe to scene manager scene change
        SceneManager.activeSceneChanged += SceneSetup;
    }

    public void SceneSetup(Scene current, Scene next)
    {
        gameStart.Invoke();
        SetScore(score);
    }
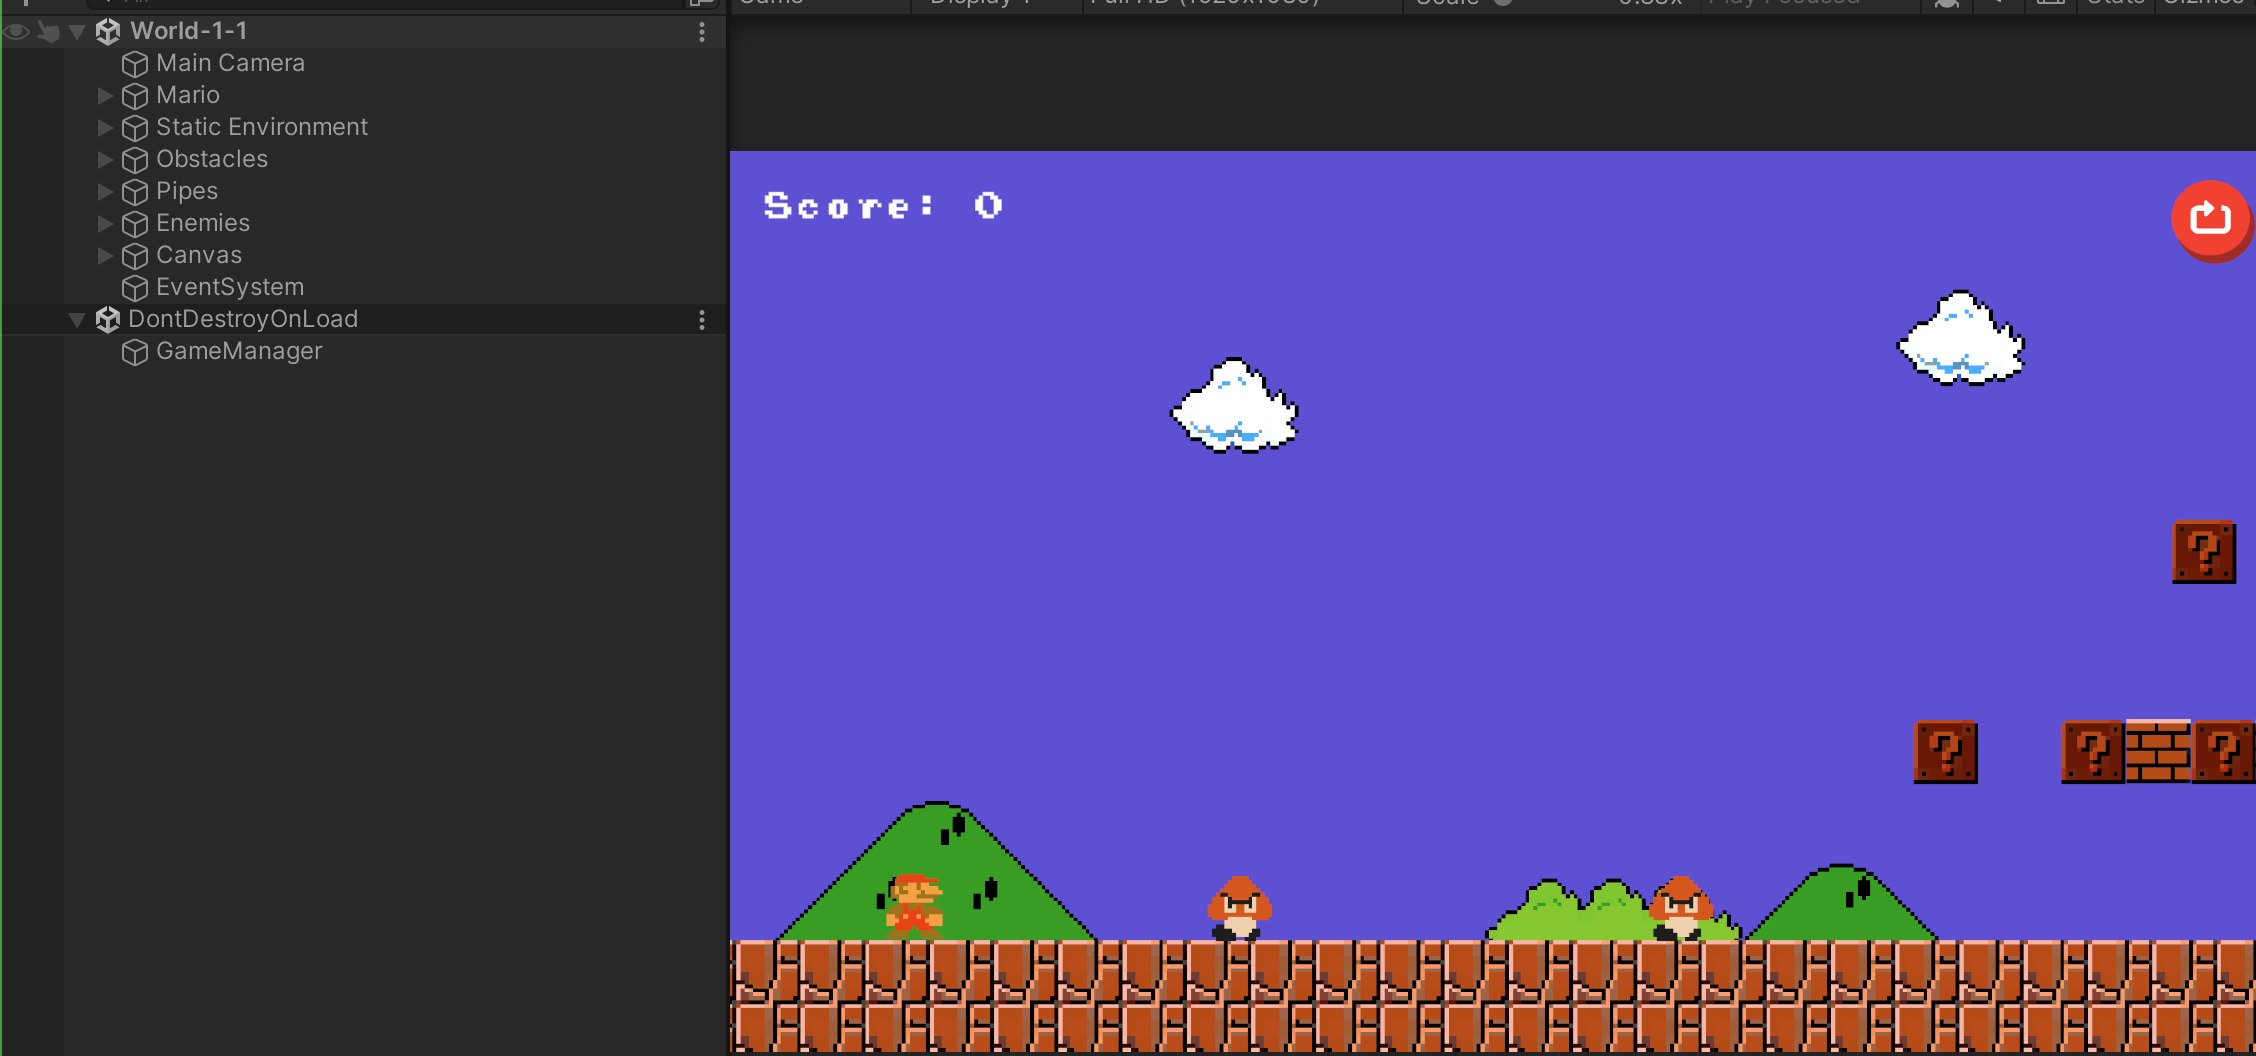
If everything works right, you can then have everything (HUD, Mario, GameManager) in each World independently (for testing):
- World-1-1 works as per normal: score increase, Goomba respawn and death, coins, game restart must all work as usual
- World-1-2 carries over scores from World-1-1 to demonstrate persistence
- World-1-2 can be played independently for testing, restart and scoring works too
- Only GameManager is part of
DontDestroyOnLoad - There's no
NullReferenceErroron the Console - There's only one Goomba for demonstration purposes in World-1-2. We have not managed Green Goombas (underground) yet
C#: Interface
It is very common in a game to have various types of buttons, powerups, or enemies, but they should have common methods that will be called by other scripts such as cast or consume, or click, etc. To do this more uniformly, we can utilise an interface. Interface members should be public by default (legacy, see deep dive section below), because they’re meant to define the public API of a type, hence the name interface: a contract meant to be use by other classes.
Deep Dive: Actually, Not-So-Simple Interface (Anymore)
The legacy definition of C# interface were:
- An interface only has declarations of methods, properties, indexers, and events.
- An interface has only public members and it cannot include private, protected, or internal members.
- An interface cannot contain fields.
However, more and more features are added now for various reasons. It was first introduced in C#8.0 in 2019, with the goal of being able to extend existing interface without breaking legacy or old libraries.
The syntax for an interface is relaxed to permit modifiers on its members. The following are permitted: private, protected, internal, public, virtual, abstract, sealed, static, extern, and partial with certain requirements.
For example: C# Interface members can be private but must have concrete (default) implementation, for the purpose of useful refactoring and organization of code used to implement the interface's public API. You can read more about C# interface default implementation of interface methods here.
Interactive Button
Let's try to create one simple interface for all interactive buttons:
public interface IInteractiveButton
{
    void ButtonClick();
}
There's no need to declare
publicin the methods
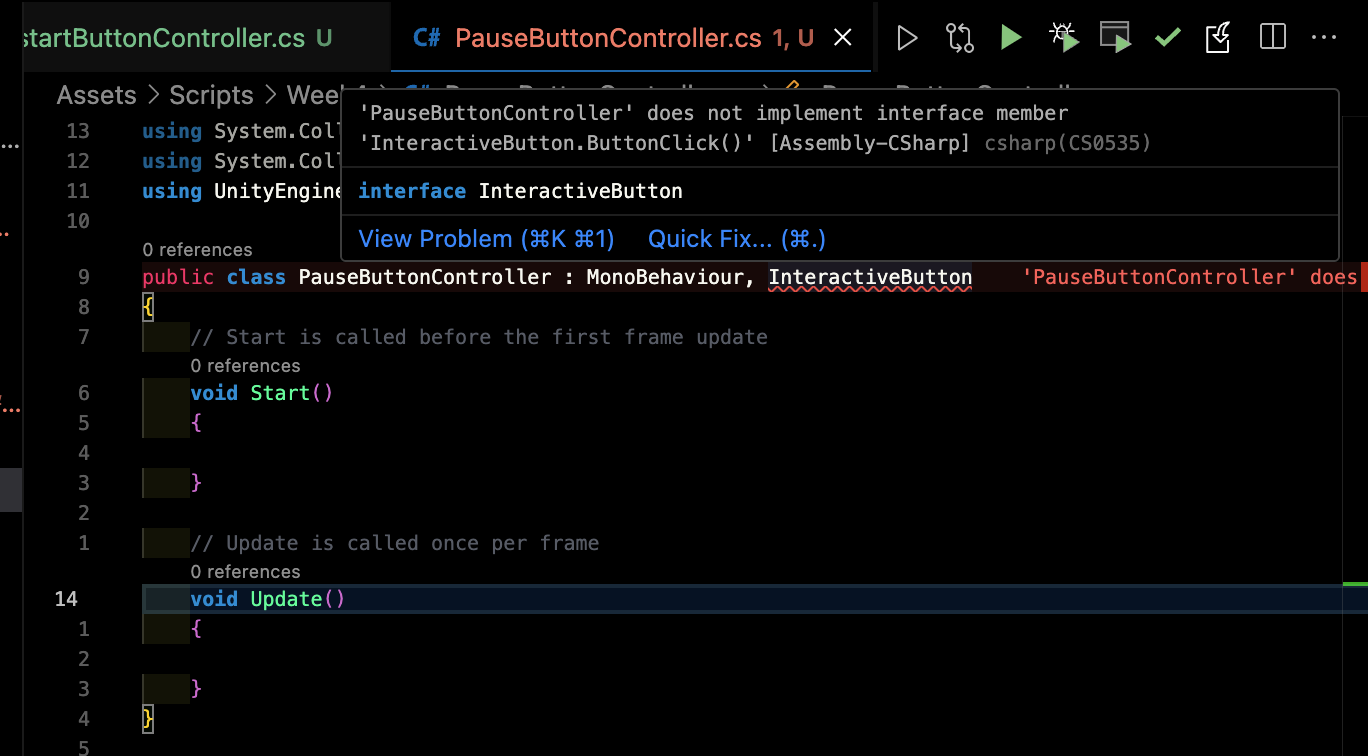
Rename your ButtonController.cs script into RestartButtonController.cs, and create another PauseButtonController.cs script to pause the game. Both controllers must inherit IInteractiveButton interface:
- RestartButtonController.cs
- PauseButtonController.cs
using System.Collections;
using System.Collections.Generic;
using UnityEngine;

// later on, teach interface
public class RestartButtonController : MonoBehaviour, IInteractiveButton
{
    // implements the interface
    public void ButtonClick()
    {
        Debug.Log("Onclick restart button");
        GameManagerWeek4.instance.GameRestart();
    }
}
using System.Collections;
using System.Collections.Generic;
using UnityEngine;
using UnityEngine.UI;

public class PauseButtonController : MonoBehaviour, IInteractiveButton
{
    private bool isPaused = false;
    public Sprite pauseIcon;
    public Sprite playIcon;
    private Image image;
    // Start is called before the first frame update
    void Start()
    {
        image = GetComponent<Image>();
    }

    // Update is called once per frame
    void Update()
    {

    }

    public void ButtonClick()
    {
        Time.timeScale = isPaused ? 1.0f : 0.0f;
        isPaused = !isPaused;
        if (isPaused)
        {
            image.sprite = playIcon;
        }
        else
        {
            image.sprite = pauseIcon;
        }
    }
}
An error will be raised if we do not implement ButtonClick method:
Powerups
In Super Mario Bros, there are a few powerups. Power-ups are unique items that give special abilities to characters that use them.
- Magic Mushroom: Upgrades Mario to Super Mario
- 1-up Mushroom (green mushroom): Grants Mario extra life
- Starman: Grants Mario invincibility for a period of time
- Coin: Increases score (not exactly special abilities, but something to "interact" with)
The main idea is that no matter which powerup is being collected by the player, we filtered and invoke the right subscribers for that powerup:
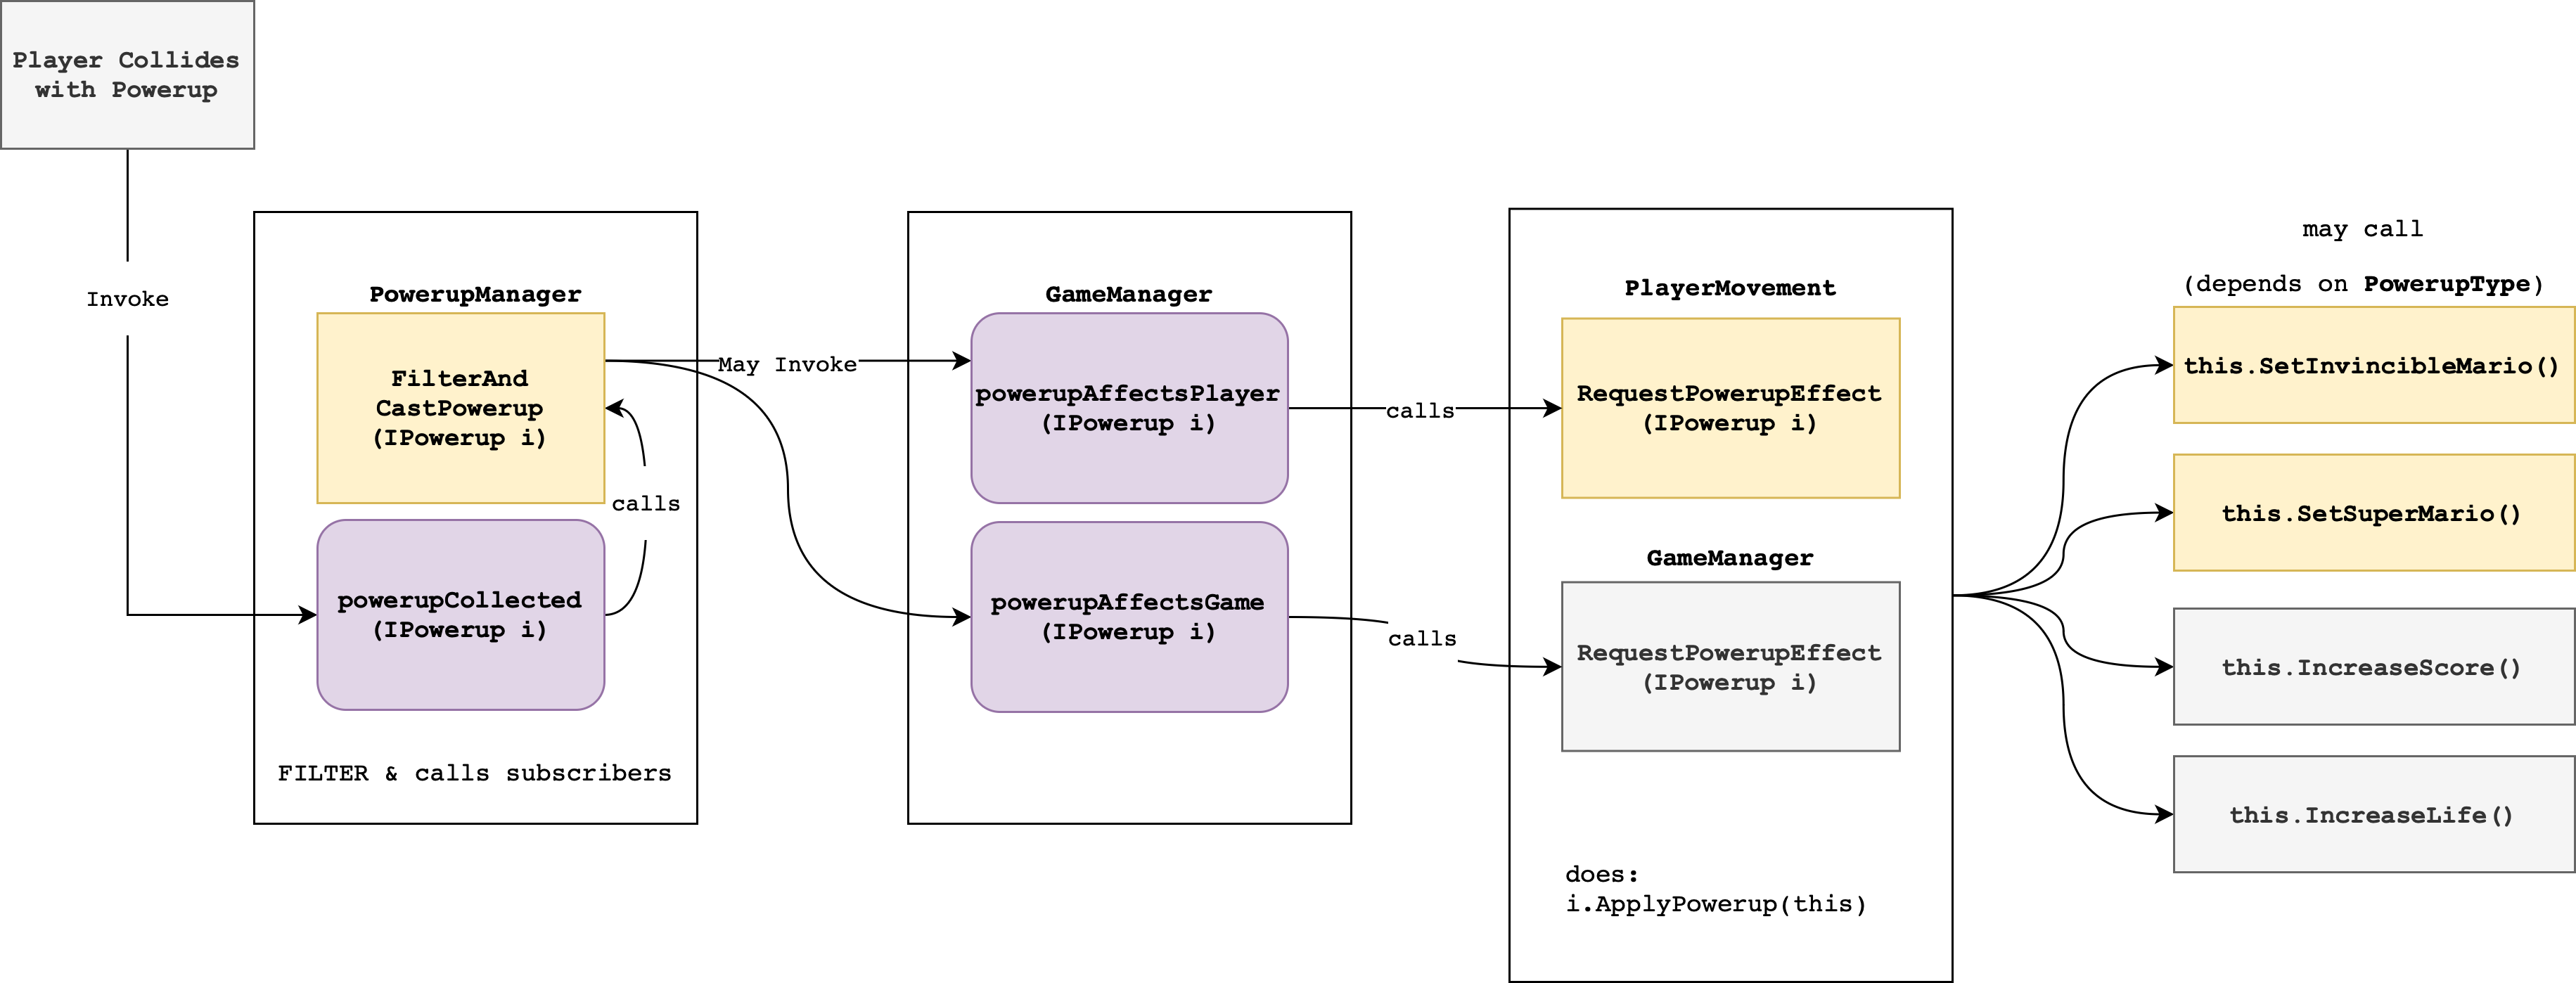
Create a new script called IPowerup.cs, where we can declare the following interfaces:
using UnityEngine;

public interface IPowerup
{
    void DestroyPowerup();
    void SpawnPowerup();
    void ApplyPowerup(MonoBehaviour i);

    PowerupType powerupType
    {
        get;
    }

    bool hasSpawned
    {
        get;
    }
}


public interface IPowerupApplicable
{
    public void RequestPowerupEffect(IPowerup i);
}
C#: Properties
We can get (and set) C# properties to allow access control over class members. It's pretty straightforward to implement just like in any other programming language. This example explains itself:
//Member variables can be referred to as fields.
private  int _healthPoints;

//healthPoints is a basic property
public  int healthPoints {
	get {
		//Some other code
		// ...
		return _healthPoints;
	}
	set {
		// Some other code, check etc
		// ...
		_healthPoints = value; // value is the amount passed by the setter
	}
}

// usage
Debug.Log(player.healthPoints); // this will call instructions under get{}
player.healthPoints += 20; // this will call instructions under set{}, where value is 20
Optionally, you can have private set instead of just set to disallow other classes from setting that member.
C#: enums
Right now we have four different types of powerups. Sure, we can use tags, or object name or some kind of pre-determined id to name each of them but we would benefit more if we use the enum type as we can name them more intuitively.
An enumeration type (or enum type) is a value type defined by a set of named constants of the underlying integral numeric type.
Add the following code to IPowerup.cs:
public enum PowerupType
{
    Coin = 0,
    MagicMushroom = 1,
    OneUpMushroom = 2,
    StarMan = 3
}
If you wish, you can create two separate files: IPowerup.cs and PowerupType.cs to physically separate the two.
C#: Abstract Class
Apart from sharing the same interface, each of our powerups will also share certain similar characteristics (properties and protected methods, or interface implementation), for instance:
- Properties:
PowerupType type GetPowerupType()has the same implementation no matter which Powerup implements it
We can create an abstract base class.
In C#, an abstract class is a class that cannot be instantiated directly but serves as a blueprint for other classes. It's meant to be subclassed (derived) by other classes, which provide implementations for its abstract members (methods, properties, events, and indexers). It can contain both abstract or concrete members.
Abstract classes are useful for creating hierarchies of related classes while ensuring a consistent structure and behavior across those classes.
using UnityEngine;


public abstract class BasePowerup : MonoBehaviour, IPowerup
{
    public PowerupType type;
    public bool spawned = false;
    protected bool consumed = false;
    protected bool goRight = true;
    protected Rigidbody2D rigidBody;

    // base methods
    protected virtual void Start(){
        rigidBody = GetComponent<Rigidbody2D>();
    }

    // interface methods
    // 1. concrete methods
    public PowerupType powerupType
    {
        get // getter
        {
            return type;
        }
    }

    public bool hasSpawned
    {
        get // getter
        {
            return spawned;
        }
    }

    public void DestroyPowerup()
    {
        Destroy(this.gameObject);
    }

    // 2. abstract methods, must be implemented by derived classes
    public abstract void SpawnPowerup();
    public abstract void ApplyPowerup(MonoBehaviour i);
}
We can typically add the abstract or virtual keywords on methods/properties/events etc in the base class.
Feel free to modify the above to your own usage. For instance, we added more methods to manage Game Restart event and manage Audio Source better.
Abstract Keyword
Methods or properties with abstract keywords indicate that the thing being modified has a missing or incomplete implementation. We are supposed to override these methods in the derived classes (otherwise there will be errors).
Virtual Keyword
Methods or properties with virtual keywords means that we can modify this method or property, and allow for it to be overridden in a derived class. In other words, we may override virtual methods if we would like to modify or extend it. We can still call the base class' method using base.methodName().
Both abstract and virtual method cannot be declared as private because they're meant to be modified by the derived class. You need to use either the protected or public keyword, but the former makes more sense as public methods should've been declared on the interface instead and implemented either in the base class or the derived class.
New Keyword
If your base class has implemented some concrete method and you would like to hide it in your derived classes (with completely new implementation), use the new keyword in your method or property declaration.
override vs new
override vs new KeywordThe override modifier extends the base class virtual or abstract method, and the new modifier hides an accessible base class method. At first glance, using concrete method implementation in the base class and calling new in the derived class (then using base.someMethod() to invoke the base class method too) might seem to have the same effect as using virtual method in the base class and overriding it in the derived class. However, this is not always quite the expected behavior.
TL;DR: If you're expecting standard polymorphism behavior, use virtual methods in base class and override keyword in derived classes, and call base.methodName() wherever appropriate.
Deep Dive
The difference between the two is very apparent in this example, especially when we declare object type BaseClass using DerivedClass constructor. The output of line 42 will be different to the output of line 38.
using UnityEngine;


class BaseClass
{
    public virtual void Method1()
    {
        Debug.Log("Base - Method1");
    }
    public void Method2()
    {
        Debug.Log("Base - Method2");
    }
}

class DerivedClass : BaseClass
{
    public override void Method1()
    {
        base.Method1();
        Debug.Log("Derived - Method1");
    }
    public new void Method2()
    {
        base.Method2();
        Debug.Log("Derived - Method2");
    }
}

public class Playground : MonoBehaviour
{
    // Start is called before the first frame update
    void Start()
    {
        // here, both methods behave similarly
        DerivedClass dc = new DerivedClass();
        dc.Method1();
        dc.Method2();
        // but here, these methods behave differently
        BaseClass bc = new DerivedClass();
        bc.Method1();
        bc.Method2();
    }

    // Update is called once per frame
    void Update()
    {

    }
}
The output is:
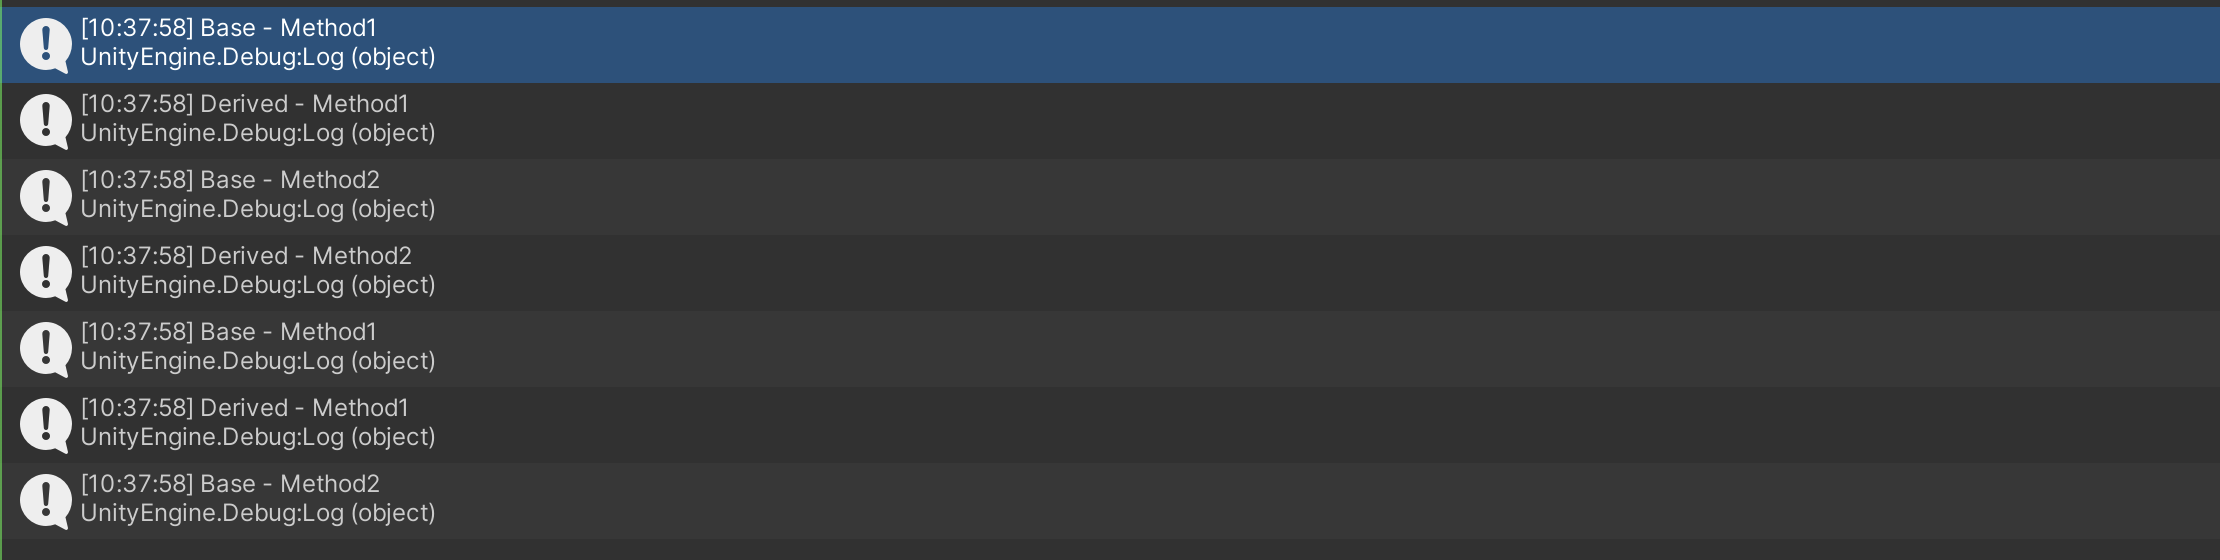
Notice how bc.Method2() does not have any reference to DerivedClass' Method2 due to the new implementation in the derived class.
Implement Powerups
We can now use the BasePowerup class to create MagicMushroom powerup and we want to extend Start() virtual method in MagicMushroomPowerup.
using System.Collections;
using System.Collections.Generic;
using UnityEngine;

public class MagicMushroomPowerup : BasePowerup
{
    // setup this object's type
    // instantiate variables
    protected override void Start()
    {
        base.Start(); // call base class Start()
        this.type = PowerupType.MagicMushroom;
    }

    void OnCollisionEnter2D(Collision2D col)
    {
        if (col.gameObject.CompareTag("Player") && spawned)
        {
            // TODO: do something when colliding with Player

            // then destroy powerup (optional)
            DestroyPowerup();

        }
        else if (col.gameObject.layer == 10) // else if hitting Pipe, flip travel direction
        {
            if (spawned)
            {
                goRight = !goRight;
                rigidBody.AddForce(Vector2.right * 3 * (goRight ? 1 : -1), ForceMode2D.Impulse);

            }
        }
    }

    // interface implementation
    public override void SpawnPowerup()
    {
        spawned = true;
        rigidBody.AddForce(Vector2.right * 3, ForceMode2D.Impulse); // move to the right
    }


    // interface implementation
    public override void ApplyPowerup(MonoBehaviour i)
    {
        // TODO: do something with the object

    }
}
The question box that spawned the Magic Mushroom must be set into some kind of disabled state after the mushroom is spawned. You can create a simple controller for that:
- IPowerupController.cs
- QuestionBoxPowerupController.cs
public interface IPowerupController
{
    void Disable();
}
using System.Collections;
using System.Collections.Generic;
using UnityEngine;

public class QuestionBoxPowerupController : MonoBehaviour, IPowerupController
{
    public Animator powerupAnimator;
    public BasePowerup powerup; // reference to this question box's powerup

    void Start()
    {

    }

    // Update is called once per frame
    void Update()
    {

    }


    private void OnCollisionEnter2D(Collision2D other)
    {
        if (other.gameObject.tag == "Player" && !powerup.hasSpawned)
        {
            // show disabled sprite
            this.GetComponent<Animator>().SetTrigger("spawned");
            // spawn the powerup
            powerupAnimator.SetTrigger("spawned");
        }
    }

    // used by animator
    public void Disable()
    {
        this.GetComponent<Rigidbody2D>().bodyType = RigidbodyType2D.Static;
        transform.localPosition = new Vector3(0, 0, 0);
    }


}
Then create a simple prefab extending the bouncy question box you did in the earlier week. There are many ways to implement this prefab, here's one sample:
While the above implementation seems working at first glance, there exist one particular bug. We will fix this later since we are not equipped for it yet.
Important Notes
Note that methods that are declared on the interface are meant to be public: used by other instances.
SpawnPowerupmight be called by Animators or eventsApplyPowerupmight be called by some PowerupManager or instances that consumes the powerupDestroyPowerupmight be called after some timeout
On the contrary, if you have some methods that are meant to be extended within the powerup only, then these methods should be declared in the BaseClass instead (either as abstract, virtual, or concrete methods).
Refactor your Coin box to implement Powerup and inherit BasePowerup as well so you can have similar functionalities. You can begin by creating BrickPowerupController.cs which implements IPowerupController interface, because how a brick is controlled is eventually different from the question box (brick is breakable by SuperMario). Here's an example where we can dynamically set whether the coin brick is eventually breakable (by SuperMario) or not: