The Singleton Pattern
The lab handout uses Super Mario Bros as assets to demonstrate certain Unity features and functionalities. You are free to follow along and submit it for checkoff, OR you can also create an entirely new project to demonstrate the requested feature(s).
The requirement(s) for the lab checkoff can be found here.
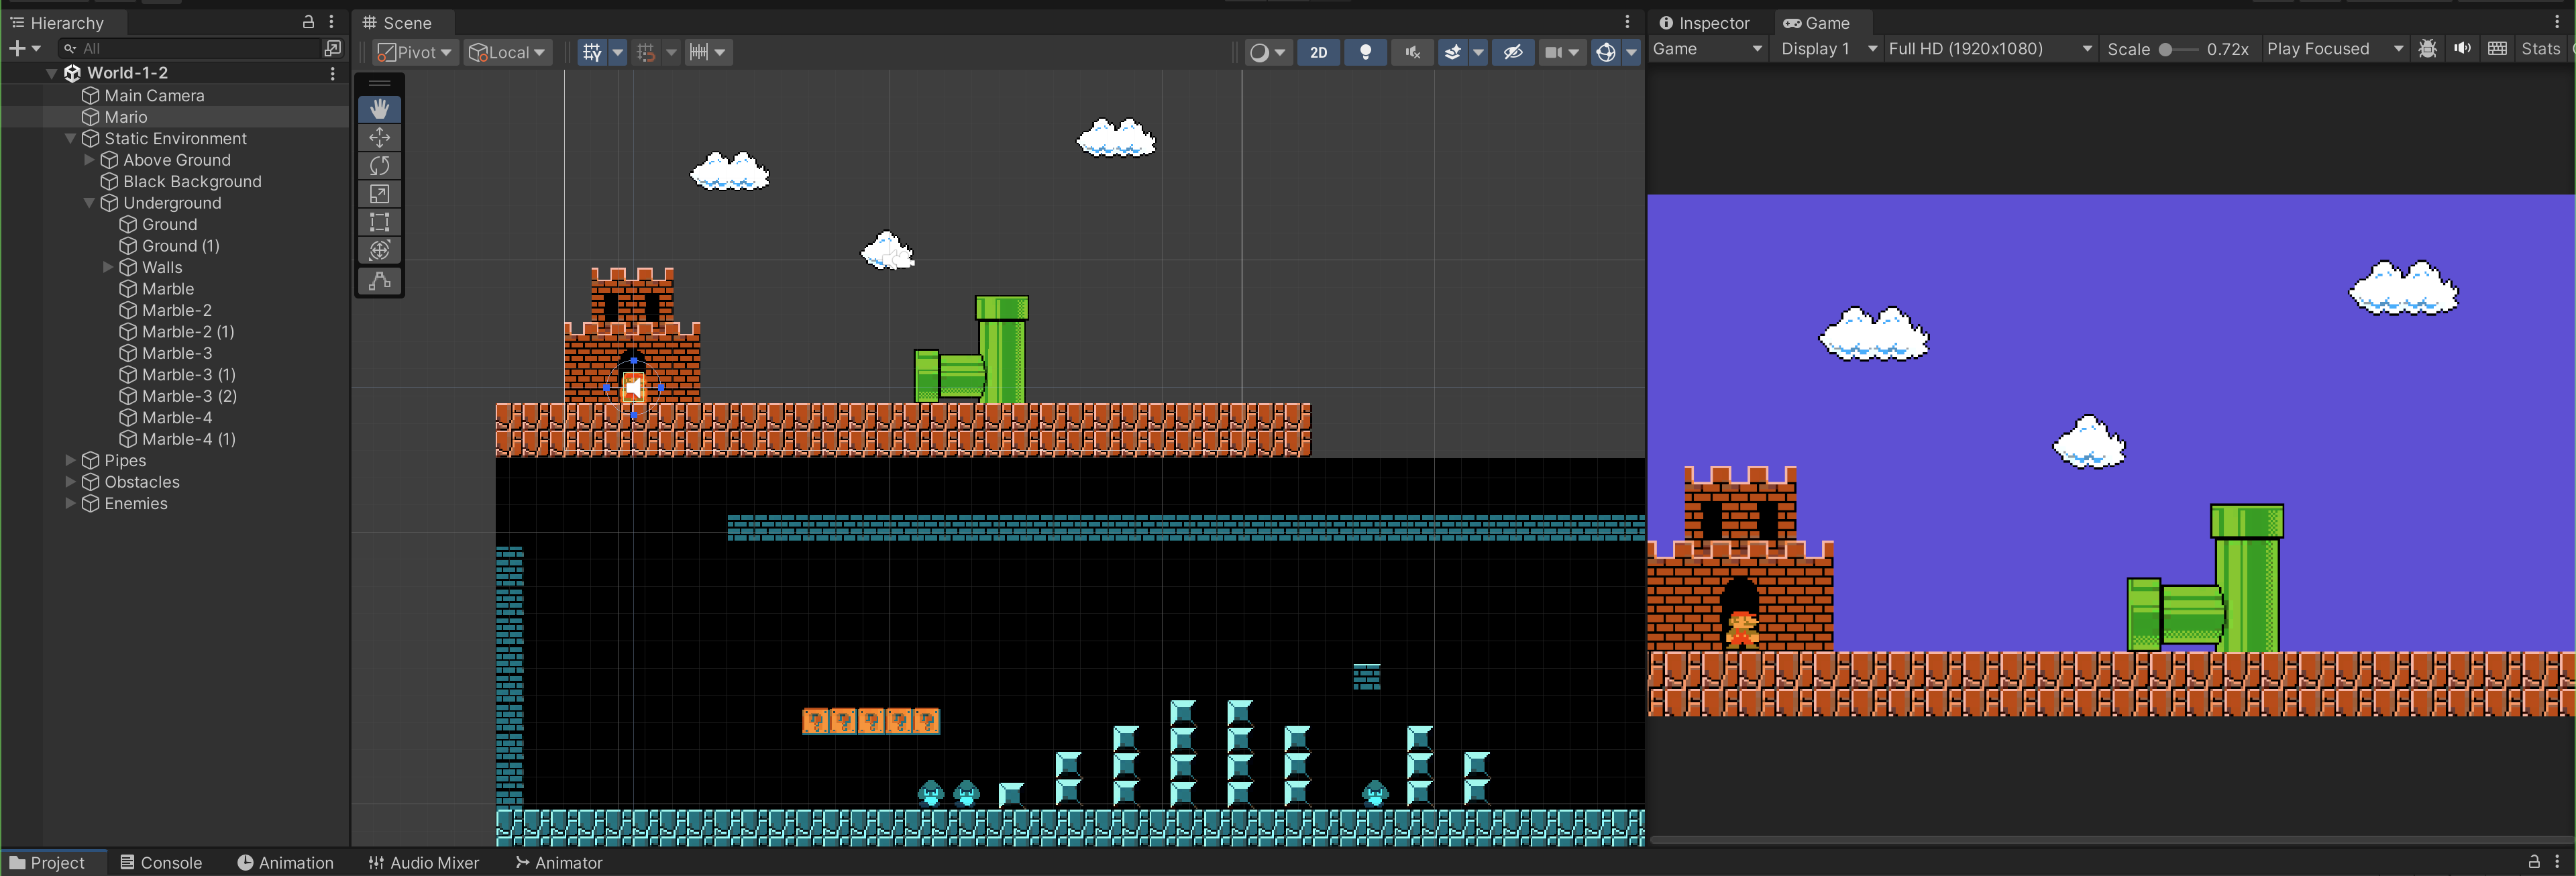
When we switch from one game scene to another, we will destroy all GameObjects (along with its components) in the previous scene. Sometimes we want some GameObjects to persist, or more specifically: its data or state. We can create a script that implement the Singleton pattern so that the GameObject (along with its children) is not destroyed upon loading to a new Scene. Note that this will only apply on root GameObject. Before we begin, create a new scene and name it World 1-2. You don't have to follow exactly how World 1-2 looks, but here's a sample:
To allow Unity to know which Scenes are involved for run test and build, we need to add them to the Build Setting. Go to File >> Build Setting and add Scenes (drag it to this Build Setting window) that are relevant to your game:
The singleton pattern is a way to ensure a class has only a single globally accessible instance available at ALL times. Behaving much like a regular static class but with some advantages. This is very useful for making global manager type classes that hold global variables and functions that many other classes need to access.
In the Awake() function of any script, you can add the following instructions to make it a Singleton:
// Property
private  static  MonoBehaviour _instance;

// Getter
public  static  MonoBehaviour instance
{
	get { return  _instance; }
}

private  void  Awake()
{
	// check if the _instance is not this, means it's been set before, return
	if (_instance  !=  null  &&  _instance  !=  this)
	{
		Destroy(this.gameObject);
		return;
	}

	// otherwise, this is the first time this instance is created
	_instance  =  this;
	// add to preserve this object open scene loading
	DontDestroyOnLoad(this.gameObject); // only works on root gameObjects
}
Note that if this.gameObject is NOT root level GameObject, it will not work. The editor will warn you: DontDestroyOnLoad only work for root GameObjects or components on root GameObjects.
Adding the above static property and Singleton pattern will turn any gameObject to be persistent between screen changing.
C#: Static Variable
The static keyword allows us to gain access to the instance via the Class name, and there will only be one instance that can be linked to this variable Instance at any given time.
C#: Properties
Properties allow access control to a class variable. Writing C# getter and setter properties are very simple, here's a quick example:
//Member variables can be referred to as fields.
private  int _healthPoints;

//healthPoints is a basic property
public  int healthPoints {
	get {
		//Some other code
		// ...
		return _healthPoints;
	}
	set {
		// Some other code, check etc
		// ...
		_healthPoints = value; // value is the amount passed by the setter
	}
}

// usage
Debug.Log(player.healthPoints); // this will call instructions under get{}
player.healthPoints += 20; // this will call instructions under set{}, where value is 20
Optionally, you can have a
privatesetter to disallow other classes from using it.
Singleton Class
If you have several gameObjects to stay persistent, you can implement the above instructions on the relevant scripts, but this will result in many boilerplate code. To avoid this, we can create a dedicated script that can be inherited by any other scripts and turning them into Singletons.
Create a new script called Singleton.cs, and declare the following properties:
using UnityEngine;

public  class Singleton<T> : MonoBehaviour  where  T : MonoBehaviour
{
	private  static  T _instance;
	public  static  T instance
	{
		get
		{
			return  _instance;
		}
	}

	public  virtual  void  Awake ()
	{
		Debug.Log("Singleton Awake called");

		if (_instance  ==  null) {
			_instance  =  this  as T;
			DontDestroyOnLoad (this.gameObject);
		} else {
			Destroy (gameObject);
		}
	}
}
The virtual method allows override by members inheriting this class, and the member can utilise this base Singleton class as such:
using UnityEngine;

public  class Foo : Singleton<Foo>
{
	override  public  void  Awake(){
		base.Awake();
		Debug.Log("awake called");
		// other instructions that needs to be done during Awake
	}
}
GameManager as Singleton
We are now ready to convert our GameManager into a Singleton as follows:
public class GameManager : Singleton<GameManager>
{
    // other instructions
}
This means that the GameManager instance will not be destroyed upon scene change. Feel free to adjust the title of the script to suit your own usage.
Changing Scene
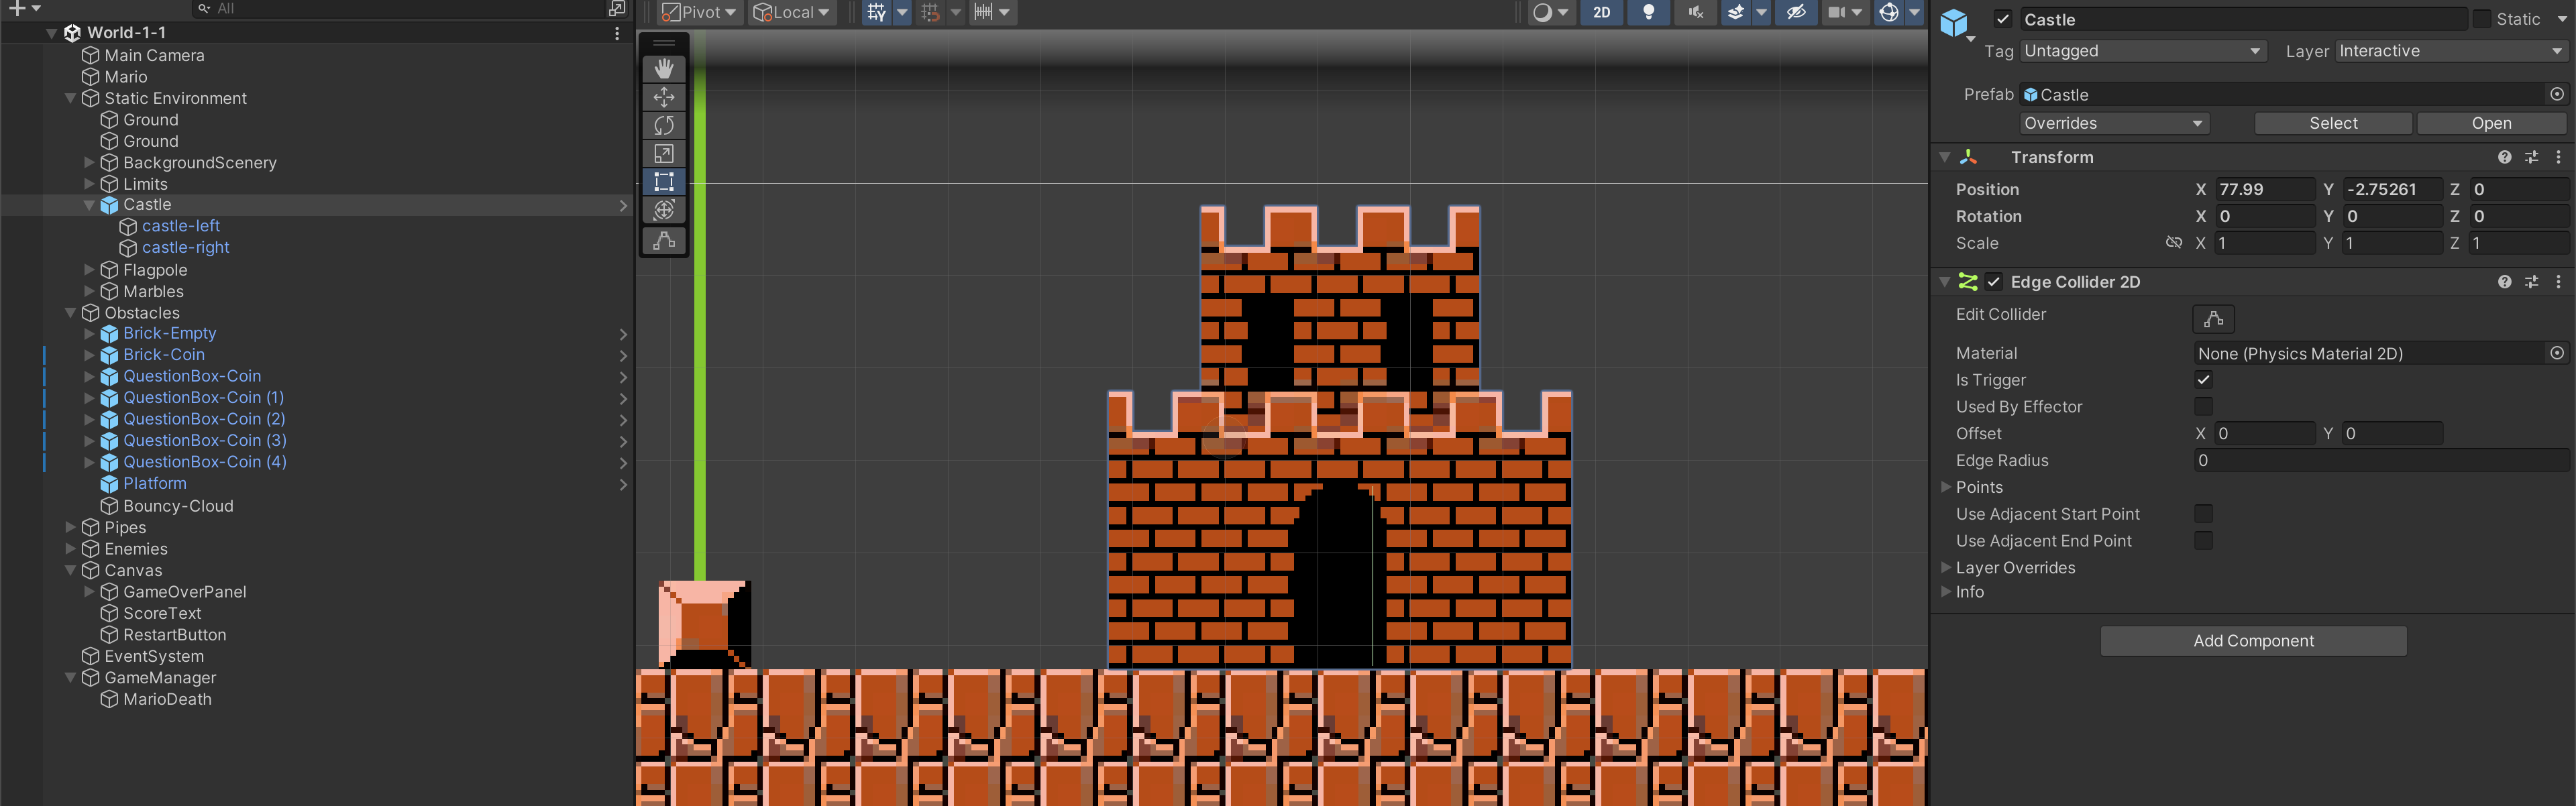
Let's test the Singleton Pattern by changing scene from World-1-1 to World-1-2. Prepare the castle at the end of World-1-1 to contain an edge collider.
- Create and set castle's Layer to
interactive - Set the
IsTriggerproperty of EdgeCollider2D
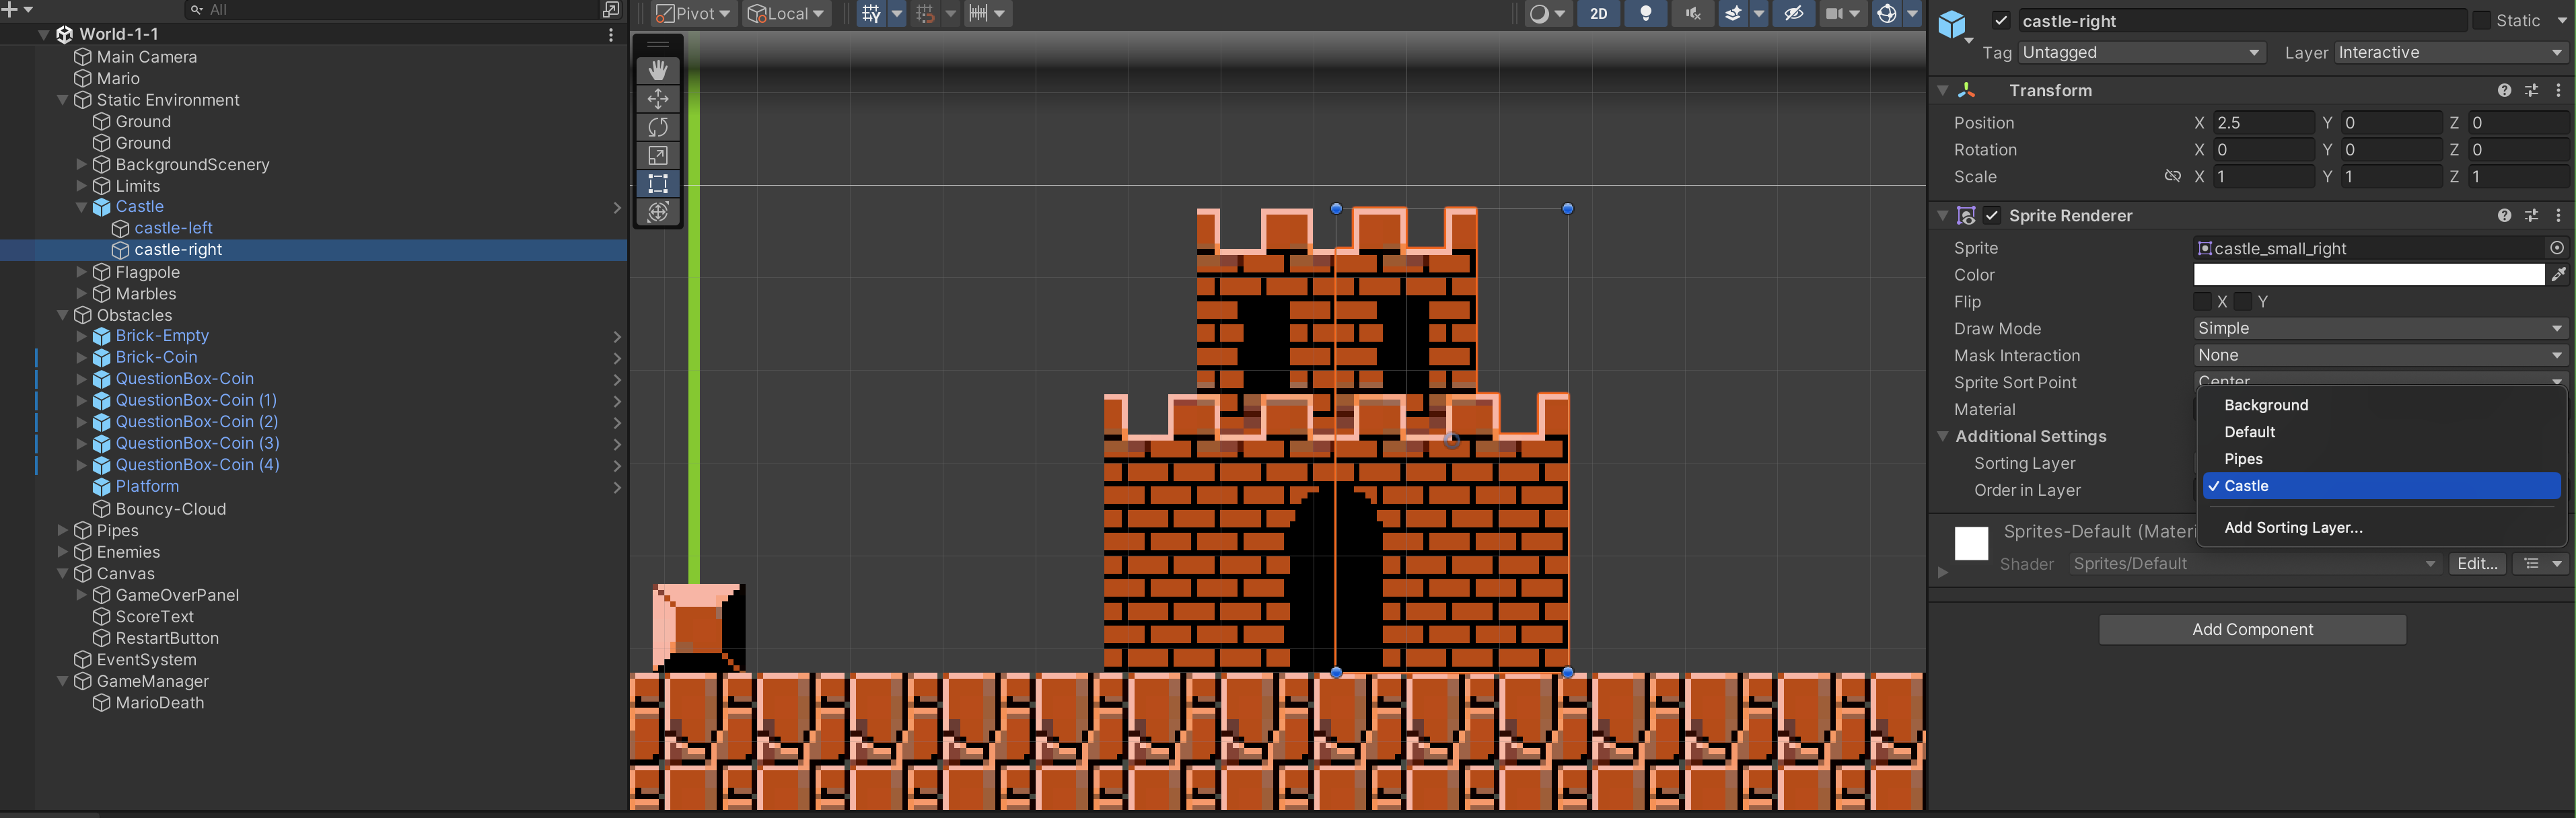
To make Mario appear like he's "entering" the castle, you can set the Sorting Layer of the right side of the castle to be above Mario's sprite (Default):
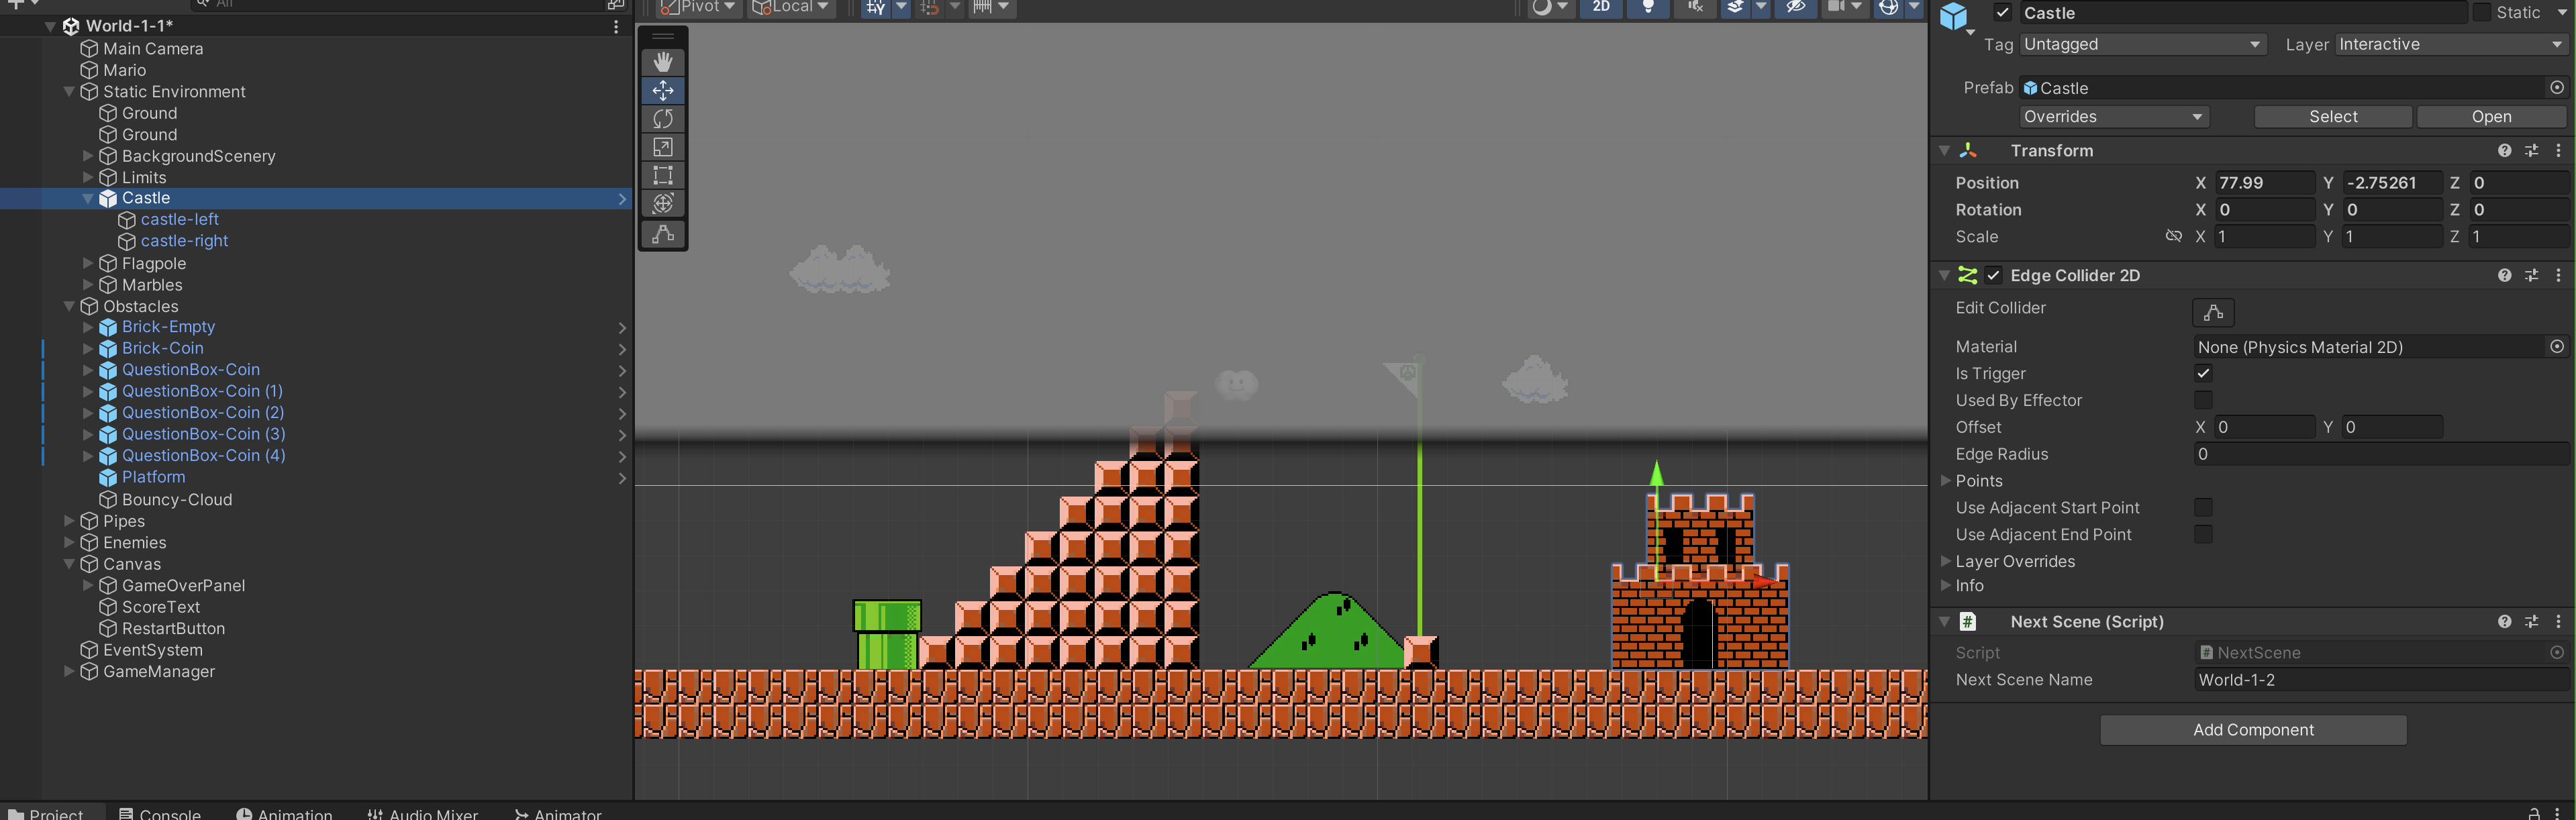
Then create new a script called NextScene.cs and attach it to the Castle. Set nextSceneName as World-1-2 in the inspector (matching exactly the next scene's name).
using System.Collections;
using System.Collections.Generic;
using UnityEngine;
using UnityEngine.SceneManagement;
public class NextScene : MonoBehaviour
{
    public string nextSceneName;
    void OnTriggerEnter2D(Collider2D other)
    {
        if (other.tag == "Player")
        {
            Debug.Log("Change scene!");
            SceneManager.LoadSceneAsync(nextSceneName, LoadSceneMode.Single);
        }
    }
}
We utilise the function LoadSceneAsync from UnityEngine.SceneManagement.SceneManager. Please consult its documentation.
LoadSceneAsync loads the Scene asynchronously in the background. The name of the Scene to load can be case insensitive. There also exist the synchronous counterpart: LoadScene. To avoid pauses or performance hiccups while loading in most cases, you should use LoadSceneAsync.
LoadSceneMode
There are two modes to load a scene: single and additive.
- In single mode, all currently loaded Scene will be closed before loading the new scene. This is suitable when you are moving a player from one region to another.
- In additive mode, we add the scene to currently loaded scene. This is suitable when you want to open fullscreen GUI for players to change gears, skill points, etc.
You should test your project and confirm that Mario can transition between scenes smoothly. Ensure that the castle in World-1-2 does NOT have the NextScene script enabled that caused him to perpetually restart World-1-2.
DontDestroyOnLoad Consequences
We are not out of the woods yet. The GameManager was made to refer to instances in World-1-1 scene as such:
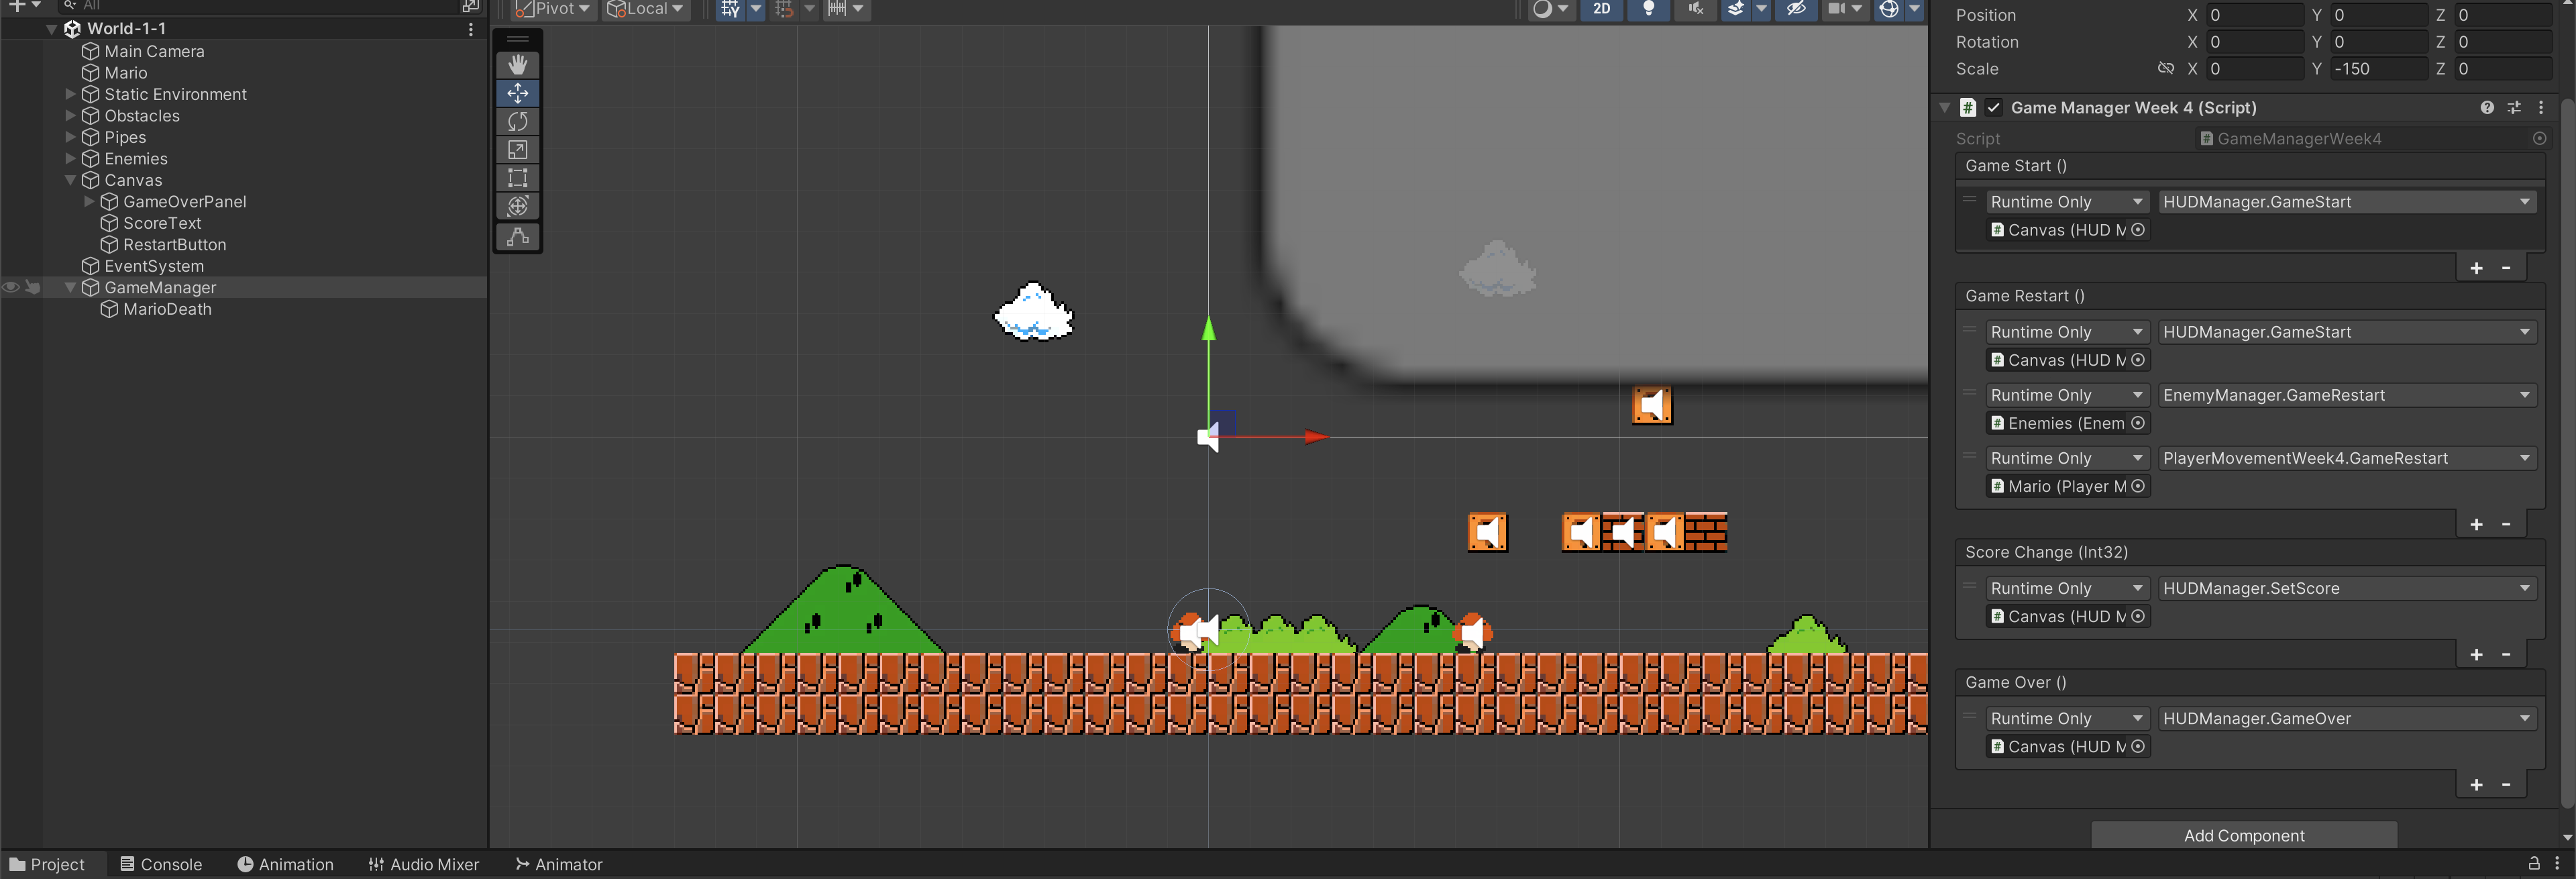
These instances will be destroyed and new one will be created in World-1-2. This caused GameManager to have missing references:
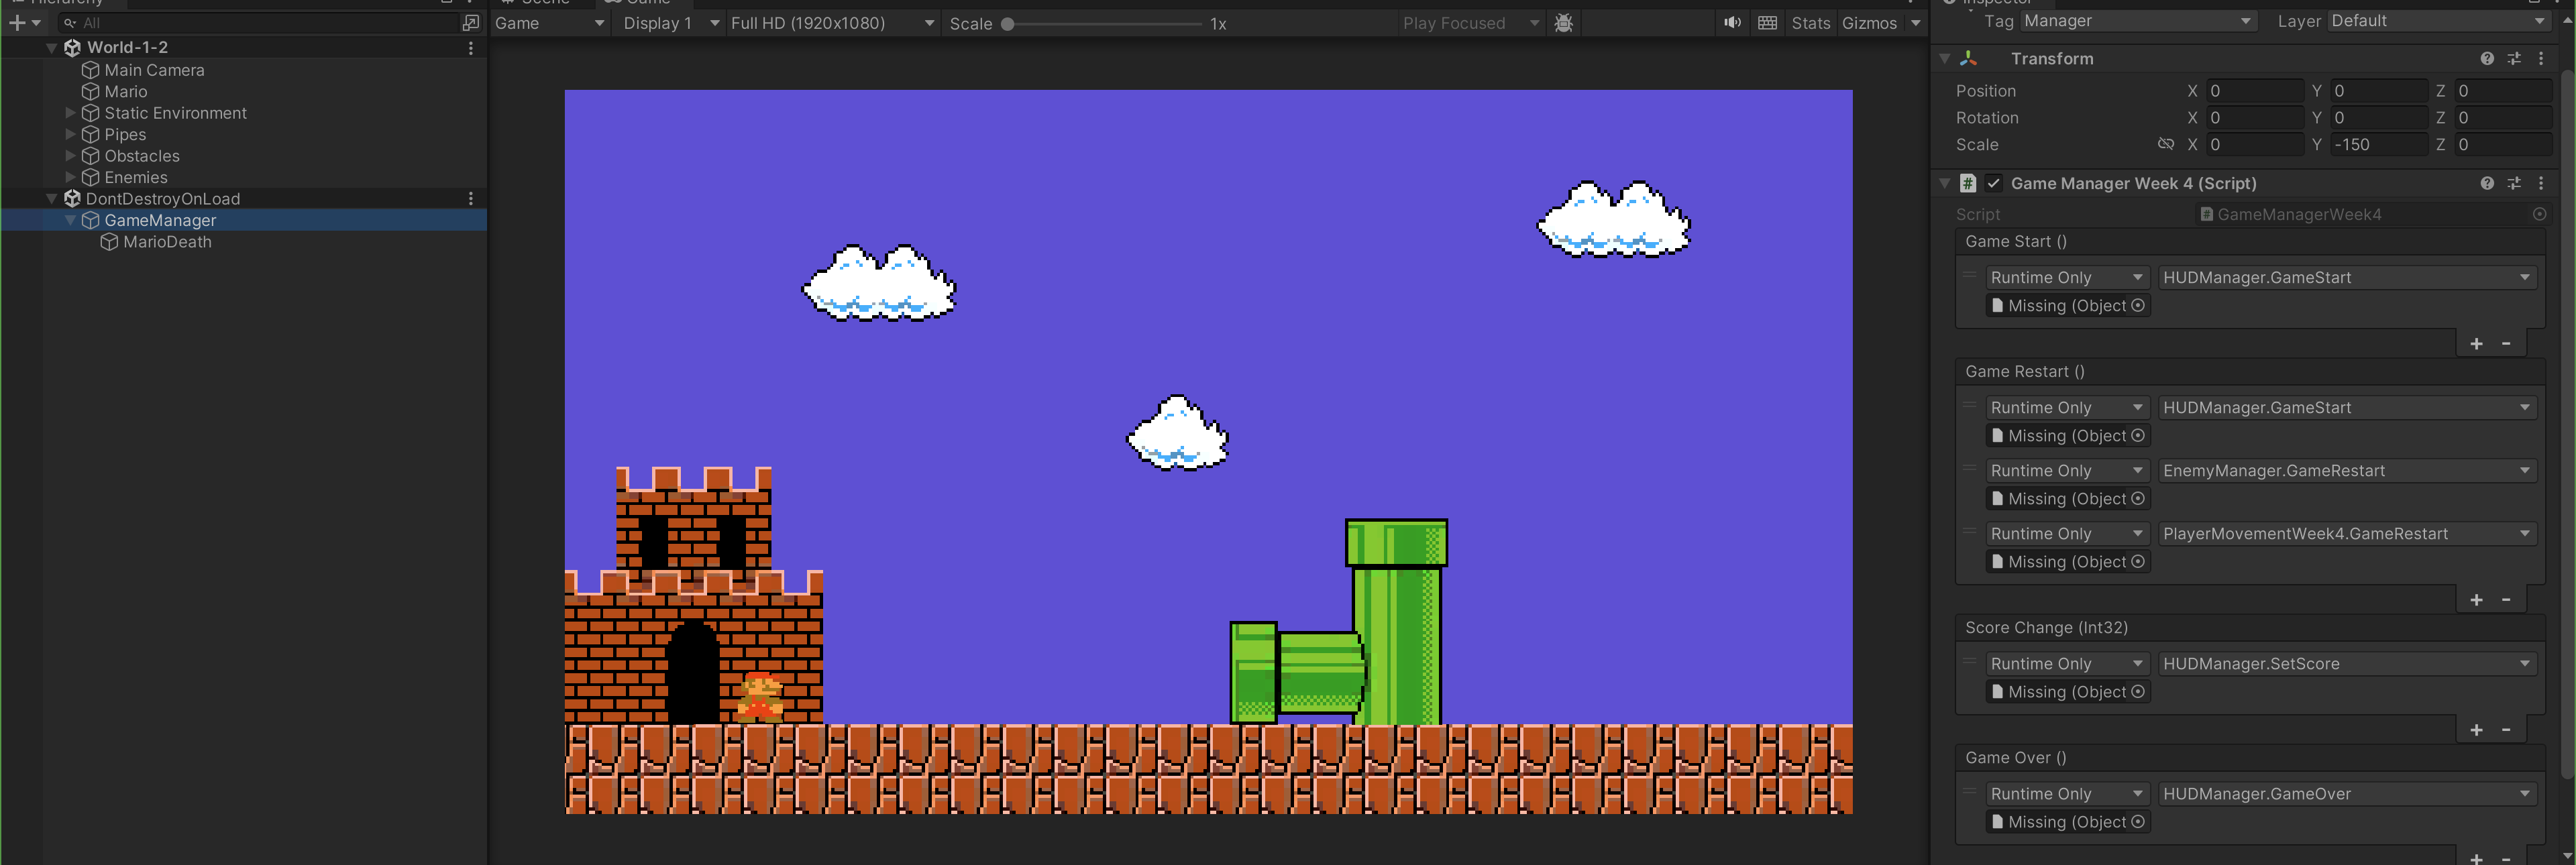
Mario in World-1-1 is not the same as Mario in World-1-2.
As a consequence, we need to turn all root GameObjects that refers to World-1-1 GameManager instance into Singletons as well.
- All scripts on Mario:
PlayerMovement.csandActionManager.csmust inheritSingleton - All scripts on Canvas:
HUDManager.csmust also inheritSingleton
SceneManager.activeSceneChanged
Since Mario persists, we need to transform Mario back to the beginning position in World-1-2. We need to subscribe to the event SceneManager.activeSceneChanged inside PlayerMovement.cs to reset Mario's starting position upon new scene being loaded:
using UnityEngine.SceneManagement;

    void Start()
    {
        // other instructions
        // subscribe to scene manager scene change
        SceneManager.activeSceneChanged += SetStartingPosition;
    }

    public void SetStartingPosition(Scene current, Scene next)
    {
        if (next.name == "World-1-2")
        {
            // change the position accordingly in your World-1-2 case
            this.transform.position = new Vector3(-10.2399998f, -4.3499999f, 0.0f);
        }
    }
If you set any object in World-1-2 to refer to Mario instance there, e.g as such in Camera:
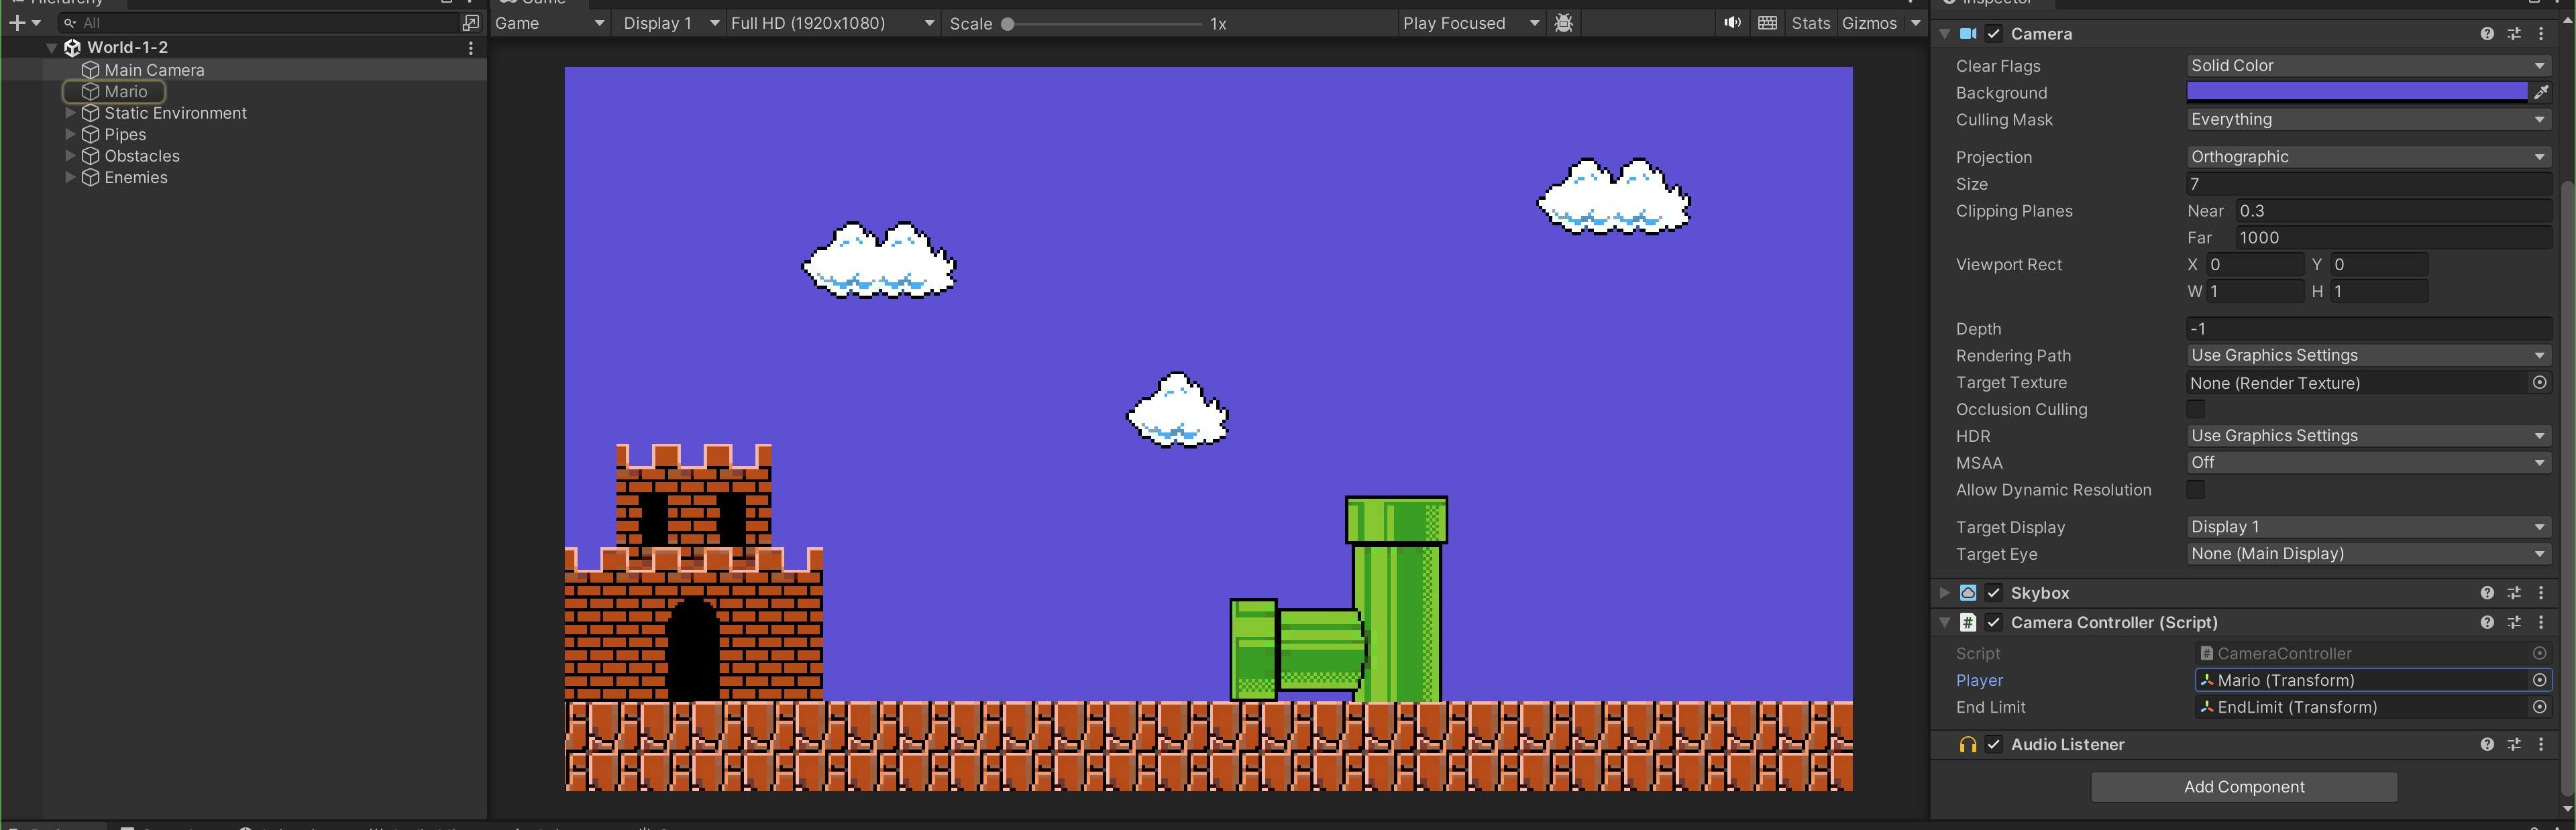
Then, you need to modify CameraController.cs to reassign current Scene's Mario under Start function:
    public Transform player; // Mario's Transform

    void Start()
    {
        // other instructions
        player = GameObject.FindGameObjectWithTag("Player").transform;
    }
In the end, you want to make sure that the HUD persists (the score), and that there's no missing references in World-1-2 scene:
Controversy
The Singleton pattern has been somewhat controversial, although at the end of the day it is up to the developer’s wisdom on whether the pattern should be used. It is prone to abuse, and it is quite difficult to debug, for reasons laid out below.
Testing Difficulty
World-1-2 Scene is made without any GameManager or Canvas (UI) due to the intention that it will be brought over from World-1-1 Scene. However, Mario still exists in case we want to test some basic functionalities:
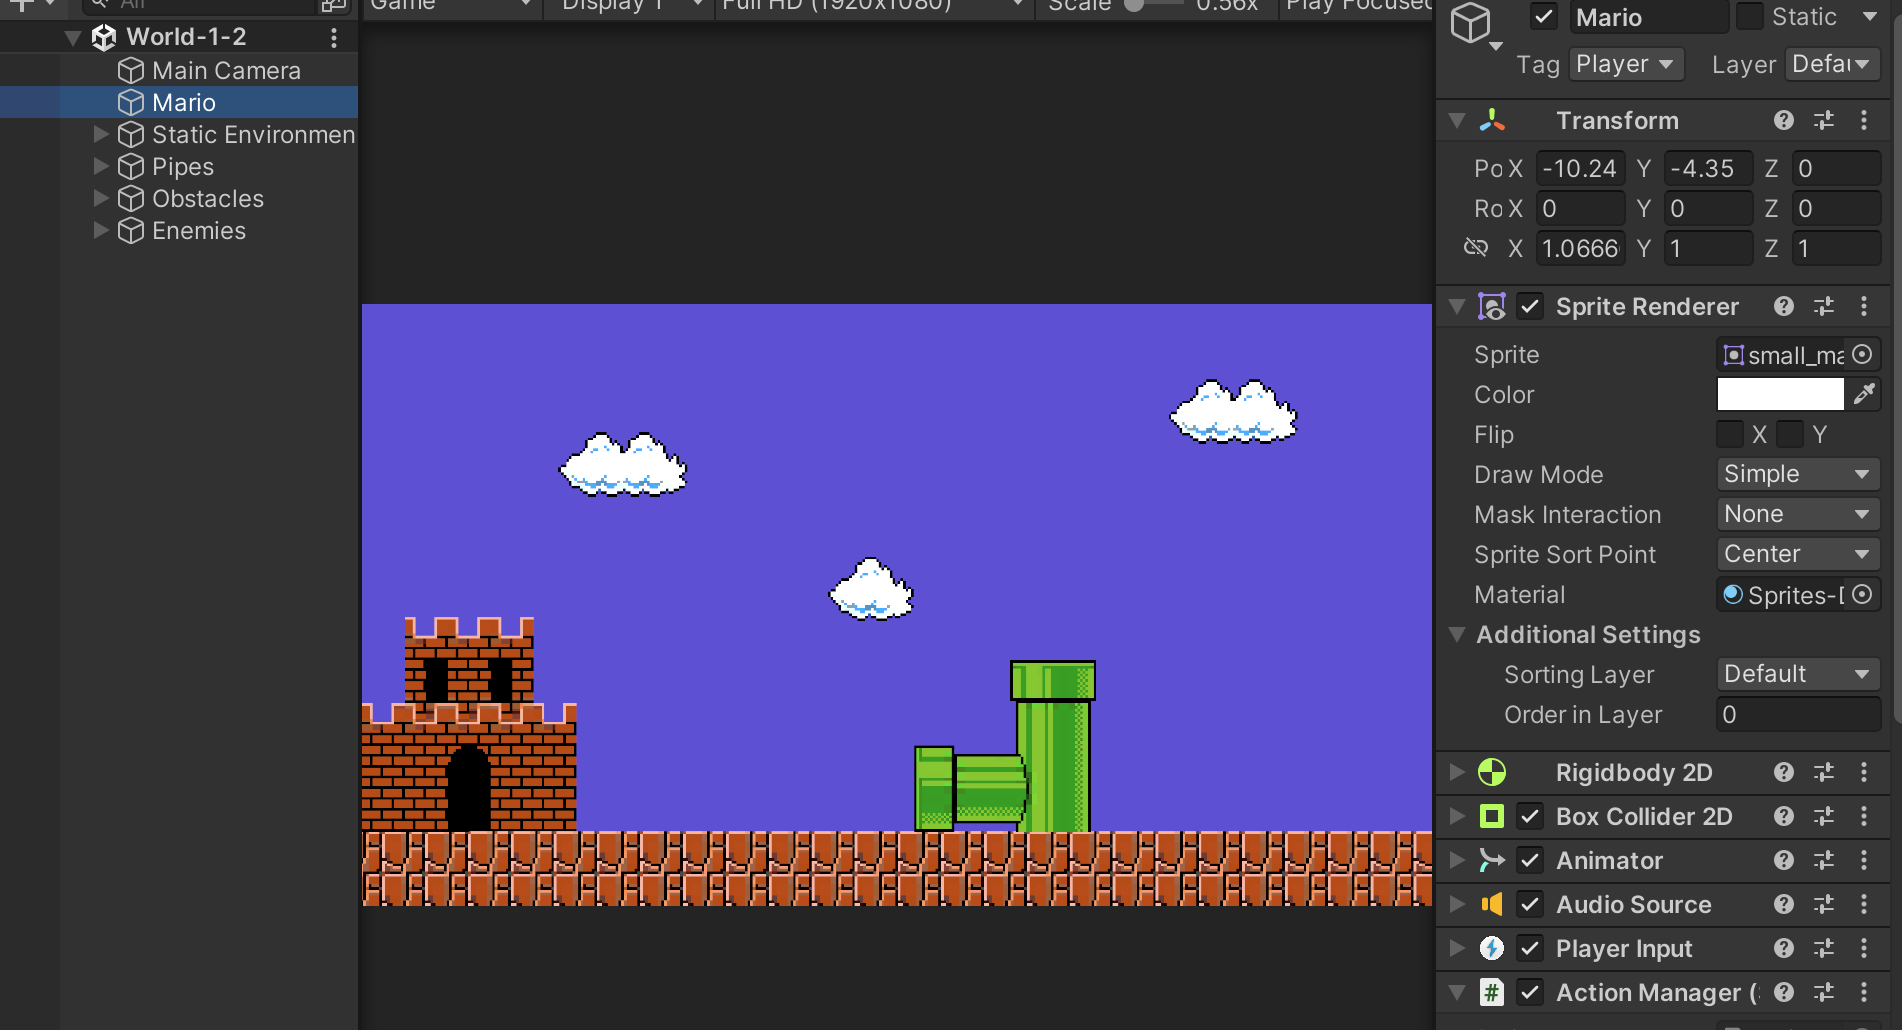
We can still have GameManager and Canvas in World-1-2 for testing purposes, but that will mean double the work. We need to test both cases:
- World-1-2 as standalone scene
- Playing World-1-2 from World-1-1
Nevertheless, testing case 1 does not straightaway imply that case 2 above will be bug free. Each cases must be treated separately. The complexity of testing will grow as we have more and more scenes. To ensure that every scene smoothly transitions to the next, you’d have to start from the first scene, and quickly dash to the end of the first scene to load the second scene to test. It will be quite ridiculous to continue doing this if you have ten separate scenes and more.
Object Reference Bug
We have to be completely certain that any instance referred by the Singleton is not obsolete upon Scene changes. All gameobjects will be destroyed if we load new scene with the option LoadSceneMode.Single (unless we use LoadSceneMode.Additive but that will be pretty weird to just simply keep the objects alive if we aren’t using both scenes in parallel). This is why we need to make both PlayerMovement and HUDManager to be Singletons.
We also need to ensure that any instance in the current scene is referring to the Singleton instance and not the scene instance. This means we can't use the inspector to link up references. For instance, each scene (World-1-1 and World-1-2) has separate instances of Camera that refers to Mario's transform. We need to handle reference to the correct (Singleton) Mario under Start(). It can be done in these two ways:
    // using tag (assuming Mario's tag is "Player")
    player = GameObject.FindGameObjectWithTag("Player").transform;

    // referring to the Singleton directly
    player = PlayerMovementWeek4.instance.gameObject.transform;
The point is that there's no way we can get a reference to World-1-1's singleton Mario in World-1-2 before running the game.
Static Class vs Singletons
Static Class and Singletons are similar at first glance: they can only have one instance available in memory, and both can be used to maintain the global state of an application. They come with some subtle differences depending on your application.
This is an example of a static GameManager class:
using UnityEngine;
using UnityEngine.Events;

public static class StaticGameManager
{
    // usage: StaticGameManager.gameStart.AddListener(<FunctionName>)
    public static UnityEvent gameStart;
    public static UnityEvent gameRestart;
    public static UnityEvent<int> scoreChange;
    public static UnityEvent gameOver;
    public static UnityEvent damageMario;

    public static IntVariable gameScore;

    // usage: StaticGameManager.GameRestart()
    public static void GameRestart()
    {
        // reset score
        gameScore.Value = 0;
        SetScore(gameScore.Value);
        gameRestart.Invoke();
        Time.timeScale = 1.0f;
    }

    public static void IncreaseScore(int increment)
    {
        gameScore.ApplyChange(increment);
        SetScore(gameScore.Value);
    }

    // invoke the scorechange events
    public static void SetScore(int score)
    {
        scoreChange.Invoke(score);
    }

    public static void GameOver()
    {
        Time.timeScale = 0.0f;
    }

}
In a static classes, all members must be static. Static classes provide a way to create and use class and method members without creating an instance of the class. This can be useful when you need to create a utility class with methods that don’t require any state or instance related information. Notice that we do not have instructions like this.GetComponent<something>() in the script above.
Extension
- A Singleton class supports interface implementation, while static classes cannot implement interfaces.
- A Singleton class supports inheritance, while a Static class is a sealed class, and therefore cannot be inherited.
- A Singleton class can inherit from other classes, while a Static class cannot (not even from other static classes).
Resource Management
- A Singleton class can be instantiated using the
newkeyword, while static can not be instantiated (static class can be used directly). - Both Singleton and static are stored on the Heap memory, but static classes are stored in a special area of the Heap Memory called the High-Frequency Heap (Objects in High Frequency Heap are not garbage collected by GC, and hence static members are available throughout the application lifetime).
- A Singleton class can Dispose (release unmanaged resources held by an object explicitly), while a static class can't. Static classes in C# are designed to be stateless and do not have instances that can be disposed of in the same way that regular (non-static) classes do.
- A Static Class is often used for utility functions or as containers for constants, and they don't have a typical object lifecycle like regular instance classes or instance-specific state.
Performance
- A Static class has better performance since static methods are bonded on compile time.
- A Singleton class can be lazy loaded when needed, while static classes are always loaded. Static classes are loaded automatically by the .NET Framework common language runtime (CLR) when the program or namespace containing the class is loaded.
General Usage
- A Singleton class can have a constructor, while a static class can only have a private static parameterless constructor and cannot have instance constructors.
- A Singleton class can be destroyed (for specific purpose like reset or restart) while Static Classes cannot.
Hence, it should be pretty straightforward for you to decide: if a class has no real need to use the Unity API (heavy dependence or computation on the attached object), make it static. If you'd like to dive deeper in making your choices, give this, this, and this articles a read on top of your own research. Good luck!