In this lab, you are tasked to investigate a program with TOCTOU (Time of Check - Time of Use) race-condition vulnerability.
The lab is written entirely in C, and it is more of an investigative lab with fewer coding components as opposed to our previous lab. At the end of this lab, you should be able to:
- Understand what is a TOUTOU bug and why is it prone to attacks
- Detect race-condition caused by the TOCTOU bug
- Provide a fix to this TOCTOU vulnerability
- Examine file permissions and modify them
- Understand the concept of privileged programs: user level vs root level
- Compile programs and make documents with different privilege level
- Understand how sudo works
- Understand the difference between symbolic and hard links
Background
Race Condition
A race condition occurs when two or more threads (or processes) access and perform non-atomic operations on a shared variable (be it across threads or processes) value at the same time. Since we cannot control the order of execution, we can say that the threads / processes race to modify the value of the shared variable.
The final value of the shared variable therefore can be non deterministic, depending on the particular order in which the access takes place. In other words, the cause of race condition is due to the fact that the function performed on the shared variable is non-atomic.
In this lab we are going to exploit a program that is vulnerable to race-condition.
- The program alone is single-threaded, so in the absence of an attacker, there’s nothing wrong with the program.
- The program however is vulnerable because an attacker can exploit the fact that the program can be subjected to race-condition.
You will learn about race condition properly in future lectures. This lab is just a preview.
Setup
Installation
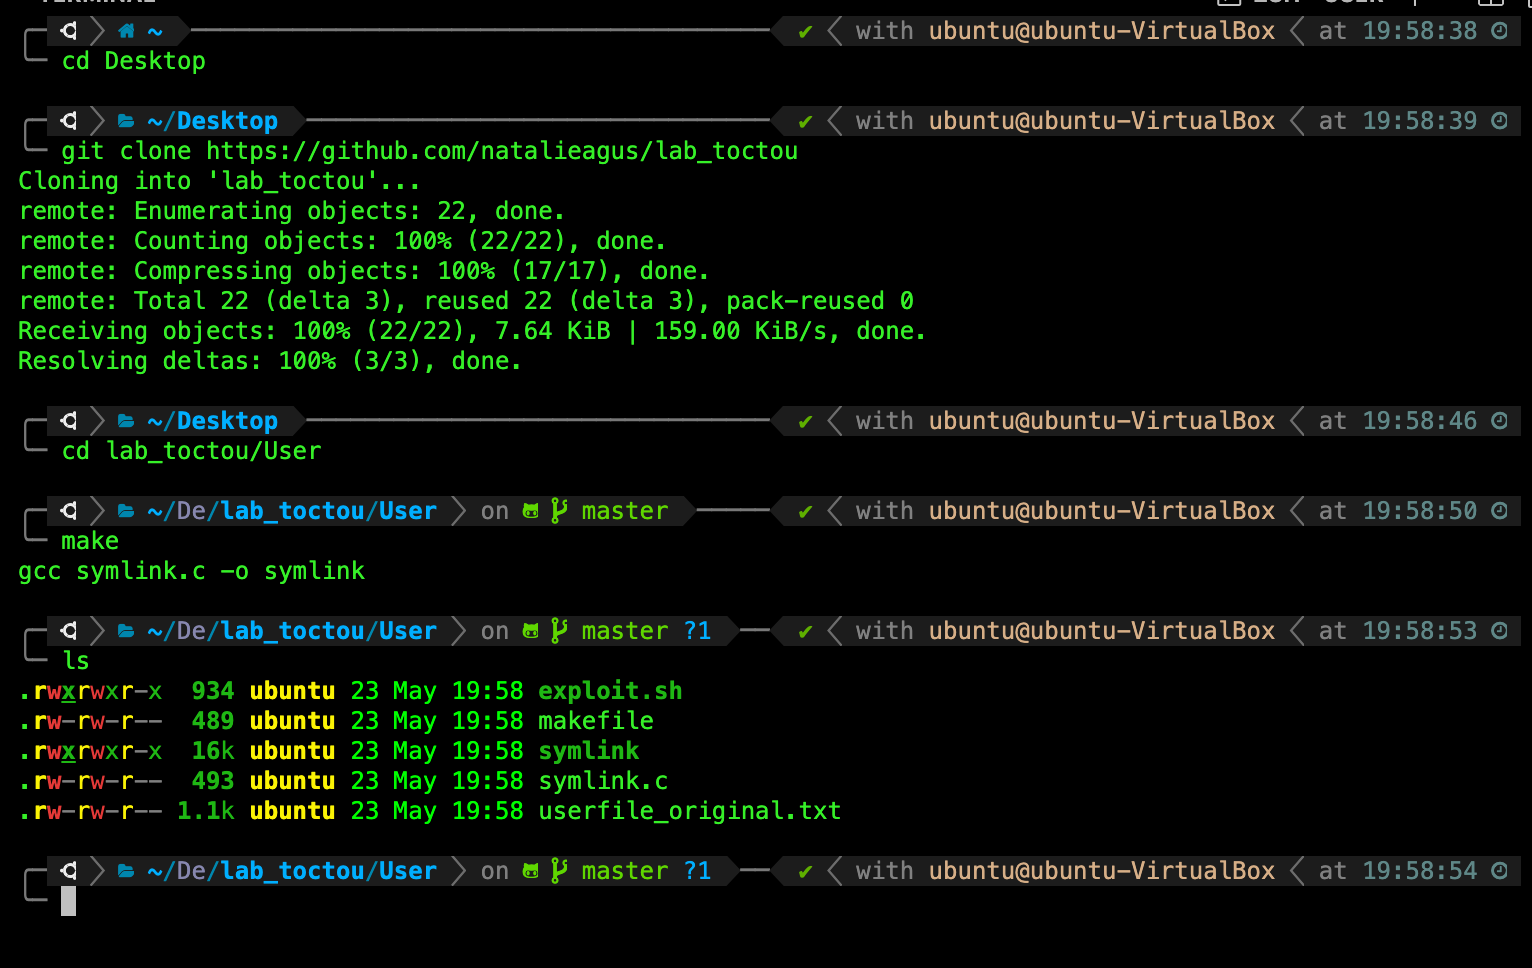
Download the files for this lab using the command:
git clone https://github.com/natalieagus/lab_toctou
You should find that the following files are given to you:
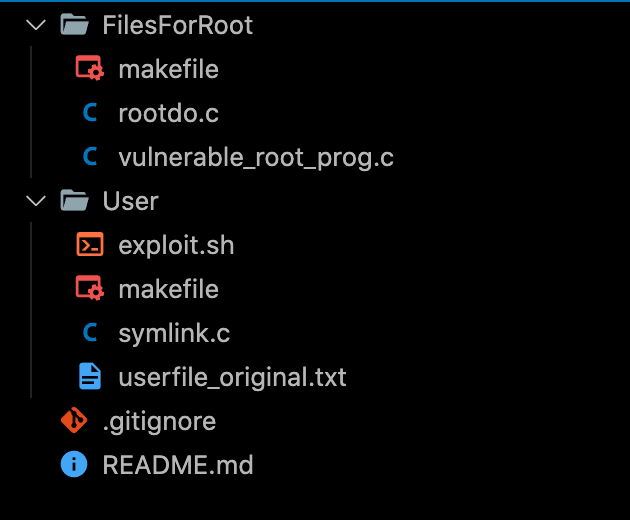
Now go to the User/ directory and call make. You should find these files in the end.
Do NOT used a shared drive with your Host machine, or a shared external drive with other OS. You will NOT be able to create root files in this case. Clone the above file in /home/
Login as Root User
Task 1
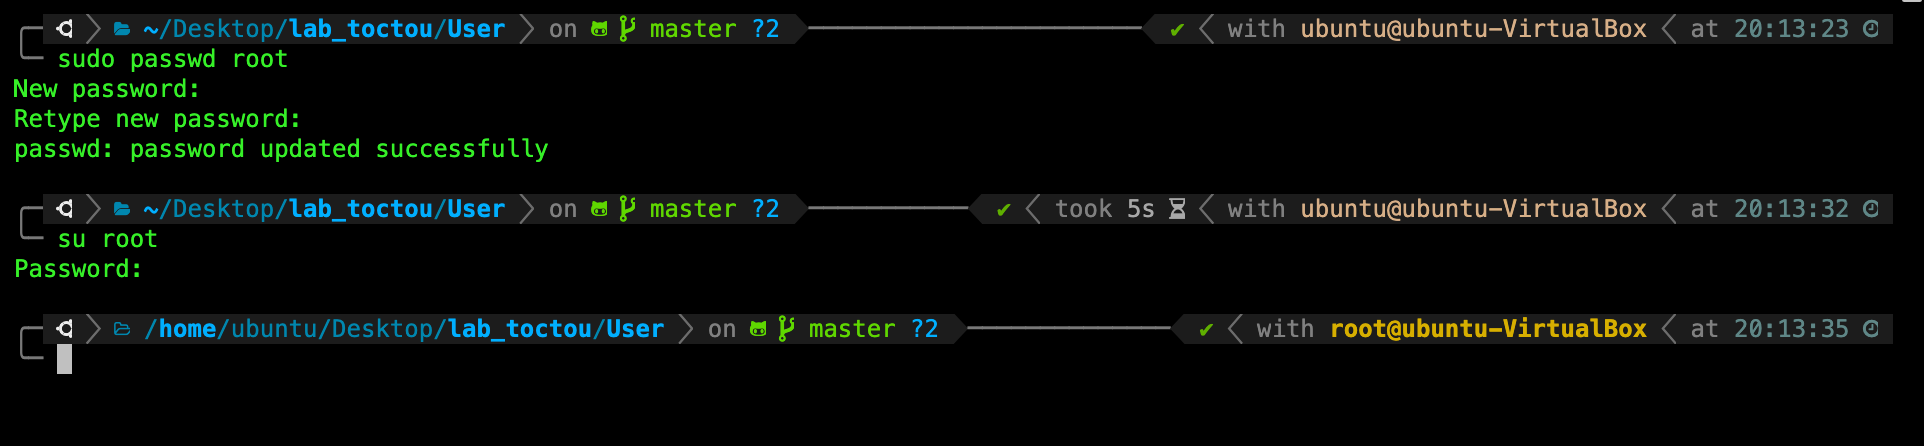
TASK 1: To switch user and login as root, you must first set the password for the root account:
sudo passwd root
You will be prompted for your current user password, then set a new password for root.
Remember this root password! You need this later to switch to root user. If you have a brainblock, use a simple phrase like: rotiprata.
Follow the instructions, and then switch to the root user using the command and the password you just created above for root:
su root
You will see the following new prompt, indicating now you’re logged in as root:
Root user is the user with the highest (administrative) privilege. It has nothing to do with Kernel Mode. Processes spawned while logged in as Root still runs on User Mode.
Task 2
TASK 2: Create files while logged in as root.
Now while logged in as root, navigate to /FilesForRoot, and type make. You should see a new directory called Root/ created with the following contents:
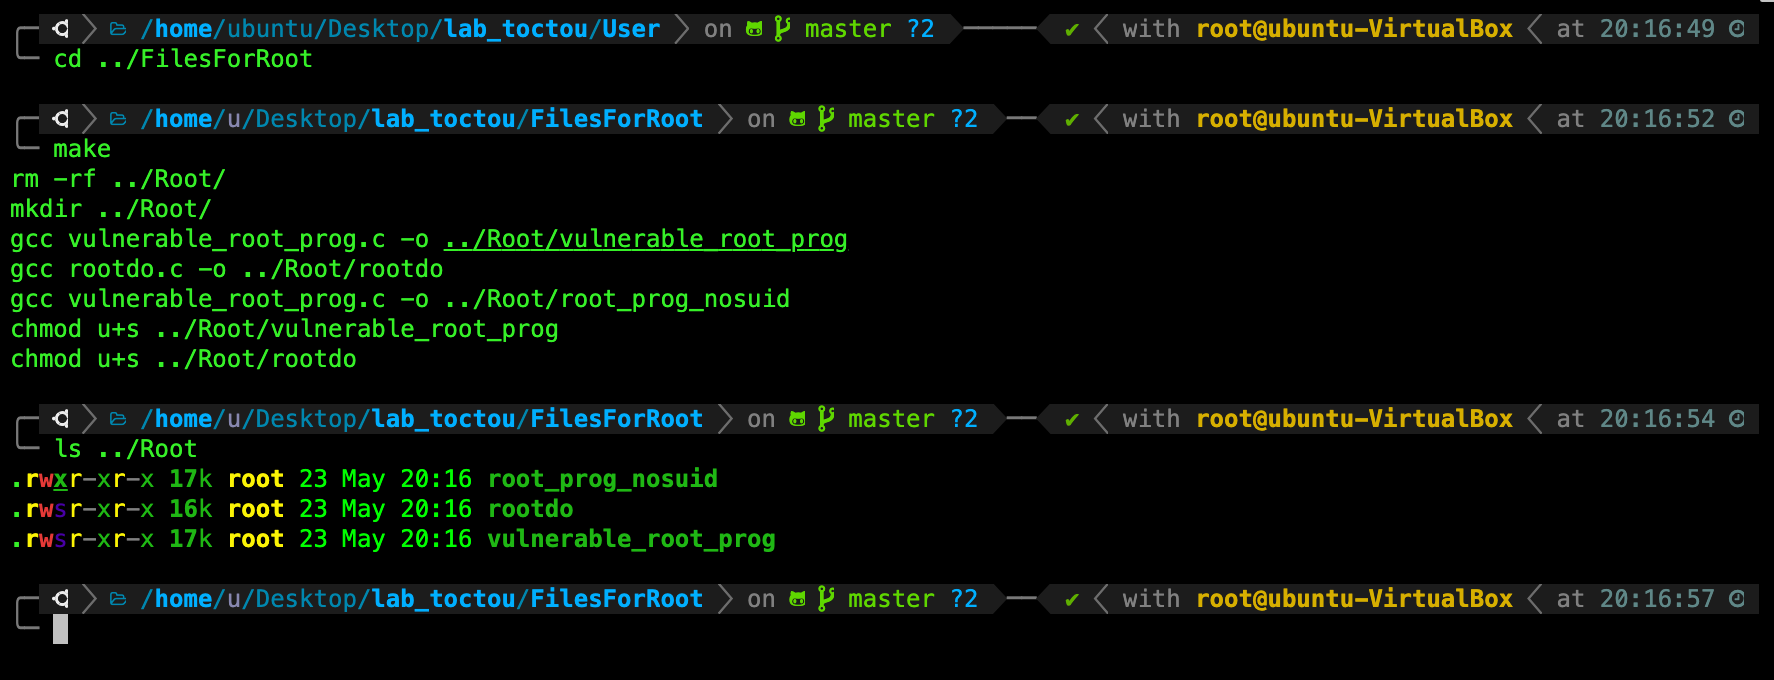
It is important to check that the newly created files belong to the user root as shown in yellow above (beside the date is the owner of the file).
adduser
Task 3
TASK 3: Create 2-3 other users.
In order to proceed with this lab, you need to login as root and create a few new users before proceeding.
For the first user, do the following (the username must be test-user-0):
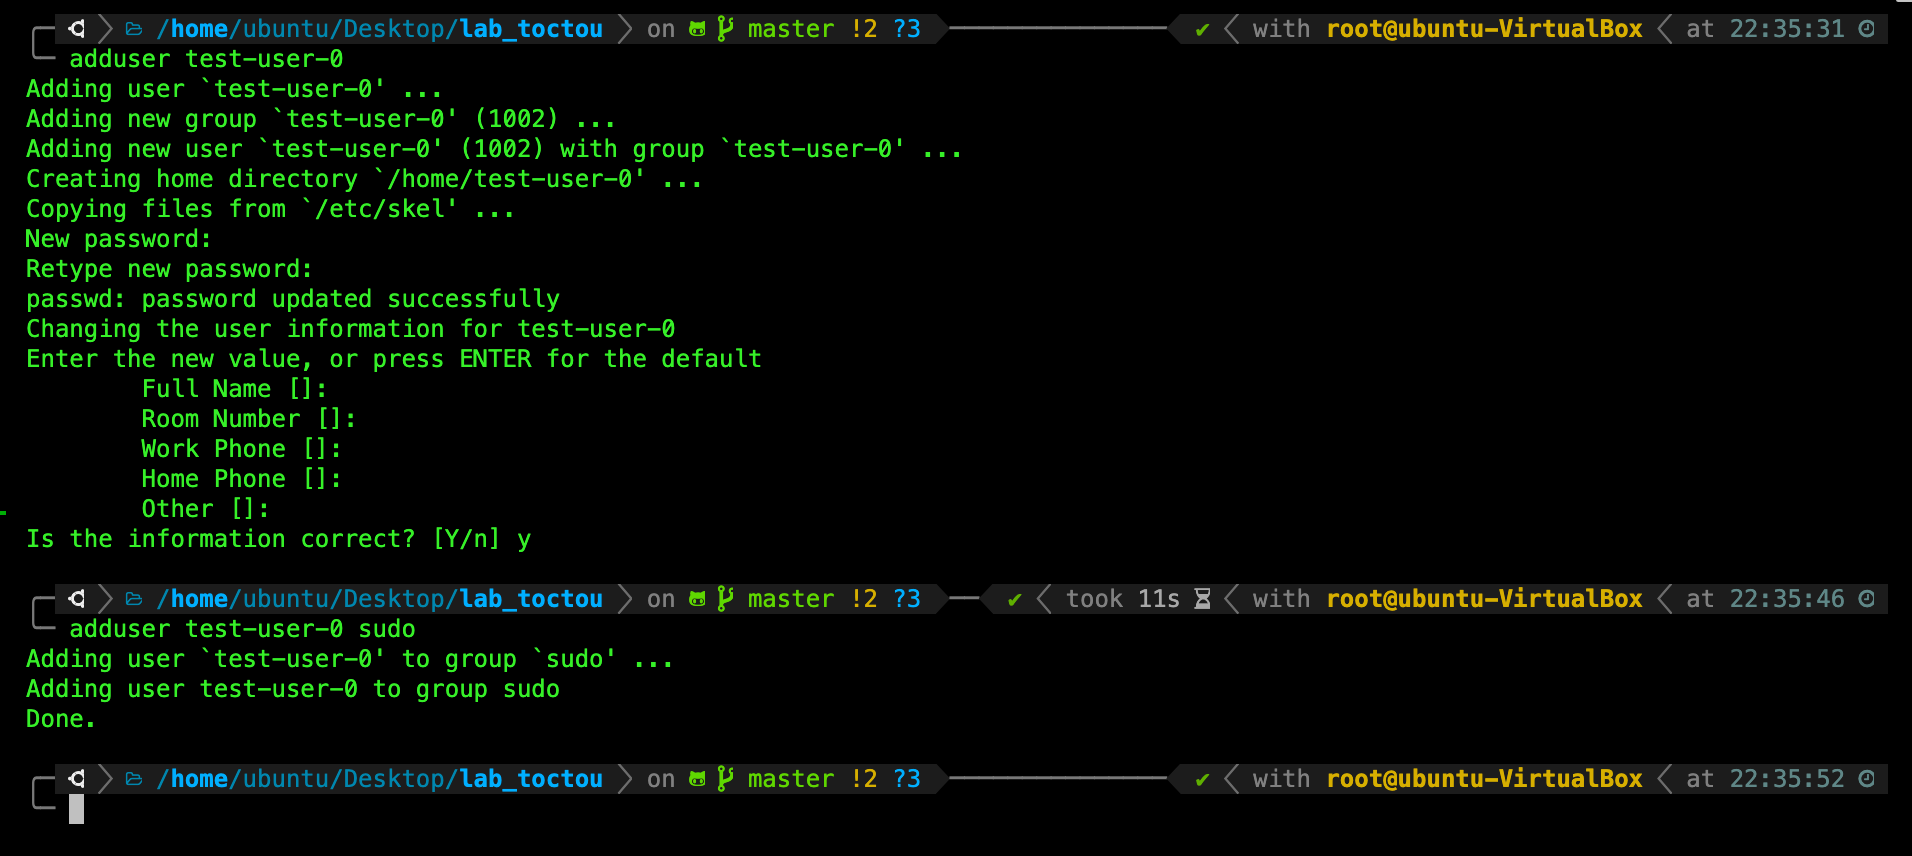
adduser test-user-0
Give it any password you like (preferably a good one, like LDcwzDJKr), and then add it to the sudo group:
adduser test-user-0 sudo
Then add a few more with different names: e.g test-user-0, test-user-1, with any appropriate password of your choice.
su
Task 4
TASK 4: Switch account as any of these new users to ensure that you’ve created new users successfully.
You can switch to your new user by using the command su <username>:
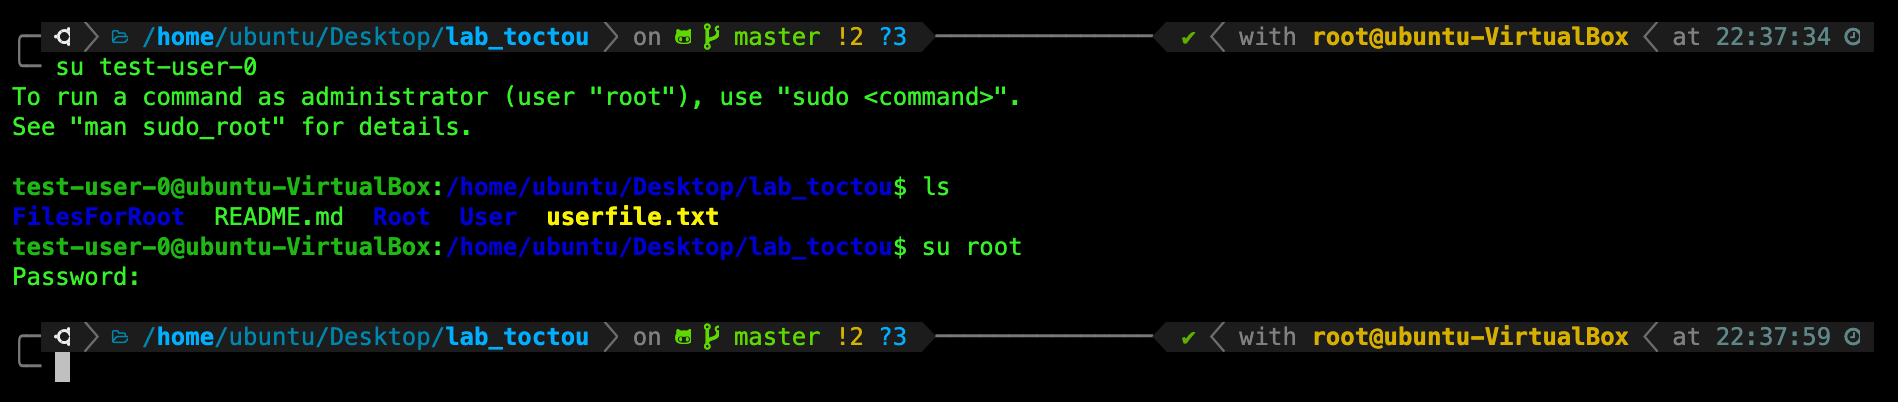
Once you’re done, switch back to root again using your root password you’ve set above.
Task 5
TASK 5: Check /etc/shadow.
Once you’re done, you should enter the command cat /etc/shadow and see that your newly created users are at the bottom of the file, with some hash values (actual values are different depending on the password you set for these users).

Task 6
TASK 6: Return to your original user account.
You can switch back to your original normal user account by using the same su <username> command:

Now go up one level by typing cd .. and attempt to delete Root/ directory while logged in as your original username. You will find such permission denied message:
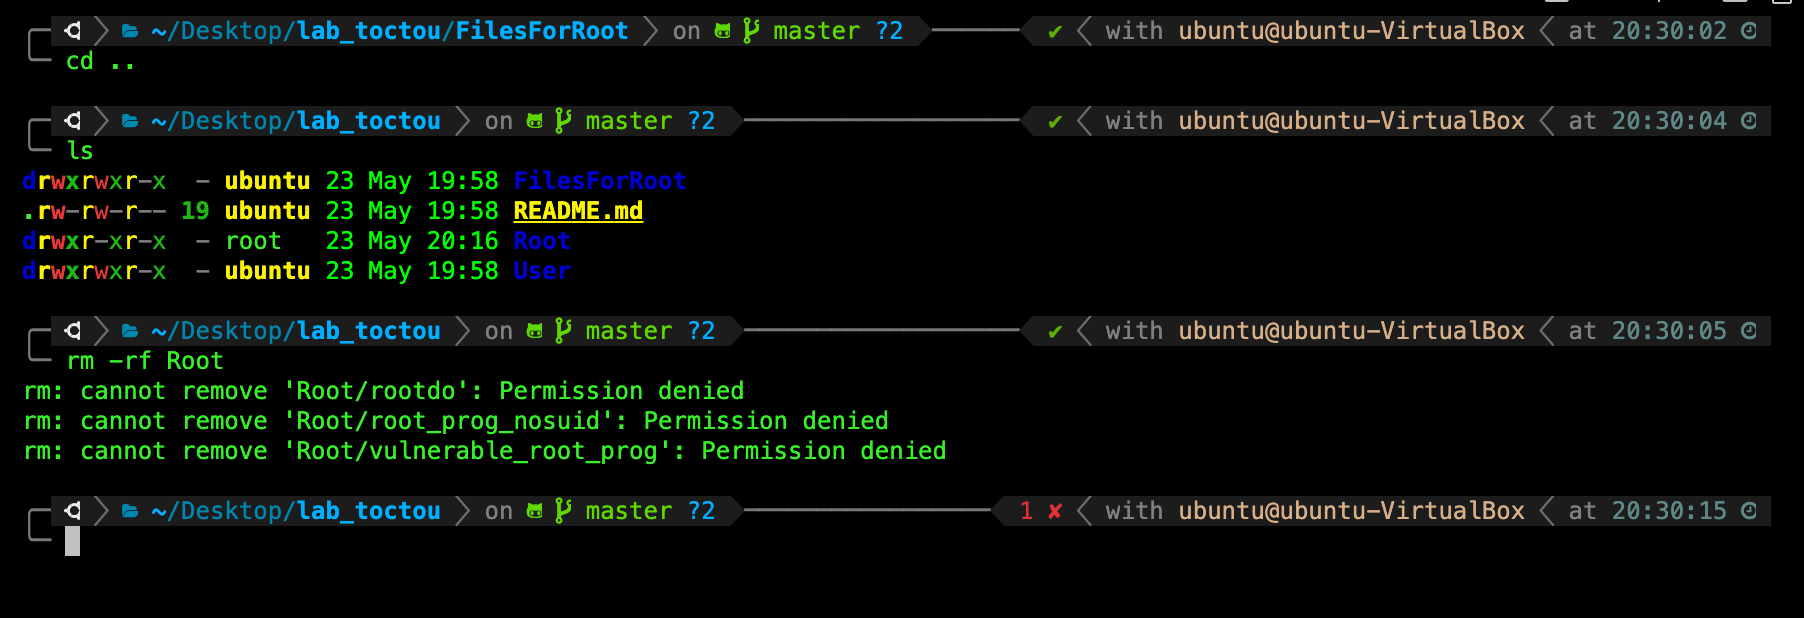
What happened?
File Permission
The reason you faced the permission denied error is because your username doesn’t have the correct permission to edit the Root/ directory.
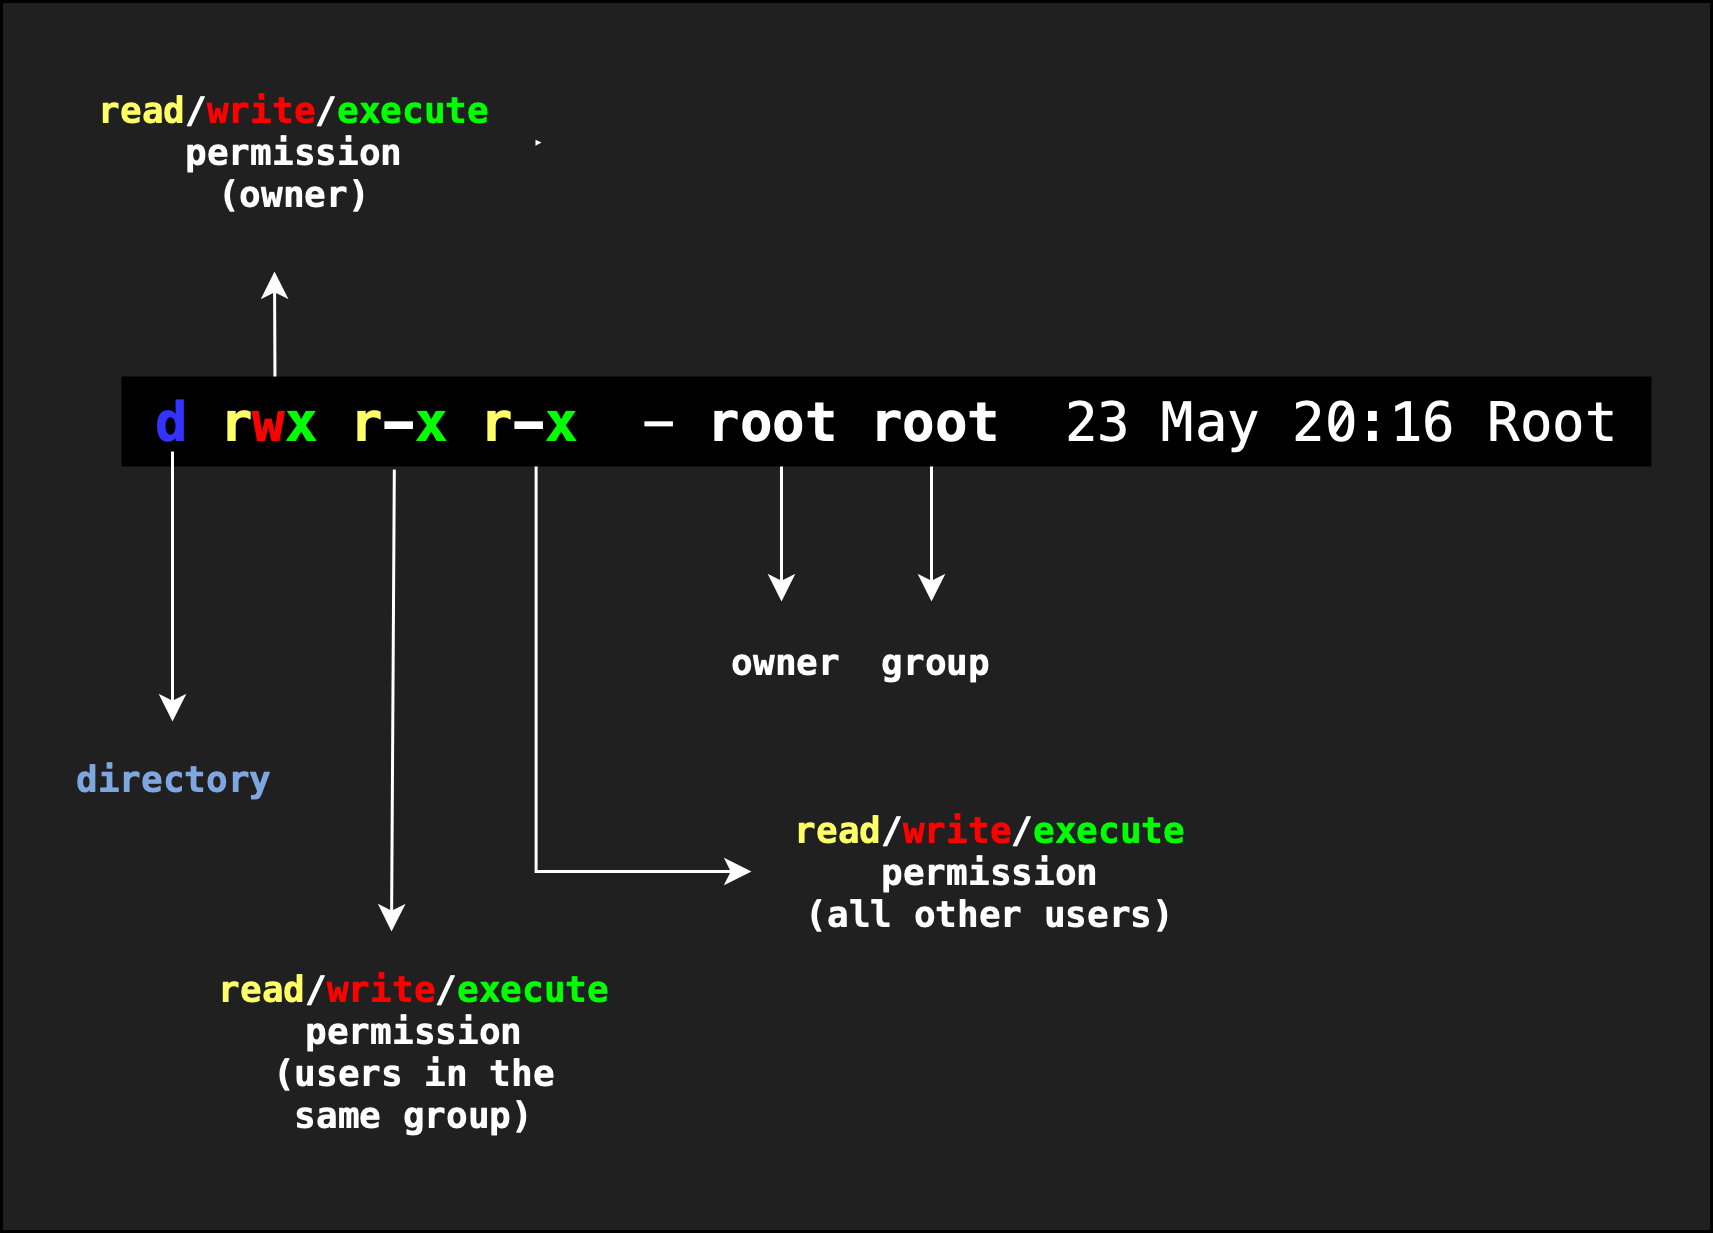
Notice that a directory is an executable, indicated by the ‘x’ symbol.
The SUID bit
SUID stand for Set Owner User ID. A file with SUID set always executes as the user who owns the file, regardless of the user passing the command.
List the file permission for all files inside Root/ directory:

Notice that instead of an x, we have an s type of permission listed on the two progs: vulnerable_root_prog and rootdo.
This is called the SUID bit.
The SUID bit allows normal user to gain elevated privilege (again this does NOT mean Kernel Mode, just privilege levels among regular users) when executing this program.
- If a normal user executes this program, this program runs in root privileges (basically, the creator of the program)
Task 7
TASK 7: Reading protected file using regular user account.
While logged in as your original user account, try to read the file /etc/shadow:
cat /etc/shadow
You will be met with permission denied because this file can only be read by root user, and other users in the same group, as shown in the file details below;

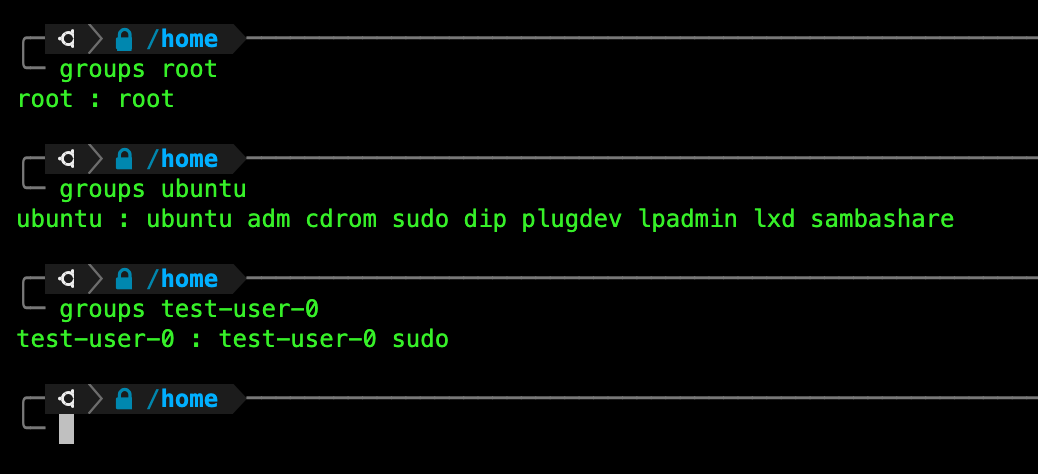
What group does root belong to? What about the user account in question (ubuntu in example above)? You can find out using the command groups:
Task 8
TASK 8: Gain privilege elevation.
Now, run the following command. We assume that your current working directory is at /lab_toctou directory. If not, please adjust accordingly.
./Root/rootdo cat /etc/shadow
When prompted, type the word password, and then press enter.
You will find that you can now read this file:
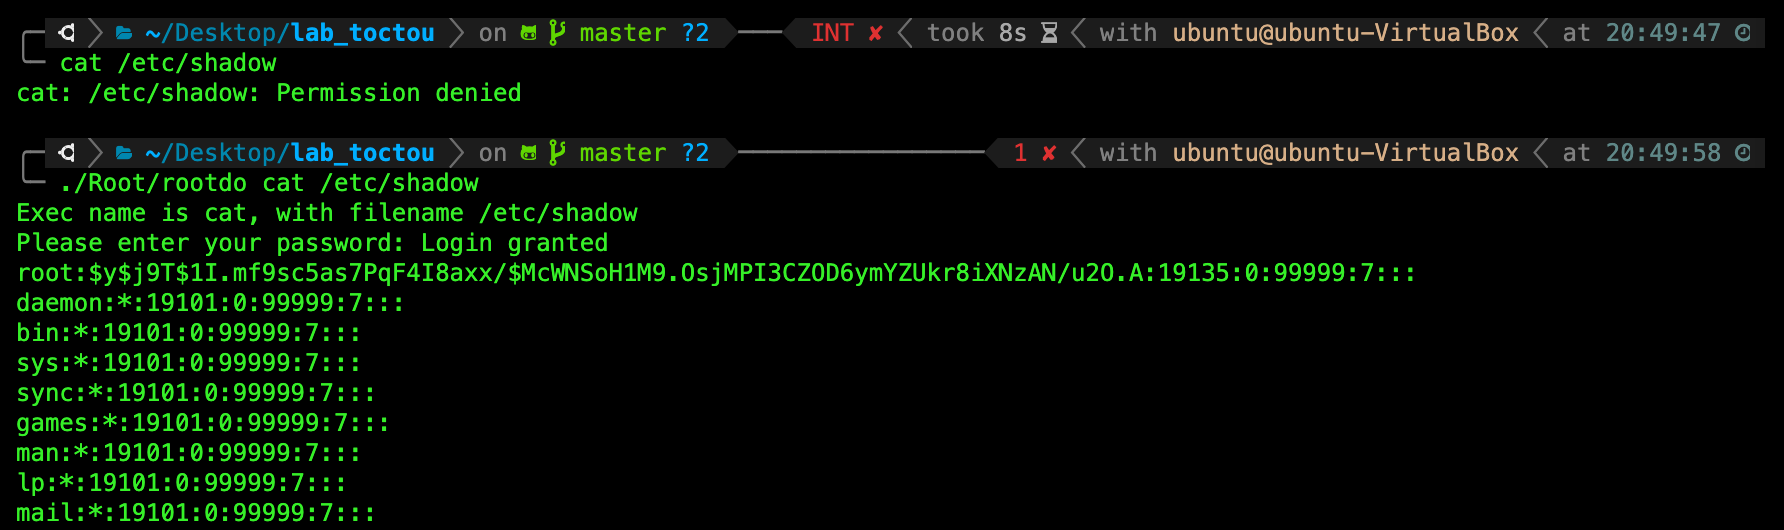
The reason you can now successfully read the file /etc/shadow is because rootdo has the SUID bit. Any other program that is executed by rootdo will run with root (rootdo creator) privileges and not the regular user.
You can open rootdo.c inside /lab_toctou/FilesForRoot/ to examine how it works, especially this part where it just simply checks that you have keyed in password and proceed to execvp (execute) the input command:
    if (!strcmp(password, "password"))
    { // on success, returns 0
        printf("Login granted\n");
        int pid = fork();
        if (pid == 0)
        {
            printf("Fork success\n");
            wait(NULL);
            printf("Children returned\n");
        }
        else
        {
            if (execvp(execName, argv_new) == -1)
            {
                perror("Executable not found\n");
            }
        }
    }
In short, as the SUID bit of rootdo program is set, it always runs with root privileges regardless of which user executes the program.
While rootdo seems like a dangerous program, don’t forget that the root itself was the one who made it and set the SUID bit in the first place, so yes it is indeed meant to run that way.
sudo
This is in fact how your sudo program works. When you typo sudo <command>, it prompts you for your password, then the program checks whether the user is verified, before executing with root privileges. In our little rootdo example, we just use hardcoded password to proceed.
Setting of rootdo’s SUID bit is done in the makefile inside FilesForRoot that you execute earlier while logged in as root,
# refresh the root files and root log file
# Set UID for rootprog and rootdo
setup:
	chmod u+s ../Root/vulnerable_root_prog
	chmod u+s ../Root/rootdo
The command chmod u+s filename sets the SUID bit of that filename.